Optimizing DNA Nanodevices for Targeted Delivery: Advanced Strategies to Improve Biodistribution and Therapeutic Efficacy
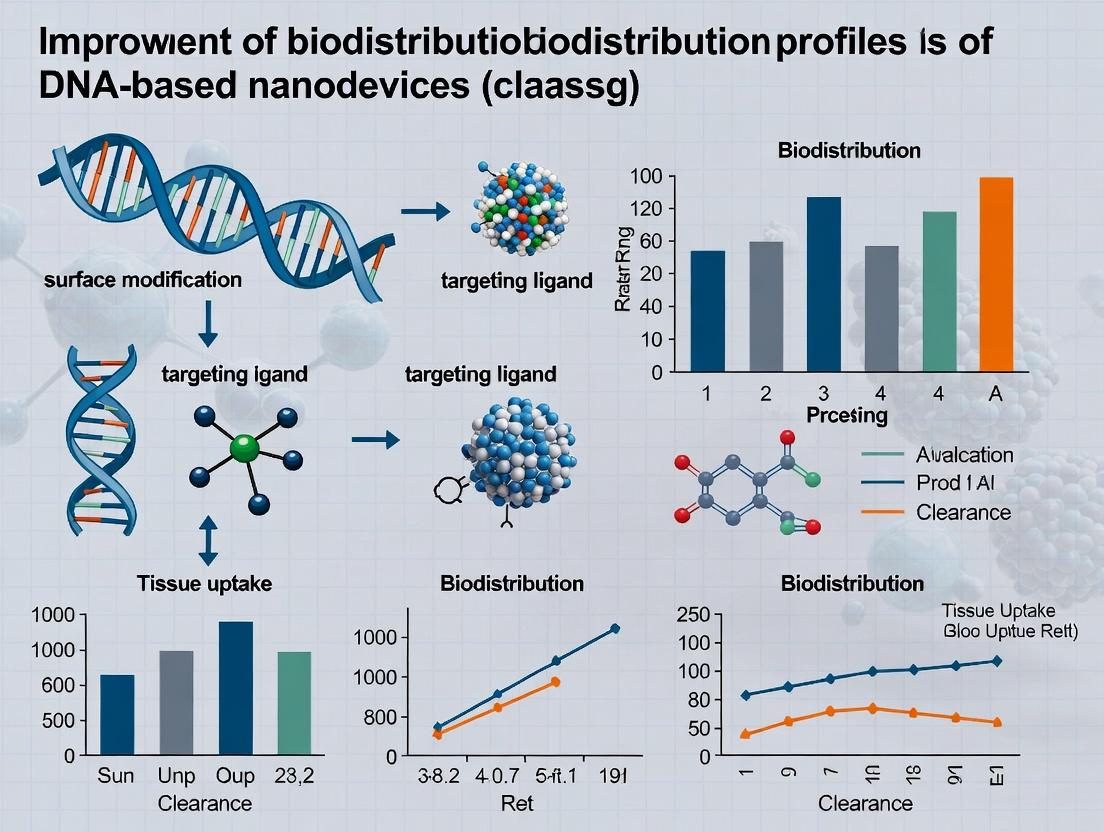
This comprehensive review explores cutting-edge methodologies for enhancing the biodistribution profiles of DNA-based nanodevices, a critical challenge in nanomedicine.
Optimizing DNA Nanodevices for Targeted Delivery: Advanced Strategies to Improve Biodistribution and Therapeutic Efficacy
Abstract
This comprehensive review explores cutting-edge methodologies for enhancing the biodistribution profiles of DNA-based nanodevices, a critical challenge in nanomedicine. Targeted at researchers, scientists, and drug development professionals, the article examines the foundational principles of DNA nanotechnology and biodistribution barriers. It details innovative design strategies, surface modifications, and targeting approaches to improve pharmacokinetics and tissue-specific accumulation. The content further addresses common troubleshooting issues, optimization techniques for stability and payload release, and rigorous validation methods through in vivo imaging and comparative analysis with alternative platforms. This synthesis provides a roadmap for translating DNA nanodevices from promising concepts into clinically viable therapeutics with precise delivery capabilities.
Understanding the Challenge: The Key Biodistribution Barriers Facing DNA Nanodevices
Technical Support Center
Troubleshooting Guides & FAQs
Q1: Our DNA origami nanostructure shows excellent stability in buffer but rapid degradation and loss of structural integrity in serum-containing media. What are the primary causes and solutions? A: This is a common issue related to nuclease degradation and protein adsorption. Implement the following protocol:
- Protocol: Polyethylene Glycol (PEG) Coating for Serum Stability
- Reagents: Purified DNA origami (10 nM in Folding Buffer), mPEG-NHS ester (5kDa), 1X PBS (pH 7.4), Amicon Ultra centrifugal filter (100kDa MWCO).
- Method: Dilute DNA origami in PBS. Add mPEG-NHS ester at a 1000:1 molar excess (PEG:DNA nanostructure). React for 2 hours at room temperature with gentle agitation.
- Purification: Use the centrifugal filter to remove unreacted PEG. Wash 3 times with PBS.
- Validation: Run a 2% agarose gel electrophoresis. PEGylated structures will show a pronounced shift to a higher molecular weight/higher gel position compared to unmodified structures.
Q2: We observe near-complete sequestration of our intravenously injected DNA nanodevice by the liver and spleen within minutes, with no delivery to the target tissue. How can we reduce this rapid clearance by the mononuclear phagocyte system (MPS)? A: This is the central biodistribution challenge. MPS clearance is driven by opsonization and recognition by resident macrophages.
- Protocol: "Stealth" Functionalization with Oligolysine-PEG Copolymers
- Reagents: DNA nanostructure (5 nM), Oligolysine(10)-PEG(5kDa)-Maleimide conjugate, Thiol-modified anchor strands incorporated into the nanostructure.
- Method: Reduce thiol groups on the nanostructure with TCEP (tris(2-carboxyethyl)phosphine) for 30 min, purify. React with the maleimide-functionalized copolymer at a 20:1 molar ratio (copolymer:nanostructure) for 4 hours at 4°C.
- Purification: Use size-exclusion chromatography (e.g., Sephacryl S-500) to isolate functionalized nanostructures.
- In Vivo Validation: Inject into mouse model (e.g., 1 nmol per mouse via tail vein). Harvest organs at 1-hour post-injection, homogenize, and quantify DNA content via qPCR or fluorophore measurement. Compare liver/spleen accumulation versus stealth-coated versions.
Q3: Our cell-targeting DNA nanorobot, functionalized with aptamers, fails to bind specifically to target cells in vivo despite working in vitro. What could be causing this loss of targeting? A: This is often due to the "protein corona" masking the targeting ligands. A density-optimization protocol is required.
- Protocol: Optimization of Targeting Ligand Density on a DNA Cube
- Reagent Solutions: DNA cube with orthogonal conjugation sites, Cy3 fluorescent label, AS1411 aptamer (targeting nucleolin) with complementary linker strand.
- Method: Prepare cubes with varying aptamer densities (e.g., 0, 4, 8, 16, 32 aptamers per cube) via thermal annealing of linker strands. Purify by PEG precipitation.
- Validation: Pre-incubate cubes (1 nM) with 50% human serum for 1 hour. Then incubate with target (MCF-7) and control (HEK293) cells. Analyze binding via flow cytometry. The optimal density balances specific binding against corona-induced masking.
Table 1: Impact of Surface Modifications on DNA Nanostructure Pharmacokinetics
| Surface Modification | Hydrodynamic Size (nm) | Zeta Potential (mV) | Serum Half-life (t1/2, min) | % Injected Dose in Liver (1h) | Primary Clearance Organ |
|---|---|---|---|---|---|
| Unmodified (Naked) | 55 ± 3 | -28 ± 4 | <2 | 85 ± 6 | Liver |
| 5kDa PEG (Low Density) | 68 ± 5 | -12 ± 3 | 25 ± 7 | 65 ± 8 | Liver/Spleen |
| 5kDa PEG (High Density) | 75 ± 4 | -2 ± 2 | 180 ± 30 | 25 ± 5 | Spleen/Kidneys |
| Oligolysine-PEG | 70 ± 6 | +5 ± 1 | >240 | 15 ± 4 | Diverse |
Table 2: Biodistribution Profile of a Model DNA Origami Tetrahedron (24h Post-IV Injection)
| Organ/Tissue | Unmodified (%ID/g) | Dense PEG Coating (%ID/g) | Fold Change |
|---|---|---|---|
| Liver | 78.2 ± 9.1 | 18.5 ± 3.2 | -4.2x |
| Spleen | 12.5 ± 2.8 | 8.1 ± 1.5 | -1.5x |
| Kidneys | 1.2 ± 0.3 | 5.5 ± 0.9 | +4.6x |
| Tumor (Subcutaneous) | 0.5 ± 0.2 | 3.8 ± 0.7 | +7.6x |
| Blood | <0.1 | 2.1 ± 0.4 | >20x |
Experimental Protocol: Key In Vivo Biodistribution Study
Protocol: Quantitative Biodistribution Analysis of Radiolabeled DNA Nanotubes
- Objective: To quantify the tissue distribution and clearance kinetics of a DNA nanostructure over 24 hours.
- Materials:
- DNA Nanotube (Self-assembled from 8 oligonucleotides)
- [γ-³²P] ATP
- T4 Polynucleotide Kinase (PNK)
- NAP-5 Sephadex column
- Female BALB/c mice (n=5 per time point)
- Gamma counter
- Method:
- Radiolabeling: Use PNK to attach [γ-³²P] ATP to the 5' ends of select staple strands during nanostructure assembly. Purify using a NAP-5 column.
- Quality Control: Verify integrity via agarose gel electrophoresis and autoradiography. Measure radioactivity (Counts Per Minute - CPM) per µL.
- Dosing: Inject 100 µL of solution containing 5 pmol of nanostructure (~100,000 CPM) via the tail vein.
- Tissue Collection: Euthanize mice at pre-defined times (e.g., 5 min, 30 min, 2h, 8h, 24h). Collect blood, liver, spleen, kidneys, heart, lungs, and target tissue (e.g., tumor). Weigh all samples.
- Quantification: Digest tissues in 1mL Soluene-350 at 50°C overnight. Add 10 mL of Hionic-Fluor scintillation cocktail and count CPM in a gamma counter. Calculate % Injected Dose per Gram of tissue (%ID/g).
Visualization: Key Pathways and Workflows
Diagram 1: MPS Clearance Pathway of DNA Nanotherapeutics
Diagram 2: Stealth Coating Strategy to Improve Biodistribution
Diagram 3: Workflow for In Vivo Biodistribution Study
The Scientist's Toolkit: Key Research Reagent Solutions
| Item & Example Product | Function in Biodistribution Research |
|---|---|
| mPEG-NHS Ester (5kDa, 10kDa) | Covalently attaches PEG to amine-modified DNA, creating a stealth layer to reduce protein binding and MPS clearance. |
| Oligolysine-PEG-Maleimide Copolymer | Provides combined charge neutralization (via oligolysine) and steric shielding (via PEG) for enhanced stability and circulation. |
| Cy5 / Cy5.5 NHS Ester | Near-infrared fluorescent dye for non-radioactive in vivo and ex vivo imaging and tissue quantification. |
| [³²P] ATP or [¹²⁵I] Bolton-Hunter Reagent | Radioisotopic labels for highly sensitive, quantitative biodistribution studies via gamma counting. |
| Sephacryl S-500 HR | Size-exclusion chromatography matrix for purifying large DNA nanostructures from unreacted labeling/modification reagents. |
| Amicon Ultra Centrifugal Filter (100kDa MWCO) | Concentrates and buffer-exchanges DNA nanostructure samples, removing salts and small nucleotides. |
| T4 Polynucleotide Kinase (PNK) | Enzymatically attaches radioactive ³²P to the 5' terminus of DNA strands for radiolabeling nanostructures. |
| Heparin Sodium Salt | Used in ex vivo blood/tissue processing to dissociate non-covalent protein corona from recovered nanostructures before analysis. |
Technical Support Center: Troubleshooting Biodistribution of DNA Nanodevices
FAQ & Troubleshooting Guide
Q1: Our DNA origami nanostructure shows rapid clearance from blood (<5 min) and high accumulation in the liver and spleen. How can we confirm this is due to RES uptake, and what are the primary mechanisms? A: Rapid hepatic/splenic sequestration is a classic sign of RES clearance. Key mechanisms include:
- Opsonization: Serum proteins (e.g., immunoglobulins, complement C3, fibronectin) adsorb to the nanodevice surface, marking it for phagocytosis.
- Scavenger Receptor Recognition: Non-specific recognition by receptors (e.g., SR-A, MARCO) on Kupffer cells (liver) and splenic macrophages.
- Size/Shape Filtering: Sinusoidal capillaries in the liver and spleen mechanically trap particles >100 nm.
Diagnostic Protocol: To confirm and characterize RES uptake:
- Pre-injection Serum Incubation: Incubate your DNA nanodevice with mouse/human serum (37°C, 30 min). Analyze by SDS-PAGE or LC-MS to identify bound opsonins.
- Cellular Depletion Studies: Pre-treat animal models with clodronate liposomes to deplete phagocytic macrophages. Compare biodistribution to untreated controls. A significant reduction in liver/spleen signal implicates macrophages.
- Receptor Blockade: Co-inject with known scavenger receptor inhibitors (e.g., polyinosinic acid for SR-A, fucoidan for some scavenger receptors). Reduced uptake suggests receptor-mediated pathway.
Q2: We PEGylated our DNA nanodevice to "stealth" it, but liver accumulation remains high. What went wrong? A: Suboptimal PEGylation is a common issue. The following table summarizes critical quantitative parameters for effective PEG shielding:
| Parameter | Ineffective PEGylation | Target for Improved Stealth | Measurement Technique |
|---|---|---|---|
| PEG Grafting Density | < 10% of surface nucleotides | > 20-30% of surface nucleotides | Fluorophore-labeled PEG quantification via HPLC/fluorescence |
| PEG Chain Length (kDa) | Short (e.g., 2 kDa) | Longer (5 kDa - 20 kDa) | Size-exclusion chromatography (SEC-MALS) |
| Conjugation Chemistry | Non-specific amine coupling | Site-specific conjugation (e.g., click chemistry on incorporated DBCO) | Mass spectrometry, gel shift assay |
| Final Hydrodynamic Diameter | Increase < 5 nm from base structure | Increase > 8 nm, indicating dense brush layer | Dynamic Light Scattering (DLS) |
| Zeta Potential | Remains highly negative (e.g., < -20 mV) | Neutral or slightly negative (-10 to 0 mV) | Laser Doppler electrophoresis |
Troubleshooting Steps:
- Verify Conjugation: Run a gel shift assay. PEGylation should cause a significant upward shift or smear.
- Measure Surface Charge: Use DLS to measure zeta potential. Aim for neutralization.
- Test in Serum: Perform a serum stability assay. Ineffective PEGylation leads to rapid degradation and opsonization.
Q3: What are the best in vitro assays to predict RES clearance before moving to in vivo studies? A: A tiered in vitro screening approach is recommended.
Experimental Protocol: Macrophage Uptake Assay
- Cell Culture: Seed RAW 264.7 or J774A.1 murine macrophage cells (or primary Kupffer cells if available) in 24-well plates.
- Nanodevice Labeling: Label DNA nanodevices with a stable fluorophore (e.g., Cy5, Alexa 647).
- Incubation: Add devices at relevant concentrations (e.g., 1-10 nM) to cells in serum-free or 10% serum media. Include controls (untreated cells, non-PEGylated device).
- Analysis (after 2-4 hrs):
- Flow Cytometry: Quantify mean fluorescence intensity (MFI) per cell. >10-fold increase in MFI vs. stealth controls indicates high uptake.
- Confocal Microscopy: Confirm internalization (punctate intracellular signal).
Experimental Protocol: Serum Protein Binding Assay
- Incubation: Incubate nanodevice (100 µL of 100 nM) with 50% mouse serum (v/v) in PBS for 30 min at 37°C.
- Size Analysis: Run samples on DLS or Nanoparticle Tracking Analysis (NTS). A significant increase in hydrodynamic diameter (>5 nm) indicates a thick "protein corona."
- Separation: Use centrifugal filters (100 kDa MWCO) to separate corona-bound devices from free protein. Elute and analyze bound proteins by mass spectrometry.
Q4: How does nanodevice shape (rod, triangle, tetrahedron) influence RES clearance rates? A: Shape is a critical design parameter. Recent data indicates:
| Shape | Aspect Ratio | Key Clearance Finding (vs. Spherical Reference) | Proposed Mechanism |
|---|---|---|---|
| Spherical / Globular | ~1:1 | Baseline clearance. Moderate liver/spleen uptake. | Standard phagocytic engulfment. |
| Rod / Filament | High (>3:1) | Reduced RES uptake, prolonged circulation. | Aligned with blood flow, difficult for macrophages to engulf. |
| Triangular / Disc | Intermediate | Increased spleen marginal zone trapping. | Enhanced mechanical filtration in splenic sinuses. |
| Tetrahedral | Low | Variable; dependent on edge sharpness. | Sharp edges may trigger complement activation. |
Protocol for Shape-Dependent Studies:
- Design & Purification: Construct and purify (using agarose gel electrophoresis or PEG precipitation) distinct shapes with identical sequences where possible.
- Label Uniformly: Use the same fluorescent label at the same stoichiometric ratio for all shapes.
- Parallel Injection: Inject shape variants into cohorts of mice (n≥5) at identical doses (mg/kg) and concentrations.
- Quantitative Imaging: Use IVIS or quantitative SPECT/CT imaging at serial time points (5 min, 30 min, 2 hr, 24 hr). Express data as % Injected Dose per Gram (%ID/g) of tissue for liver, spleen, and blood.
The Scientist's Toolkit: Research Reagent Solutions
| Item | Function & Application |
|---|---|
| Clodronate Liposomes | Depletes phagocytic macrophages (Kupffer cells, splenic macrophages) upon intravenous injection, used to prove RES-mediated clearance. |
| Biotinylated Scavenger Receptor Ligands (e.g., AcLDL, fucoidan) | Used in competitive binding assays on macrophage cell lines to identify specific receptor interactions. |
| DSPE-PEG (2000-5000)-Maleimide | A phospholipid-PEG conjugate for inserting a stealth layer onto hydrophobic-modified DNA nanostructures or lipid-coated devices. |
| Site-Specific Reactive Handles (DBCO, Azide) | Incorporated into DNA during synthesis for precise, high-efficiency "click" conjugation of PEG or targeting ligands, improving batch consistency. |
| Complement Inhibitors (e.g., FUT-175, Compstatin) | Used in in vitro serum assays to inhibit the complement cascade and determine its role in opsonization. |
| Fluorophore-Labeled Deoxyuridine Triphosphates (e.g., Cy3-/Cy5-dUTP) | For stable, internal fluorescent labeling of DNA nanodevices during enzymatic assembly (PCR, rolling circle amplification). |
| Polyacrylamide or Agarose Gel Electrophoresis Kits | Critical for analyzing assembly purity, stability in serum, and confirming conjugate (PEG, antibody) attachment. |
| Dynamic Light Scattering (DLS) & Zeta Potential Analyzer | Essential instrument for characterizing hydrodynamic size, polydispersity (PDI), and surface charge—key predictors of in vivo behavior. |
Visualizations
Diagram 1: Primary Systemic Clearance Pathways for Nanodevices
Diagram 2: Stealth Design Strategies to Evade RES Clearance
Diagram 3: Preclinical Screening Workflow for RES Clearance
Troubleshooting Guide & FAQs
FAQ 1: Why is my DNA nanostructure degrading rapidly in serum-containing media?
- Answer: Rapid degradation is primarily due to serum nuclease activity. Nuclease resistance is not intrinsic to nanostructure assembly alone. Consider the following steps:
- Verify Assembly: Run a native agarose gel to confirm correct assembly before serum exposure.
- Assess Stability: Perform a time-course assay. Incubate the nanostructure in 10-50% FBS at 37°C, sampling at intervals (e.g., 0, 15min, 1h, 4h, 24h) and analyzing via gel electrophoresis or fluorescence quenching.
- Mitigation Strategy: If degradation is observed within the first hour, chemical modification of oligonucleotides (e.g., phosphorothioate backbones, 2'-O-methyl RNA) is likely required to improve nuclease resistance.
FAQ 2: How can I distinguish between degradation and aggregation as the cause of my nanoparticle signal loss in circulation?
- Answer: Signal loss (e.g., fluorescence) can stem from either nuclease degradation or protein corona-induced aggregation/quenching. Use this differential diagnostic protocol:
| Assay | If due to Degradation | If due to Aggregation/Corona |
|---|---|---|
| DLS/NTA Size Measurement | Size distribution decreases or becomes polydisperse (fragments). | Hydrodynamic diameter increases significantly (>2x original size). |
| Agarose Gel Electrophoresis | Shows smearing or lower molecular weight bands. | Sample may not enter the gel; material stuck in well. |
| Centrifugation | No pellet after high-speed spin (e.g., 50,000 x g). | Significant pellet containing your nanostructure. |
| Fluorescence Microscopy | Diffuse background signal. | Visible punctate aggregates. |
Experimental Protocol: Serum Stability Time-Course Assay
- Objective: Quantify the half-life of a DNA nanostructure in serum.
- Materials: Purified DNA nanostructure, Fetal Bovine Serum (FBS), 10x PBS, Nuclease-Free Water, SYBR Gold dye, 2-4% Agarose Gel, TBE buffer.
- Method:
- Prepare a 1 µM solution of the DNA nanostructure in 1x PBS.
- Create an incubation mix: 10 µL nanostructure + 40 µL FBS. For control, use 10 µL nanostructure + 40 µL 1x PBS.
- Incubate at 37°C. Remove 10 µL aliquots at critical timepoints (0, 0.5, 1, 2, 4, 8, 24 hours).
- Immediately mix each aliquot with 2 µL of 500 mM EDTA (pH 8.0) to chelate Mg²⁺ and halt nuclease activity.
- Analyze all samples on a native agarose gel stained with SYBR Gold. Image and quantify band intensity.
- Plot remaining intact nanostructure (%) vs. time to determine degradation kinetics.
FAQ 3: My modified DNA nanostructure is stable in serum but shows unexpected liver accumulation. What's the cause?
- Answer: This is a classic sign of a significant serum protein corona forming, particularly opsonins like complement proteins or immunoglobulins, which promote clearance by the mononuclear phagocyte system (MPS) in the liver and spleen. Stability against nucleases does not equate to stealth from immune recognition.
FAQ 4: What are the best methods to characterize the protein corona?
- Answer: A multi-technique approach is necessary due to corona complexity.
| Method | Information Gained | Sample Requirement | Protocol Note |
|---|---|---|---|
| Dynamic Light Scattering (DLS) | Hydrodynamic size increase, aggregation. | Low (µg) | Measure before and after 1-hour serum incubation. |
| SDS-PAGE with Silver Stain | Corona protein molecular weight profile. | Moderate (10-50 µg) | Isolate corona via centrifugation/washing first. |
| LC-MS/MS | Identification of corona protein composition. | High (>50 µg) | The definitive method for proteomic analysis. |
| Surface Plasmon Resonance (SPR) | Binding kinetics of key serum proteins. | Low (µg) | Useful for studying specific protein interactions. |
Experimental Protocol: Isolating Corona for SDS-PAGE/MS
- Objective: Isolate the hard protein corona for compositional analysis.
- Materials: DNA nanostructure, FBS, PBS, 100kDa MWCO centrifugal filters.
- Method:
- Incubate 1 nmol of DNA nanostructure with 1 mL of 50% FBS/PBS for 1 hour at 37°C.
- Load the mixture into a 100kDa MWCO centrifugal filter. Centrifuge at 4000 x g for 10 min.
- Discard the flow-through. Wash the retentate (nanostructure-corona complex) with 1 mL of cold PBS. Centrifuge again. Repeat wash 3 times.
- Resuspend the final retentate in 50 µL of 1x SDS-PAGE loading buffer.
- Heat at 95°C for 5-10 minutes to denature proteins and disassociate the nanostructure.
- Run the supernatant on an SDS-PAGE gel for staining, or submit for LC-MS/MS analysis.
FAQ 5: How can I engineer the nanostructure to minimize unfavorable corona formation?
- Answer: The goal is to steer the corona toward a "stealth" profile. Strategies include:
- Surface Functionalization: Conjugating polyethylene glycol (PEG) or creating biomimetic membranes (e.g., lipid coats).
- Surface Topography: Designing smooth surfaces rather than porous ones to reduce protein interaction sites.
- Charge Modulation: Maintaining a near-neutral or slightly negative zeta potential to reduce electrostatic binding of opsonins.
- Affinity Tuning: Incorporating specific ligands (e.g., human serum albumin binders) to pre-emptively recruit a more favorable corona.
Visualizations
The Scientist's Toolkit: Key Research Reagent Solutions
| Reagent / Material | Function in Stability/Corona Studies |
|---|---|
| Fetal Bovine Serum (FBS) | Standard serum supplement for in vitro modeling of blood protein and nuclease exposure. |
| Phosphorothioate-modified Oligos | Oligonucleotides with sulfur replacing non-bridging oxygen in backbone; increases nuclease resistance. |
| 2'-O-methyl RNA Oligos | Ribose-modified oligonucleotides with high nuclease resistance and minimal impact on hybridization. |
| SYBR Gold Nucleic Acid Gel Stain | High-sensitivity fluorescent dye for visualizing intact and degraded DNA in gels. |
| 100 kDa MWCO Centrifugal Filters | Used to separate nanostructure-corona complexes from unbound serum proteins. |
| Dynamic Light Scattering (DLS) Instrument | Measures hydrodynamic size and size distribution to monitor aggregation in real time. |
| EDTA (0.5 M, pH 8.0) | Chelates Mg²⁺ ions, instantly halting Mg²⁺-dependent nuclease activity for assay timepoints. |
| PEGylation Reagents (e.g., mPEG-NHS) | For covalent attachment of polyethylene glycol to amine groups, to impart steric "stealth" properties. |
Technical Support Center: Troubleshooting & FAQs
This technical support center provides guidance for researchers optimizing the biodistribution of DNA-based nanodevices (DNbDs). Issues are framed within the thesis of Improving biodistribution profiles of DNA-based nanodevices.
FAQ & Troubleshooting Guide
Q1: Our spherical DNA origami nanoparticles show rapid hepatic clearance, contrary to our design for prolonged circulation. What could be the cause? A: Rapid hepatic clearance is often dictated by size and surface charge. Nanoparticles >100 nm or with a highly positive or negative surface charge are optimized for macrophage uptake in the liver and spleen.
- Primary Check: Measure the hydrodynamic diameter (Dh) via Dynamic Light Scattering (DLS) and zeta potential (ζ) in physiologically relevant buffer (e.g., 1x PBS).
- Troubleshooting Table:
| Issue | Likely Cause | Recommended Action |
|---|---|---|
| Dh > 120 nm | Aggregation or unintended multimer formation. | Increase repulsive forces: introduce PEG spacers, adjust buffer ionic strength, or implement size-exclusion chromatography purification. |
| Highly Negative ζ (< -30 mV) in PBS | Naked DNA phosphate backbone attracts opsonins, leading to RES recognition. | Modulate surface charge: coat with a neutral polymer (e.g., PEGylation) or introduce slight positive charge via lysine-rich peptide conjugation. |
| Highly Positive ζ (> +10 mV) in PBS | Nonspecific binding to negatively charged serum proteins and cell membranes. | Shield positive charge: use charge-neutralizing coatings or conjugate anionic ligands (e.g., hyaluronic acid) to achieve a near-neutral net charge. |
| Polydispersity Index (PDI) > 0.2 | Inhomogeneous sample leads to unpredictable biodistribution. | Optimize folding protocol (slower annealing), implement stricter purification (e.g., agarose gel extraction, HPLC), and verify monodispersity via TEM. |
Q2: We designed rod-shaped DNbDs for enhanced margination and tumor targeting, but in vivo imaging shows low tumor accumulation. What should we investigate? A: Tumor targeting relies on the Enhanced Permeability and Retention (EPR) effect and subsequent extravasation. Shape influences margination but not alone.
- Primary Check: Confirm the aspect ratio (AR) and flexibility of the rods. Rigid rods with AR 3-5 are theoretically optimal for margination.
- Troubleshooting Protocol:
- Validate Aspect Ratio: Use Atomic Force Microscopy (AFM) or TEM to confirm physical dimensions (length, diameter). Calculate AR.
- Assess Serum Stability: Incubate DNbDs in 90% FBS at 37°C for 24h. Run on agarose gel. Smearing indicates degradation; band shift indicates protein corona formation.
- Quantify Protein Corona: Isolate DNbDs from serum via centrifugation (100kDa filter). Elute proteins and analyze via SDS-PAGE/MS. A dense corona can mask targeting ligands and alter effective size/shape.
- Check Targeting Ligand Accessibility: Perform a ligand-specific binding assay (e.g., using biotinylated target receptor) after serum incubation to confirm ligand functionality.
Q3: How can we experimentally determine the dominant clearance pathway for our PEGylated DNA icosahedra? A: A systematic in vivo study with organ harvesting and quantitative analysis is required.
- Experimental Protocol: Quantitative Biodistribution Study
- Reagent: Label DNbDs with a radioactive isotope (e.g., Cy5 for fluorescence, ^64^Cu for PET) or a stable DNA barcode for qPCR quantification.
- Animal Model: Use healthy mice (n=5 per time point) or relevant tumor-bearing models.
- Procedure:
- Inject a known dose (e.g., 1 mg/kg) intravenously via tail vein.
- Euthanize animals at pre-determined time points (e.g., 5 min, 1h, 4h, 24h).
- Perfuse with saline to clear blood from organs.
- Harvest key organs: Blood, Liver, Spleen, Kidneys, Lungs, Heart, Tumor.
- Quantification: For fluorescent labels, homogenize organs and measure fluorescence, comparing to a standard curve. For DNA barcodes, extract total DNA from tissue and use qPCR with specific primers.
- Data Analysis: Express data as % Injected Dose per Gram of tissue (%ID/g). Plot over time to identify primary accumulation (clearance) organs.
The Scientist's Toolkit: Key Research Reagents & Materials
| Item | Function in Biodistribution Research |
|---|---|
| Dynamic Light Scattering (DLS) / Zetasizer | Measures hydrodynamic diameter (size), polydispersity (PDI), and zeta potential (surface charge) in solution. |
| Transmission Electron Microscopy (TEM) w/ Negative Stain | Visualizes and confirms the precise nanoscale shape, architecture, and monodispersity of DNbDs. |
| Size-Exclusion Chromatography (SEC) Columns (e.g., Sephacryl) | Purifies DNbDs by size, removing aggregates and misfolded structures to ensure sample homogeneity. |
| PEG-Conjugated Oligonucleotides (e.g., 5kDa, 10kDa mPEG) | Used to functionalize DNbD surface to confer "stealth" properties, reduce opsonization, and prolong circulation half-life. |
| Near-Infrared (NIR) Fluorophores (e.g., Cy5, Cy7, Alexa Fluor 790) | Enables real-time, non-invasive in vivo fluorescence imaging to track biodistribution and kinetics. |
| qPCR Kit with SYBR Green | Quantifies DNbD concentration in tissue homogenates using specific DNA barcodes, allowing ultrasensitive biodistribution. |
| Phosphoramidites for Modified Bases (e.g., 5'-Hexynyl dU) | Facilitates site-specific conjugation of targeting ligands (e.g., peptides, antibodies) via click chemistry. |
| Fetal Bovine Serum (FBS) | Used in in vitro stability assays to study protein corona formation and DNbD integrity under physiological conditions. |
Experimental Workflow & Pathway Diagrams
Title: DNbD Biodistribution Optimization Workflow
Title: How DNbD Properties Dictate Biological Fate
Technical Support Center: Troubleshooting EPR & Biodistribution for DNA Nanodevices
Context: This support center is designed for researchers working on Improving biodistribution profiles of DNA-based nanodevices. The FAQs and guides address common experimental pitfalls related to leveraging and quantifying the EPR effect.
Frequently Asked Questions (FAQs)
Q1: In our murine tumor models, we observe high inter-animal variability in tumor accumulation of our DNA origami nanostructure. What are the primary factors to investigate? A: High variability often stems from tumor model characteristics. Key factors to check:
- Tumor Type & Site: Subcutaneous tumors often show higher EPR than orthotopic models. Ensure consistent implantation site and procedure.
- Tumor Stage & Vascularization: EPR is heterogeneous. Use tumors within a narrow size window (e.g., 100-150 mm³). Assess vascular maturity with histology (CD31 staining).
- Nanodevice Stability: Verify serum stability of your DNA nanodevice via gel electrophoresis or HPLC post-incubation in mouse serum. Degradation leads to inconsistent biodistribution.
Q2: Our fluorescently labeled DNA nanotube shows strong liver and spleen sequestration, with minimal tumor signal. How can we shift the distribution toward the tumor? A: This indicates rapid clearance by the mononuclear phagocyte system (MPS). Troubleshooting steps:
- Surface Passivation: Functionalize the nanostructure with dense PEG shells (e.g., using PEG-oligolysine coatings) or human serum albumin to create "stealth" properties.
- Charge Neutralization: Ensure the net charge of the device is neutral or slightly negative. Highly negative (from DNA backbone) or positive charges increase MPS uptake.
- Size Check: Re-characterize hydrodynamic diameter post-modification via DLS. Aggregates >200 nm are preferentially filtered by the spleen.
Q3: When quantifying tumor accumulation via fluorescence imaging, background signal is high. What are the best practices for in vivo imaging? A:
- Use Near-Infrared (NIR) Dyes: Shift from Cy5 to Cy7 or IRDye800CW to reduce tissue autofluorescence.
- Employ Spectral Unmixing: If using a spectral imaging system, unmix the specific dye signal from autofluorescence.
- Conjugate a Radioisotope: For definitive, quantitative data, conjugate a radioisotope like ^89Zr or ^64Cu for Positron Emission Tomography (PET). This provides absolute pharmacokinetic data.
Q4: We want to test the "beyond EPR" strategy of active targeting. How do we validate that our attached targeting ligand (e.g., folate, RGD peptide) is functional in vivo? A:
- Perform a Competitive Blocking Study: Pre-inject a large dose of free ligand (e.g., 100x molar excess) 10 minutes before administering the targeted nanodevice. A significant reduction in tumor accumulation confirms active targeting.
- Use Isogenic Control Cell Lines: Use tumor models with high and low (or knockout) expression of the target receptor to demonstrate specificity.
Experimental Protocols
Protocol 1: Assessing Serum Stability of DNA Nanodevices Purpose: To determine the degradation kinetics of DNA-based nanodevices in biologically relevant media. Materials: Purified DNA nanodevice, mouse/human serum (commercially sourced), 10x TBE buffer, 2% agarose gel, SYBR Gold nucleic acid stain, gel imaging system. Method:
- Mix 10 µL of DNA nanodevice (100 nM in PBS) with 90 µL of pre-warmed (37°C) serum.
- Incubate the mixture at 37°C. Remove 20 µL aliquots at time points: 0, 15 min, 30 min, 1h, 2h, 4h, 8h, 24h.
- Immediately add aliquot to 5 µL of 5x loading buffer containing 50 mM EDTA to chelate Mg²⁺ and halt nucleases.
- Load aliquots onto a pre-cast 2% agarose gel in 1x TBE + 0.5 µg/mL ethidium bromide or SYBR Safe. Run at 80V for 60-90 min.
- Image gel. Compare band integrity over time.
Protocol 2: Ex Vivo Biodistribution Quantification via Radiolabeling Purpose: To obtain quantitative, organ-level accumulation data of a modified DNA nanodevice. Materials: DNA nanodevice modified with a NOTA or DOTA chelator, ^64Cu or ^177Lu, size-exclusion PD-10 desalting column, healthy or tumor-bearing mice, gamma counter. Method:
- Radiolabeling: Incubate chelator-modified nanodevice (100 µg in 100 µL chelation buffer, e.g., 0.1 M NH₄OAc pH 5.5) with 5 mCi of ^64Cu for 30 min at 37°C.
- Purification: Pass reaction mixture through a PD-10 column equilibrated with PBS. Collect 0.5 mL fractions. Measure radioactivity of each fraction with a dose calibrator.
- Quality Control: Analyze the peak radioactive fraction via instant thin-layer chromatography (iTLC) to confirm radiochemical purity >95%.
- Administration: Inject 100 µL (10-20 µg, ~100 µCi) of purified product into the tail vein of mice (n=5 per group).
- Tissue Harvest & Counting: At selected time points (e.g., 1h, 4h, 24h, 48h), euthanize animals. Harvest blood, tumors, and major organs (heart, lungs, liver, spleen, kidneys). Weigh each tissue.
- Quantification: Count radioactivity in each tissue using a gamma counter. Calculate % Injected Dose per Gram of tissue (%ID/g).
Data Presentation
Table 1: Impact of Surface Modification on Biodistribution of a 50 nm DNA Cube (%ID/g, 24h Post-Injection)
| Nanodevice Formulation | Tumor | Liver | Spleen | Kidneys | Tumor-to-Liver Ratio |
|---|---|---|---|---|---|
| Unmodified DNA Cube | 0.8 ± 0.3 | 35.2 ± 4.1 | 18.5 ± 2.7 | 5.1 ± 1.2 | 0.02 |
| PEGylated DNA Cube (5kDa, dense) | 3.5 ± 0.6 | 12.8 ± 2.3 | 6.4 ± 1.5 | 4.8 ± 0.9 | 0.27 |
| PEGylated + RGD-Targeted Cube | 5.9 ± 1.1 | 11.1 ± 1.8 | 5.9 ± 1.1 | 5.0 ± 1.0 | 0.53 |
Table 2: Comparison of Imaging Modalities for Tracking DNA Nanodevices In Vivo
| Modality | Detection Limit | Quantitative? | Spatial Resolution | Key Advantage | Key Limitation |
|---|---|---|---|---|---|
| Fluorescence (NIR) | ~1 nM | No (relative) | 1-3 mm | Low cost, real-time | Scattering, autofluorescence |
| PET (e.g., ^64Cu) | ~pM | Yes (absolute) | 1-2 mm | Deep tissue, quantitative %ID/g | Requires cyclotron, radiochemistry |
| SPECT (e.g., ^111In) | ~pM | Yes (absolute) | 0.5-1 mm | Multi-isotope imaging | Lower sensitivity than PET |
| Bioluminescence | ~pM | Semi-quantitative | 3-5 mm | No background, high sensitivity | Requires genetic encoding (luciferase) |
Mandatory Visualization
Title: Classical EPR vs. Active Targeting Pathways
Title: In Vivo Biodistribution Study Workflow
The Scientist's Toolkit: Research Reagent Solutions
| Item | Function & Application |
|---|---|
| 10-kDa MWCO Amicon Filters | Concentrates and buffer-exchanges DNA nanodevice samples post-synthesis or modification. |
| Sephacryl S-400 HR Size Exclusion Column | Purifies large DNA nanostructures from staples/unincorporated strands; critical for polydispersity index (PDI). |
| Methoxy-PEG-NHS Ester (5kDa) | Common reagent for amine-reactive PEGylation of modified DNA (e.g., amine-modified strands) to reduce MPS uptake. |
| NOTA-NHS Ester Chelator | Conjugates to DNA nanodevices for subsequent chelation of radiometals (^64Cu, ^177Lu) for PET/SPECT imaging. |
| IRDye 800CW NHS Ester | Near-infrared fluorescent dye for in vivo optical imaging; conjugates to amine groups on nanostructures. |
| CD31 Antibody (for IHC) | Validates tumor vascular density and normalization status in tissue sections; critical for EPR assessment. |
| Matrigel | Used for consistent subcutaneous tumor cell implantation to support vascularization. |
| Mouse Serum (BALB/c, nude) | For in vitro stability assays under physiological conditions. |
Designing for Success: Engineering Strategies to Enhance DNA Nanodevice Delivery
Troubleshooting Guides & FAQs
Q1: During phosphorothioate (PS) backbone synthesis, my oligo yield is low. What could be the cause? A: Low yield is often due to suboptimal sulfurization reaction time or inefficient oxidizing reagent. For a 0.2 µmol-scale synthesis using a standard DNA synthesizer, ensure the sulfurization step (e.g., using 0.05 M solution of 3-((Dimethylamino-methylidene)amino)-3H-1,2,4-dithiazole-3-thione (DDTT) in pyridine) is extended to 90 seconds per cycle. Old or degraded sulfurization reagent is a common culprit. Always use fresh reagents and validate on a short test sequence.
Q2: My crosslinked oligonucleotide shows multiple bands on PAGE gel, suggesting incomplete or heterogeneous crosslinking. How can I improve reaction uniformity? A: Heterogeneous crosslinking is typically a result of incorrect stoichiometry or purification of the intermediate. For a "click chemistry" crosslink (e.g., between alkyne and azide-modified nucleotides), ensure:
- Pre-purification: Purify the individual modified strands before crosslinking via HPLC.
- Stoichiometry: Use a slight excess (1.2:1 molar ratio) of the shorter strand to drive the reaction to completion.
- Oxygen Exclusion: Perform the copper-catalyzed reaction under an inert atmosphere (Ar/N2) to prevent catalyst oxidation.
- Time Course: Monitor the reaction by analytical HPLC at 30 min intervals; optimal time is often 2-4 hours at 25°C.
Q3: The nuclease resistance assay for my backbone-modified DNA shows unexpected degradation patterns. How should I control the experiment? A: Unexpected patterns often stem from variable nuclease activity. Implement these controls:
- Positive Control: Unmodified DNA of the same sequence. Expected half-life should be <5 minutes in 10% FBS at 37°C.
- Negative Control: A known nuclease-resistant structure (e.g., fully phosphorothioated DNA).
- Nuclease Titration: Perform a time course (e.g., 0, 5, 15, 30, 60, 120 min) and a serum concentration gradient (1%, 5%, 10%, 20% FBS).
- Quenching: Ensure the quenching method (e.g., 5mM EDTA, heat inactivation) is immediate and consistent. Run samples on denaturing PAGE immediately or store at -80°C.
Q4: How do I quantify the improvement in stability from backbone modifications in a biologically relevant context? A: Use a combination of in vitro and cellular assays. A standard protocol is:
- In Vitro FBS Half-life: Incubate 1 µM oligonucleotide in 10% FBS at 37°C. Withdraw aliquots at time points, quench, and analyze via gel electrophoresis or HPLC. Calculate half-life (t1/2).
- Cellular Uptake & Stability: Transfert cells with a fluorescently labeled oligo (e.g., Cy5). Use flow cytometry to measure mean fluorescence intensity (MFI) over 24-48 hours. Co-stain with lysosomal markers to assess compartmental integrity.
- Quantitative Data: Compare your modified construct to an unmodified control. A successful modification should show a >5-fold increase in serum half-life and a >2-fold increase in cellular MFI retention at 24h.
Key Experimental Protocols
Protocol 1: Assessing Nuclease Resistance via Serum Incubation Objective: Determine the degradation kinetics of modified oligonucleotides in fetal bovine serum (FBS). Materials: Oligonucleotide sample, FBS, Nuclease-Free Water, 0.5M EDTA, Heating block, Agarose or PAGE gel system. Procedure:
- Prepare a 2 µM solution of the oligonucleotide in nuclease-free water.
- Pre-warm FBS to 37°C.
- In a microcentrifuge tube, combine 10 µL of oligonucleotide with 90 µL of pre-warmed FBS to create a 10% FBS solution. Start timer.
- At each time point (e.g., 0, 15, 30, 60, 120 minutes), withdraw 10 µL of the reaction and immediately quench by adding to 2 µL of 0.5M EDTA (pH 8.0) and heating at 95°C for 5 minutes.
- Analyze all quenched samples on a denaturing 15% polyacrylamide gel. Stain with SYBR Gold and image.
- Quantify band intensity using software (e.g., ImageJ). Plot % full-length product remaining vs. time to calculate half-life.
Protocol 2: Copper-Catalyzed Azide-Alkyne Cycloaddition (CuAAC) for Oligonucleotide Crosslinking Objective: Site-specifically crosslink two oligonucleotide strands bearing alkyne and azide modifications. Materials: Alkyne-modified Oligo, Azide-modified Oligo, Copper(II) Sulfate (CuSO4), Tris(3-hydroxypropyltriazolylmethyl)amine (THPTA), Sodium Ascorbate, 1x PBS Buffer, Desalting Column. Procedure:
- Prepare Stock Solutions: 100 mM CuSO4 in water; 100 mM THPTA in water; 500 mM Sodium Ascorbate in water (fresh).
- Mix Oligos: Combine alkyne-oligo and azide-oligo at a 1:1.2 molar ratio in 1x PBS (final oligo concentration ~50 µM) in a low-binding tube.
- Add Catalysts: To the oligo mix, add THPTA to 1 mM final, CuSO4 to 0.1 mM final, and Sodium Ascorbate to 5 mM final. Mix gently.
- React: Incubate reaction at 25°C for 2 hours, protected from light.
- Purify: Pass the reaction mixture through a NAP-5 or similar desalting column equilibrated with water or TE buffer to remove copper catalysts. Further purify by HPLC or PAGE if necessary.
Table 1: Comparative Nuclease Resistance of Common Backbone Modifications
| Modification Type | Example Structure | Serum (10% FBS) Half-life (t1/2) | Relative Synthesis Cost (Scale: 1-5) | Key Trade-off |
|---|---|---|---|---|
| Native DNA (Control) | Phosphodiester | < 2 min | 1 | Baseline stability |
| Partial Phosphorothioate (PS) | Random ~20% substitution | 30 - 60 min | 2 | Slight increase in toxicity potential |
| Full Phosphorothioate (PS) | All linkages replaced | > 24 hours | 3 | Reduced binding affinity, toxicity |
| 2'-OMe RNA | 2'-O-Methyl ribose | 60 - 120 min | 2 | High affinity, some immune activation |
| Locked Nucleic Acid (LNA) | Bridged 2'-O,4'-C methylene ribose | > 120 min | 4 | Very high affinity, risk of hepatotoxicity |
| Crosslinked (Dual-Modified) | PS backbone + internal site-specific crosslink | > 48 hours | 5 | Complex synthesis, optimal biodistribution |
Table 2: Impact on Biodistribution Parameters in Murine Models
| Oligonucleotide Formulation | % Injected Dose/Gram in Liver (1h) | % Injected Dose/Gram in Kidney (1h) | Circulatory Half-life (in vivo) | Dominant Clearance Pathway |
|---|---|---|---|---|
| Unmodified DNA (linear) | 15.2 ± 3.1 | 65.4 ± 8.7 | < 5 min | Renal filtration |
| Full PS DNA (linear) | 45.8 ± 6.5 | 30.2 ± 4.3 | ~40 min | Hepatic uptake, Renal |
| 2'-OMe/PS Gapmer | 70.3 ± 9.2 | 15.1 ± 2.8 | ~6 hours | Hepatocyte uptake (ASGPR mediated) |
| Crosslinked DNA Nanostructure (Tetrahedron) | 35.5 ± 4.8 | 20.5 ± 3.1 | ~90 min | RES/MPS uptake in liver & spleen |
The Scientist's Toolkit: Research Reagent Solutions
| Item Name / Reagent | Function / Purpose | Key Supplier Examples |
|---|---|---|
| Phosphoramidites (2'-OMe, LNA, PS) | Building blocks for solid-phase synthesis of modified oligonucleotides. | Glen Research, Merck, Sigma |
| DDTT (3-((Dimethylamino-methylidene)amino)-3H-1,2,4-dithiazole-3-thione) | Sulfurizing agent for efficient phosphorothioate linkage synthesis during oligonucleotide assembly. | ChemGenes, Tokyo Chemical Industry |
| Alkyne-/Azide-Modified Phosphoramidites (e.g., 5'-Hexynyl, 3'-Azide) | Enables "click chemistry" for post-synthetic conjugation or crosslinking. | Berry & Associates, Jena Bioscience |
| THPTA Ligand (Tris(3-hydroxypropyltriazolylmethyl)amine) | Copper chelator for CuAAC; accelerates reaction and reduces Cu-induced oligo degradation. | Sigma-Aldrich, BroadPharm |
| Recombinant Exonuclease III (E. coli) | For controlled, in vitro nuclease resistance assays targeting double-stranded regions. | New England Biolabs, Thermo Fisher |
| Size-Exclusion Spin Columns (e.g., NAP-5) | Rapid desalting and cleanup of crosslinking reactions. | Cytiva, Merck |
| SYBR Gold Nucleic Acid Gel Stain | High-sensitivity fluorescent stain for quantifying degradation products on gels. | Thermo Fisher Scientific |
Visualizations
Diagram Title: Nuclease Resistance Mechanism & Outcome Pathway
Diagram Title: Serum Stability Assay Experimental Workflow
Technical Support Center
Troubleshooting Guide & FAQs
FAQ 1: Why is my PEGylated DNA nanodevice still showing rapid clearance in murine models despite high conjugation efficiency?
Answer: Rapid clearance post-PEGylation often points to suboptimal polymer properties or immune recognition.
- Cause A: PEG Molecular Weight & Density: PEG chains below 5 kDa offer insufficient steric shielding. A surface density below 0.5 PEG chains per 100 nm² can create "bare patches" susceptible to opsonin adsorption.
- Troubleshooting: Increase PEG molecular weight to 10-20 kDa and optimize conjugation chemistry to achieve a higher surface density. Verify using a method like H-NMR or a colorimetric assay (e.g., iodine assay for PEG).
- Cause B: Anti-PEG Immunity: Pre-existing or induced anti-PEG antibodies can cause accelerated blood clearance (ABC). This is a significant issue in repeat-administration studies.
- Troubleshooting: Screen animal sera for anti-PEG IgM/IgG via ELISA. Consider switching to a low-immunogenicity PEG alternative (e.g., methoxy-PEG over branched PEG) or employ biomimetic polymers.
FAQ 2: My biomimetic polymer coating (e.g., CD47-mimic) is unstable and dissociates in serum, leading to loss of the "self" signal. How can I improve conjugate stability?
Answer: Stability issues typically stem from non-covalent conjugation or linker hydrolysis.
- Cause A: Non-Covalent Attachment: Physical adsorption or streptavidin-biotin linkages (in certain conditions) can be unstable.
- Troubleshooting: Transition to covalent conjugation strategies. Use click chemistry (e.g., DBCO-Azide) or maleimide-thiol coupling for irreversible attachment. Ensure proper molar ratio and reaction time.
- Cause B: Ester-Based Linker Degradation: Many polymer-drug linkers use esters that hydrolyze in serum.
- Troubleshooting: Replace ester linkers with more stable amide or carbamate linkers. Perform an in vitro stability assay in 100% FBS at 37°C, sampling at 0, 1, 4, 8, 24, and 48 hours to monitor coating integrity via HPLC or gel shift assay.
FAQ 3: After coating my DNA origami with a zwitterionic polymer, I observe significant aggregation. How can I maintain colloidal stability?
Answer: Aggregation indicates an imbalance in inter-particle forces during the coating process.
- Cause A: Charge Neutralization & Poor Solvation: Zwitterionic polymers can transiently neutralize the DNA's negative charge before establishing a hydrated layer, leading to aggregation.
- Troubleshooting: Introduce the polymer gradually under vigorous stirring. Perform the coating in a low-ionic-strength buffer (e.g., 5 mM HEPES, pH 7.4) initially, then dialyze into physiological buffer. Use a polymer with a net-neutral but highly hydrophilic backbone.
- Cause B: Incomplete Purification: Unreacted polymer or byproducts can cause bridging flocculation.
- Troubleshooting: Implement a stringent, multi-step purification post-coating. Use size-exclusion chromatography (SEC) or tangential flow filtration (TFF) with an appropriate molecular weight cutoff to separate coated nanodevices from free polymer and aggregates. Analyze by dynamic light scattering (DLS) and agarose gel electrophoresis.
FAQ 4: How do I quantitatively compare the circulation half-life improvements offered by different stealth coatings in my DNA nanodevice?
Answer: Use a standardized pharmacokinetic (PK) study protocol with blood sampling and quantitative analysis.
- Experimental Protocol:
- Labeling: Label DNA nanodevices with a fluorescent dye (e.g., Cy5.5) or a radioisotope (e.g., ³²P) at a defined site to avoid interfering with the coating.
- Administration: Inject a bolus dose (e.g., 1 mg/kg in 100 µL PBS) intravenously into groups of mice (n=5 per coating type).
- Blood Sampling: Collect blood (20-30 µL) from the retro-orbital plexus or tail vein at precise time points: 2 min, 15 min, 30 min, 1h, 2h, 4h, 8h, 12h, and 24h post-injection.
- Quantification: Lyse blood samples. Measure fluorescence (using a standard curve in blood lysate) or radioactivity via scintillation counting.
- Analysis: Fit concentration-vs.-time data to a two-compartment PK model using software (e.g., PKSolver). Extract key parameters: t₁/₂α (distribution half-life) and t₁/₂β (elimination half-life). Compare the Area Under the Curve (AUC) for total exposure.
Comparative Data: Stealth Coating Performance
Table 1: Pharmacokinetic Parameters of Coated vs. Uncoated DNA Nanodevices (Representative Murine Data)
| Coating Strategy | Polymer/Ligand | Avg. Circulation Half-life (t₁/₂β) | Relative AUC (0-24h) | Key Limitation |
|---|---|---|---|---|
| Uncoated (Control) | N/A | 5 - 15 min | 1.0 (Reference) | Rapid renal clearance & MPS uptake |
| Linear PEG (5 kDa) | Methoxy-PEG-NHS | ~45 min | 8.5 | Moderate ABC effect |
| High-Density PEG (20 kDa) | Branched PEG-Maleimide | ~4.2 hours | 35.2 | Potential immunogenicity |
| Zwitterionic Polymer | Poly(carboxybetaine) | ~3.8 hours | 29.8 | Complex conjugation chemistry |
| Biomimetic (Peptide) | "Self" peptide (CD47-derived) | ~2.1 hours | 15.7 | Proteolytic susceptibility |
| Hybrid Coating | PEG + "Self" peptide | ~6.5 hours | 52.0 | Multi-step fabrication |
Experimental Protocols
Protocol 1: Site-Specific PEGylation of DNA Nanodevice via Click Chemistry Objective: Covalently attach 10 kDa DBCO-PEG to an azide-modified DNA strand pre-incorporated into a DNA origami structure.
- Synthesis: Assemble DNA origami in 1x TAEMg buffer (40 mM Tris, 20 mM Acetic acid, 2 mM EDTA, 12.5 mM MgCl₂, pH 8.0) using a thermal annealer. Include one azide-modified staple strand at desired position.
- Purification: Purify assembled nanostructures using 100 kDa MWCO Amicon centrifugal filters to remove excess staples and salts. Wash 3x with conjugation buffer (1x PBS, 5 mM MgCl₂, pH 7.4).
- Conjugation: React purified azide-functionalized origami (10 nM) with a 100-fold molar excess of DBCO-PEG (10 kDa) in conjugation buffer. Incubate at room temperature for 2 hours with gentle rotation.
- Purification: Remove excess PEG using 100 kDa MWCO filters, washing 5x with storage buffer (1x PBS, 5 mM MgCl₂). Confirm conjugation via 1% agarose gel electrophoresis (shifted mobility) and DLS (increase in hydrodynamic diameter).
Protocol 2: Assessing Serum Stability of Polymer-Coated Nanodevices Objective: Determine the integrity of the stealth coating under physiological conditions.
- Incubation: Dilute the coated DNA nanodevice to 100 nM in 500 µL of 100% fetal bovine serum (FBS). Incubate at 37°C with slow agitation.
- Sampling: At each time point (0, 1, 4, 8, 24, 48 h), withdraw 50 µL aliquot.
- Analysis:
- Gel Shift: Load aliquot (mixed with 6x dye, no EDTA) on a 1% agarose gel + 0.5 µg/mL ethidium bromide. Run at 70 V for 45 min in TBE + 11 mM MgCl₂. A smear or lower band indicates coating dissociation/degradation.
- DLS: Dilute a 10 µL aliquot in 1 mL of 0.22 µm filtered PBS. Measure hydrodynamic diameter. An increasing polydispersity index (PdI >0.3) or size change indicates aggregation or degradation.
- Quantification: Plot remaining intact product (%) over time to determine degradation half-life.
Diagrams
Title: Stealth Coating Conjugation & QC Workflow
Title: MPS Clearance Pathway with and without Stealth Coating
The Scientist's Toolkit: Research Reagent Solutions
Table 2: Essential Reagents for Stealth Coating Research
| Reagent / Material | Function & Rationale | Key Considerations |
|---|---|---|
| Functionalized PEGs (e.g., mPEG-NHS, DBCO-PEG, Maleimide-PEG) | Gold-standard for conferring "stealth" properties via steric repulsion and hydration layer. Different end-groups allow for site-specific conjugation. | Opt for high purity (>95%), low polydispersity. Store dry, desiccated. Avoid freeze-thaw cycles of solutions. |
| Zwitterionic Polymers (e.g., Poly(carboxybetaine methacrylate)) | Provide superior anti-fouling properties via a strong hydration layer, potentially lower immunogenicity than PEG. | Polymerization control (PDI) is critical. Requires functional handles (e.g., NHS ester, alkyne) for conjugation. |
| Biomimetic Peptide Ligands (e.g., CD47-derived "Self" peptides) | Actively engage "don't eat me" signaling pathways (e.g., SIRPα on phagocytes) to evade immune clearance. | Susceptible to proteolysis. Must be conjugated with correct orientation. Often used in tandem with a polymer base coat. |
| Click Chemistry Kits (Cu-free, e.g., DBCO-Azide) | Enable efficient, bio-orthogonal, and site-specific conjugation under mild aqueous conditions, preserving nanostructure integrity. | Ensure azide/DBCO modification is on a solvent-accessible site. Control stoichiometry to avoid aggregation. |
| Size-Exclusion Chromatography (SEC) Columns (e.g., Sepharose CL-4B, FPLC systems) | Critical purification step to separate coated nanodevices from unreacted polymers, aggregates, and free labels. | Choose resin with appropriate fractionation range. Use buffers containing Mg²⁺ for DNA origami stability. |
| Dynamic Light Scattering (DLS) / Zeta Potential Analyzer | Measures hydrodynamic diameter, polydispersity index (PdI), and surface charge (zeta potential) to confirm coating and colloidal stability. | Always filter buffers (0.22 µm). Interpret PdI values cautiously in polydisperse samples. |
Troubleshooting Guides & FAQs
FAQ Category: Conjugation Chemistry & Bioconjugation Issues
Q1: During aptamer conjugation via NHS ester chemistry, my nanoparticle aggregation increases dramatically. What is the cause and solution? A: This is often due to improper pH control or insufficient purification. NHS ester reactions require a pH of 8.0-8.5 in a non-amine buffer (e.g., HEPES, PBS). At higher pH, nanoparticles can destabilize. Perform the reaction in a step-wise manner: First, purify nanoparticles via size-exclusion chromatography (SEC) to remove excess crosslinker. Then, react with the aptamer. Include a 0.05% (w/v) Tween-20 surfactant in buffers to minimize aggregation. Always monitor hydrodynamic diameter by DLS before and after each step.
Q2: My antibody-nanodevice conjugate shows significantly reduced binding affinity in ELISA compared to free antibody. Why? A: This is typically due to orientational hindrance or denaturation. Antibodies conjugated randomly via lysine residues may have their paratopes blocked. Use site-specific conjugation strategies:
- Protocol for Glycan Oxidation-based Conjugation:
- Incubate antibody (1 mg/mL) with 10 mM sodium periodate (in 0.1 M sodium acetate, pH 5.5) for 30 min at 4°C in the dark to oxidize Fc glycans.
- Purify using a Zeba Spin Desalting Column (7K MWCO) pre-equilibr with conjugation buffer (0.1 M NaCl, 0.1 M NaH2PO4, pH 7.2).
- Immediately mix with nanoparticles functionalized with hydrazide groups (in molar ratio 5:1 Ab:NP).
- Incubate for 2 hrs at room temperature. Quench with 50 mM lysine.
- Purify conjugate via SEC (Sepharose CL-4B).
Q3: How do I quantify the number of targeting ligands (peptides) per nanodevice? A: Use a combination of spectroscopic assays and validate with mass photometry.
- Protocol for Fluamine-based Peptide Quantification:
- Prepare a standard curve of free peptide (0-100 µM) in assay buffer.
- Label peptides and conjugated nanoparticles separately with Fluamine reagent (5 µL of 10 mg/mL in DMSO per 100 µL sample) for 1 hr.
- Measure fluorescence (Ex/Em: 494/521 nm).
- Calculate peptide concentration from standard curve. The number per particle = ( [Peptide] / [Nanoparticle] ). Determine [Nanoparticle] via phosphorus assay (for DNA origami) or UV-Vis at 260 nm (for aptamers, using extinction coefficient).
Q4: My targeted nanodevice shows excellent in vitro binding but no improvement in vivo biodistribution in mouse models. What are key factors to check? A: This is a common translational hurdle. Check these parameters systematically:
| Potential Cause | Diagnostic Experiment | Possible Solution |
|---|---|---|
| Rapid Desialylation | Incubate conjugate with mouse serum (37°C, 1 hr), run IEF gel. | PEGylate the nanodevice core before ligand attachment. |
| Protein Corona Masking | Incubate with 100% FBS for 1 hr, isolate particle via centrifugation, perform SDS-PAGE & ligand-specific ELISA. | Pre-coat with "stealth" molecules like CD47-mimetic peptides. |
| Insufficient Ligand Density | Use quantitative assays (see Q3). Aim for 5-20 ligands/particle for multivalent binding. | Optimize conjugation stoichiometry; use higher input ratio. |
| Off-Target Sequestration | Perform ex vivo organ imaging at early time points (e.g., 30 min post-injection). | Incorporate a cleavable PEG shield that sheds in the tumor microenvironment. |
Q5: The bioactivity of my conjugated peptide is lost. How can I preserve it? A: Peptides, especially linear ones, can lose conformation. Use these strategies:
- Cyclize the peptide before conjugation to lock its active conformation.
- Insert a spacer/linker (e.g., (PEG)₄, GGGGS) between the nanoparticle surface and the peptide to reduce steric hindrance.
- Conjugate via terminal cysteine using maleimide chemistry, ensuring the conjugation site is distal from the bioactive peptide sequence.
Key Experimental Protocols
Protocol 1: Site-Specific Conjugation of DNA-Aptamers to Lipid Nanoparticles (LNPs) via Click Chemistry
Objective: Attach 5'-DBCO-modified DNA aptamers to azide-functionalized LNPs with controlled density.
- Synthesis of Azide-LNPs: Formulate LNPs using standard microfluidic mixing, incorporating 2.5 mol% of DSPE-PEG(2000)-Azide into the lipid mix.
- Purification & Characterization: Purify LNPs via tangential flow filtration (100 kDa MWCO) into 1X PBS, pH 7.4. Characterize size (DLS: ~110 nm) and PDI (<0.1).
- Click Conjugation: Incubate Azide-LNPs (1 mM total lipid) with varying molar ratios of 5'-DBCO-Aptamer (1:10 to 1:100 LNP:Aptamer) for 24 hrs at 4°C with gentle rotation.
- Purification: Remove unreacted aptamer using sepharose CL-4B size exclusion chromatography. Collect the void volume fraction (conjugates).
- Quantification: Determine aptamer density via qPCR against a standard curve and LNP concentration by cholesterol assay.
Protocol 2: Assessing Target-Specific Cellular Uptake via Flow Cytometry
Objective: Compare uptake of targeted vs. non-targeted nanodevices.
- Cell Preparation: Seed target-positive and target-negative cells (isogenic controls) at 2e5 cells/well in 12-well plates 24 hrs prior.
- Dosing: Incubate cells with fluorescently labeled (e.g., Cy5) nanodevice conjugates (50 nM equivalent) in serum-free media for 2 hrs at 37°C.
- Competition Assay: Include a control group pre-treated with 100x excess free targeting ligand for 30 min prior to adding the conjugate.
- Processing: Wash cells 3x with cold PBS, trypsinize, quench with FBS, and resuspend in cold PBS + 1% BSA + 1 µg/mL DAPI (live/dead stain).
- Analysis: Analyze on a flow cytometer. Gate on single, live cells. Report median fluorescence intensity (MFI) in the Cy5 channel for ≥10,000 cells. Specific uptake = (MFItargetcells - MFItargetcellswithcompetitor) / MFInegativecells.
Visualizations
Diagram Title: Targeted Nanodevice Biodistribution Pathway
Diagram Title: Conjugation Method Selection Workflow
The Scientist's Toolkit: Key Research Reagent Solutions
| Reagent / Material | Function in Active Targeting Research |
|---|---|
| DSPE-PEG(2000)-Maleimide | A lipid-PEG derivative for creating stealthy nanoparticle surfaces with a terminal thiol-reactive group for conjugating cysteine-containing peptides/antibodies. |
| Sulfo-SMCC (Sulfosuccinimidyl 4-(N-maleimidomethyl)cyclohexane-1-carboxylate) | A heterobifunctional crosslinker for NHS ester-maleimide coupling. Used to first functionalize amine-bearing nanodevices, then conjugate thiolated ligands. |
| DBCO-PEG5-NHS Ester | A bifunctional linker for "click" chemistry. The NHS ester reacts with nanoparticle amines, presenting DBCO groups for strain-promoted conjugation to azide-modified oligonucleotides (aptamers). |
| Zeba Spin Desalting Columns (7K MWCO) | Rapid, small-volume spin columns for buffer exchange and removal of excess crosslinkers or unreacted small molecules prior to conjugation steps, preventing side reactions. |
| Streptavidin-Coated Magnetic Beads | For pull-down assays to verify conjugation success or to isolate conjugates. Biotinylated ligands or nanodevices can be captured and analyzed. |
| Size Exclusion Chromatography Resin (Sepharose CL-4B) | For gentle, high-recovery purification of large nanodevice conjugates from smaller, unreacted ligands based on hydrodynamic size. |
| Polyacrylamide Gel Electrophoresis (PAGE) Reagents | For analyzing the integrity of DNA-based nanodevices pre- and post-conjugation, and for assessing purity of oligonucleotide ligands. |
| Microfluidic Mixers (e.g., NanoAssemblr) | For reproducible, scalable formulation of uniform lipid nanoparticles (LNPs) or polymeric nanoparticles with embedded functional groups for conjugation. |
Technical Support Center: Troubleshooting & FAQs
Frequently Asked Questions (FAQs)
Q1: Our self-assembled DNA tetrahedra show low yield and incorrect folding. What are the primary causes? A: Low yield in DNA tetrahedron assembly is commonly caused by:
- Incorrect stoichiometry: The four staple strands must be equimolar with the long scaffold strand. Verify concentrations via UV-Vis spectrophotometry (NanoDrop) using extinction coefficients.
- Inadequate thermal annealing ramp: A rapid cooling rate does not allow for proper nucleation. Implement a slow, linear anneal from 95°C to 4°C over 24-48 hours.
- Mg²⁺ concentration: Mg²⁺ is critical for folding. Titrate MgCl₂ concentration between 5-20 mM in the assembly buffer.
- Oligonucleotide purity: Use HPLC- or PAGE-purified strands. Truncated sequences act as kinetic traps.
Q2: Our designed DNA origami structures are unstable in physiological buffers (e.g., PBS, cell culture media). How can we improve stability? A: Physiological conditions, specifically low Mg²⁺ and presence of nucleases, degrade origami. Implement these stabilization strategies:
- Crosslinking: Use psoralen (for T-A crosslinks) or glutaraldehyde treatments for covalent stabilization.
- Polymer Coating: Coat structures with cationic polymers like polyethylene glycol (PEG)-lipid conjugates or chitosan. This shields charge and sterically hinders nuclease access.
- Buffer Exchange: After assembly in high-Mg²⁺ TAE/Mg buffer, perform a graded dialysis into your target buffer supplemented with at least 2-5 mM Mg²⁺.
Q3: How do we confirm the correct 3D size and shape of our optimized nanostructures? A: Use orthogonal characterization techniques, as summarized in the table below.
Table 1: Quantitative Characterization Techniques for DNA Nanostructures
| Technique | Primary Data Output | Optimal Size Range | Key Parameter Measured |
|---|---|---|---|
| Native Agarose Gel Electrophoresis | Electrophoretic Mobility Shift | 5 - 200 nm | Hydrodynamic size & assembly yield. |
| Atomic Force Microscopy (AFM) | Topographical Height Image | 5 nm - 5 µm | 2D/3D shape, dimensions, surface morphology. |
| Transmission Electron Microscopy (TEM) | 2D Projection Image | 1 - 500 nm | High-resolution shape & size. Requires staining (uranyl acetate). |
| Dynamic Light Scattering (DLS) | Hydrodynamic Diameter (nm) | 1 nm - 10 µm | Average size & size distribution in solution. |
| Size Exclusion Chromatography (SEC) | Elution Volume (mL) | 5 - 100 nm | Hydrodynamic volume & sample purity. |
Q4: In biodistribution studies, our nanostructures accumulate in the liver and spleen instead of the target vascular endothelium. What shape/size optimizations can improve circulation? A: This indicates rapid clearance by the mononuclear phagocyte system (MPS). To promote endothelial targeting and controlled vascular transport:
- Optimize Size: Aim for a major axis of 50-150 nm to avoid rapid renal clearance (<10 nm) and liver/spleen sequestration (>200 nm).
- Optimize Shape: Employ high-aspect-ratio shapes (e.g., rods, origami rectangles) over spherical tetrahedra. Rods exhibit lower phagocytic uptake and can align with blood flow, enhancing margination to vessel walls.
- Surface Functionalization: Conjugate targeting ligands (e.g., peptides, antibodies) at a controlled density (≈1-5 per structure) to engage specific endothelial receptors (e.g., ICAM-1, VCAM-1).
Experimental Protocols
Protocol 1: Assembly of DNA Tetrahedra for Vascular Transport Studies
- Objective: Produce monodisperse 3D DNA tetrahedra (~10 nm edge length).
- Reagents: Four synthetic oligonucleotides (S1-S4, ≈60-80 nt each), TAE/Mg²⁺ buffer (40 mM Tris, 20 mM acetic acid, 2 mM EDTA, 12.5 mM MgCl₂, pH 8.0).
- Procedure:
- Combine strands S1, S2, S3, and S4 at equimolar ratios (50 nM each) in TAE/Mg²⁺ buffer.
- Heat the mixture to 95°C for 5 minutes in a thermal cycler.
- Cool linearly from 95°C to 4°C over 24 hours (ramp rate ≈ 0.06 °C/min).
- Purify assembled tetrahedra using a 100 kDa molecular weight cutoff centrifugal filter to remove excess single strands.
- Verify assembly by 3% native agarose gel electrophoresis (70V, 2 hours, 4°C) in TAE/Mg²⁺ running buffer, stained with SYBR Safe.
Protocol 2: Stabilization of DNA Origami for Physiological Conditions
- Objective: Render DNA origami structures resistant to low-Mg²⁺ buffers and nucleases.
- Reagents: Assembled DNA origami (e.g., a rectangular sheet), PBS (pH 7.4), 1-ethyl-3-(-3-dimethylaminopropyl) carbodiimide (EDC), N-hydroxysuccinimide (NHS), 5kDa mPEG-NH₂.
- Procedure (PEGylation via Amine Coupling):
- Exchange origami buffer into 0.1 M MES buffer (pH 6.0) containing 5 mM MgCl₂ using dialysis.
- Activate carboxyl-modified staple strands on the origami surface by adding EDC (10 mM final) and NHS (5 mM final). Incubate for 15 minutes at room temperature.
- Add a 1000-fold molar excess of mPEG-NH₂ to the reaction. Incubate for 2 hours at room temperature.
- Quench the reaction with 100 mM Tris-HCl (pH 8.0) for 15 minutes.
- Purify PEGylated origami via PEG precipitation or SEC.
The Scientist's Toolkit: Research Reagent Solutions
Table 2: Essential Materials for DNA Nanostructure Biodistribution Research
| Item | Function/Application |
|---|---|
| HPLC/PAGE Purified Oligonucleotides | High-purity DNA strands are essential for high-fidelity self-assembly and reproducible yields. |
| p7249 or p8064 Scaffold Strand | Standard, long (7249 or 8064 nt) single-stranded DNA from M13mp18 phage, used as the scaffold for most 2D/3D DNA origami. |
| TAE/Mg²⁺ Buffer (1x TAE, 12.5 mM MgCl₂) | Standard assembly buffer. Mg²⁺ cations are crucial for shielding negative charge and facilitating folding. |
| SYBR Safe DNA Gel Stain | A safer, non-mutagenic alternative to ethidium bromide for visualizing DNA in gels under blue light. |
| Centrifugal Filters (100 kDa MWCO) | For buffer exchange and removal of excess staple strands post-assembly. |
| Uranyl Acetate (2% aqueous) | Negative stain for Transmission Electron Microscopy (TEM) to enhance contrast of DNA nanostructures. |
| mPEG-NH₂ (5 kDa) | Methoxy-polyethylene glycol-amine, used for "PEGylation" to create a stealth layer, reducing immune clearance. |
| Streptavidin, Alexa Fluor 647 Conjugate | Common fluorescent label (via biotin-streptavidin linkage) for in vitro and ex vivo fluorescence imaging of biodistribution. |
Visualizations
Optimization Workflow for Biodistribution
MPS Clearance Challenges & Strategic Solutions
Technical Support Center
Troubleshooting Guides & FAQs
Q1: My pH-sensitive DNA nanodevice shows premature cargo release in physiological buffer (pH 7.4) before reaching the acidic tumor microenvironment. What could be causing this? A: Premature release often stems from an insufficient pKa difference between the trigger pH and storage pH. Verify the exact pKa of your responsive motif (e.g., i-motif, DNA triplex). Ensure your storage buffer is correctly formulated—avoid acidic contaminants. Consider adding a stabilizing cation like 5 mM Mg²⁺ to increase transition sharpness. Test release kinetics in a full pH gradient from 7.4 to 5.5.
Q2: Enzyme-triggered release using DNase I or restriction enzymes is inefficient in serum-containing media. How can I improve specificity and efficiency? A: Serum nucleases cause non-specific degradation. Implement these steps:
- Shield your device: Use poly(ethylene glycol) (PEG) conjugation or serum albumin coating to create a steric barrier.
- Optimize sequence: Design recognition/cleavage sites that are specific to your target enzyme (e.g., a unique restriction site, a matrix metalloproteinase (MMP)-specific peptide linker) and not recognized by common serum nucleases.
- Use allosteric control: Employ a "lock" mechanism where the enzyme-sensitive site is only exposed upon a prior target-binding event.
Q3: For redox-triggered systems (GSH), my disulfide bond reduction and cargo release is slower than expected inside cells. How do I troubleshoot? A: Intracellular glutathione (GSH) levels vary (2-10 mM). Confirm local GSH concentration in your cell model. Check disulfide bond accessibility:
- Steric hindrance: Ensure the disulfide linkage is not buried within the nanostructure. Redesign for surface exposure.
- Bond strength: Use a labile disulfide bond (e.g., cystamine). Avoid overly stable cyclic disulfides.
- Validation: Use a control with dithiothreitol (DTT) in vitro to confirm the mechanism is functional.
Q4: How can I quantitatively compare the release profiles of different trigger mechanisms to select the best one for my biodistribution study? A: Perform standardized in vitro release assays under simulated physiological conditions. Key metrics to track and compare are in Table 1.
Table 1: Quantitative Comparison of Stimuli-Responsive Release Profiles
| Trigger Type | Simulated Condition | Key Metric | Optimal Value (Typical Target) | Measurement Technique |
|---|---|---|---|---|
| pH | pH gradient from 7.4 to 5.0 | Release Half-time (t₁/₂) at pH 5.5 | 1-4 hours | Fluorescence dequenching (FRET), HPLC |
| Enzymatic | [Enzyme] at reported tissue level | Catalytic Efficiency (kcat/Km) | High (>10⁴ M⁻¹s⁻¹) | Fluorescent substrate cleavage, Gel Electrophoresis |
| Redox (GSH) | 10 mM GSH vs. 2 µM GSH | Release Ratio (High/Low GSH) | >50-fold | LC-MS, Spectrophotometry (Ellman's assay) |
| All | 10% FBS, 37°C | Stability (Non-triggered) | <10% release in 24h | DLS, SEC, Fluorescence |
Experimental Protocols
Protocol 1: Standardized In Vitro Release Kinetics Assay for pH-Responsive Nanodevices Purpose: To quantitatively measure cargo release as a function of pH. Materials: pH-responsive DNA nanodevice, cargo (e.g., dye-labeled oligonucleotide), buffers (pH 7.4, 6.5, 6.0, 5.5), fluorescence plate reader. Method:
- Load Cargo: Incubate nanodevice with excess cargo. Purify via spin filtration (100kDa MWCO) to remove unbound cargo.
- Establish Baseline: Dilute loaded device in pH 7.4 buffer (100 µL final). Measure initial fluorescence (Finitial) at λex/λ_em for your dye.
- Trigger Release: Rapidly acidify aliquots to target pH (6.5, 6.0, 5.5) using a predetermined volume of acidic buffer.
- Kinetic Measurement: Immediately transfer to a 37°C plate reader. Measure fluorescence (F_t) every 2-5 minutes for 4-8 hours.
- Data Analysis: Calculate % Release = (Ft - Finitial) / (Ftotal - Finitial) * 100, where F_total is fluorescence after full denaturation. Plot % Release vs. time to determine t₁/₂.
Protocol 2: Validating Enzyme-Specific Cleavage in Complex Media Purpose: To confirm specific cleavage by a target enzyme (e.g., MMP-9) in the presence of serum nucleases. Materials: Device with enzyme-cleavable linker (peptide or specific DNA sequence), active MMP-9 enzyme, MMP-9 inhibitor, 10% FBS/PBS, quenching buffer (EDTA), gel electrophoresis system. Method:
- Set Reactions: Prepare four 50 µL reactions in 10% FBS/PBS:
- A: Device only.
- B: Device + MMP-9 (100 nM).
- C: Device + MMP-9 + Inhibitor (10 mM EDTA).
- D: Device + Heat-denatured MMP-9.
- Incubate: Incubate at 37°C for 2 hours.
- Quench: Add EDTA to all samples to 20 mM final concentration.
- Analyze: Run samples on non-denaturing PAGE (10-15%). Specific cleavage (band shift only in Reaction B) confirms enzyme-specific triggering amid background nucleases.
Diagrams
pH-Triggered Release in Tumor Tissue
Sequential Enzyme & Redox Triggering Pathway
The Scientist's Toolkit: Research Reagent Solutions
Table 2: Essential Materials for Stimuli-Responsive Nanodevice Development
| Reagent / Material | Function in Research | Key Consideration for Biodistribution |
|---|---|---|
| i-Motif Forming Oligos (C-rich) | Forms pH-sensitive quadruplex; unfolds at low pH to release cargo. | Choose sequence with transition pH ~6.5 to match tumor microenvironment. |
| Disulfide Phosphoramidites | Incorporates reducible S-S bonds during DNA synthesis for redox response. | Use cleavable linkers (e.g., SPDP) for conjugating non-nucleic acid cargo. |
| PEGylation Reagents (e.g., NHS-PEG) | Conjugates polyethylene glycol to nanodevice surface to enhance stability, reduce non-specific binding, and improve biodistribution. | Optimal PEG chain length (2k-5k Da) balances stealth vs. accessibility to triggers. |
| Matrix Metalloproteinase (MMP) Substrate Peptides | Peptide linker (e.g., GPLGVRG) cleaved by overexpressed MMPs in disease sites. | Verify enzyme specificity (MMP-2 vs MMP-9) for your target tissue. |
| Fluorescent Reporters (Cy5, FAM, Quenchers) | Labels DNA or cargo to track assembly, stability, and release via fluorescence or FRET. | Use near-infrared dyes (Cy5, Cy7) for in vivo imaging compatibility. |
| Size-Exclusion Spin Columns (e.g., 100kDa MWCO) | Purifies assembled nanodevices from excess components and unbound cargo. | Critical step to ensure accurate release kinetics and prevent false signals. |
| Glutathione (GSH) & Glutathione S-Transferase | Used to create reducing environments in vitro that mimic the intracellular cytosol. | Establish standard GSH concentration (e.g., 10 mM) for comparative release studies. |
From Lab to Living System: Solving Common Biodistribution Pitfalls
Technical Support Center
Troubleshooting Guide: Common Issues & Solutions
Issue 1: High Accumulation in Liver/Spleen Despite PEGylation
- Problem: DNA nanodevice shows >60% injected dose per gram (%ID/g) in liver/spleen after 24 hours, even with 20% PEG surface conjugation.
- Diagnosis: Likely due to incomplete surface shielding or insufficient PEG density/chain length.
- Solution:
- Verify Conjugation Efficiency: Run agarose gel shift assay. A complete shift indicates successful PEGylation.
- Optimize PEG Parameters: Increase PEG density (e.g., from 20% to 40% of surface attachment points) or switch to longer chain PEG (e.g., from 2k Da to 5k Da).
- Implement Fractionated Dosing: Administer the dose in smaller fractions over 1-2 hours to saturate innate immune clearance pathways partially.
Issue 2: Inconsistent Biodistribution Between Batches
- Problem: Significant variation in liver/spleen sequestration rates between different synthesis batches of the same DNA nanodevice.
- Diagnosis: Probable contamination with endotoxin or aggregation during purification/storage.
- Solution:
- Test for Endotoxin: Use LAL chromogenic assay. Acceptable threshold is <0.5 EU/mL for in vivo studies.
- Implement Rigorous Purification: Add a final size-exclusion chromatography (SEC) or tangential flow filtration (TFF) step.
- Standardize Storage: Aliquot in nuclease-free, low-protein-binding tubes with appropriate cryoprotectants (e.g., 5% trehalose).
Issue 3: Loss of Targeting Efficacy After Surface Modification
- Problem: After applying strategies to reduce sequestration (e.g., adding hydrophilic polymers), the nanodevice no longer binds its intended target cell.
- Diagnosis: Surface modifications are sterically blocking the targeting ligand (e.g., aptamer, antibody).
- Solution: Introduce a cleavable linker (e.g., matrix metalloproteinase-cleavable peptide) between the targeting ligand and the nanodevice core. The linker remains intact in circulation but is cleaved in the target tissue microenvironment.
Frequently Asked Questions (FAQs)
Q1: What is the typical baseline level of liver and spleen uptake we should expect for an unmodified DNA origami structure, and what is a realistic improvement target? A: For a standard 100 nm DNA origami structure (e.g., a rod or triangle), expect initial liver accumulation of 40-70 %ID/g and spleen accumulation of 15-30 %ID/g at 24 hours post-injection in murine models. A realistic target for a well-optimized device is to reduce these values to <20 %ID/g in the liver and <10 %ID/g in the spleen while maintaining or improving target site delivery.
Q2: Are there specific physicochemical properties that correlate most strongly with reduced sequestration? A: Yes. The primary factors, in order of impact, are:
- Surface Charge (Zeta Potential): Neutral or slightly negative surfaces (-10 to +5 mV) minimize opsonization.
- Hydrophilicity: High surface hydrophilicity, achieved via PEG or other polymers, reduces protein adsorption.
- Size: Structures below 50 nm can bypass liver sinusoid fenestrations less efficiently, but very small sizes (<10 nm) lead to rapid renal clearance. An optimal window is often 50-150 nm.
- Shape: While data is evolving, compact, isotropic shapes (spheres) may show slightly lower initial uptake than high-aspect-ratio shapes (rods).
Q3: Which immune cells are primarily responsible for off-target clearance, and can we pre-block them? A: Kupffer cells (liver macrophages) and splenic red pulp macrophages are the primary phagocytes. Marginal zone B-cells and dendritic cells in the spleen also contribute. Transient pre-blockade with clodronate liposomes 24 hours before administration can deplete phagocytic cells and is a useful experimental tool to confirm the mechanism. However, this is not a clinical strategy.
Q4: What are the best in vitro assays to predict in vivo sequestration before animal studies? A: A combination of assays is recommended:
- Serum Protein Binding: Incubate with 50-100% serum for 1 hour, then run SEC-HPLC or quantify unbound fraction. Aim for <30% protein binding.
- Macrophage Uptake Assay: Use RAW 264.7 or J774A.1 cells. Measure cellular association via flow cytometry after 2-4 hour incubation. <20% cellular association is favorable.
- Hemocompatibility Test: Incubate with fresh whole blood; measure complement activation (C3a, SC5b-9) and platelet aggregation.
Table 1: Impact of Common Modifications on Liver/Spleen Sequestration (%ID/g at 24h)
| Modification Strategy | Liver Uptake (Mean ± SD) | Spleen Uptake (Mean ± SD) | Key Benefit | Key Drawback |
|---|---|---|---|---|
| Unmodified DNA Origami | 65.2 ± 8.7 | 22.5 ± 4.1 | Baseline | High clearance |
| 20% PEGylation (5k Da) | 35.4 ± 6.1 | 12.8 ± 3.2 | Proven, simple | Batch variability |
| Cholesterol Insertion | 45.1 ± 9.3 | 18.2 ± 5.0 | Enhances stability | Increases liver uptake |
| Polylysine-g-PEG Coating | 28.9 ± 5.5 | 9.5 ± 2.8 | Very effective shielding | Can cause aggregation |
| 'Stealth' DNA Motif (e.g., A15) | 31.5 ± 4.8 | 11.2 ± 2.4 | No chemical mod. | Moderate effect alone |
| Dense PEG Brush (40%, 2k Da) | 18.7 ± 3.9 | 7.3 ± 1.8 | Best reduction | May hinder targeting |
Table 2: Biodistribution of Optimized vs. Standard DNA Nanodevice
| Organ/Tissue | Standard Nanodevice (%ID/g) | Optimized 'Stealth' Nanodevice (%ID/g) | Fold Change |
|---|---|---|---|
| Liver | 65.2 | 18.7 | 3.5x decrease |
| Spleen | 22.5 | 7.3 | 3.1x decrease |
| Tumor | 4.1 | 12.8 | 3.1x increase |
| Kidney | 8.8 | 15.2 | 1.7x increase |
| Heart | 1.2 | 1.5 | 1.3x increase |
Experimental Protocols
Protocol 1: Assessing Macrophage Uptake In Vitro
- Cell Culture: Seed murine macrophage cells (e.g., J774A.1) in a 24-well plate at 2x10^5 cells/well. Culture overnight in complete RPMI medium.
- Nanodevice Preparation: Label DNA nanodevices with Cy5 fluorophore. Dilute in serum-free medium to a working concentration of 50 nM.
- Incubation: Replace cell medium with the nanodevice-containing medium. Incubate for 3 hours at 37°C.
- Washing & Analysis: Wash cells 3x with cold PBS. Detach cells using gentle trypsin. Analyze cellular fluorescence via flow cytometry (Ex/Em: 640/670 nm). Express results as Mean Fluorescence Intensity (MFI) or % positive cells.
Protocol 2: In Vivo Biodistribution Study Using Radiolabeling
- Radiolabeling: Label DNA nanodevices with a radioisotope (e.g., Iodine-125, ^125I) using the chloramine-T method or by incorporating [γ-^32P]ATP via T4 Polynucleotide Kinase. Purify using a NAP-5 desalting column.
- Animal Administration: Inject mice (n=5 per group) intravenously via the tail vein with 100 µL of solution containing ~1 x 10^6 counts per minute (cpm) of the radiolabeled device.
- Tissue Harvest: At the desired time point (e.g., 24h), euthanize animals. Perfuse with 10 mL saline via the heart. Harvest organs of interest (liver, spleen, kidneys, heart, lungs, tumor) and weigh them.
- Quantification: Count radioactivity in each organ using a gamma (^125I) or beta (^32P) scintillation counter. Calculate %ID/g as: (cpm in organ / weight in g) / (total injected cpm) x 100%.
Visualization
The Scientist's Toolkit: Research Reagent Solutions
| Item | Function & Rationale |
|---|---|
| Methoxy-PEG-NHS Ester (5k Da) | Gold-standard for amine-conjugation on DNA. Creates a hydrophilic steric barrier to reduce opsonization. |
| Cholesterol-TEG Phosphoramidite | Enables direct synthesis of cholesterol-conjugated oligonucleotides for integration into nanostructures, enhancing membrane interactions and stability. |
| Clodronate Liposomes | Experimental tool for in vivo depletion of phagocytic macrophages to confirm their role in nanodevice clearance. |
| Sepharose CL-4B Size Exclusion Columns | For gentle purification of large DNA nanostructures (>100 nm) away from aggregates and unconjugated components. |
| T4 Polynucleotide Kinase (with [γ-^32P]ATP) | For highly sensitive radiolabeling of DNA 5' ends for precise biodistribution quantification. |
| RAW 264.7 Cell Line | Murine macrophage line used as a standard model for in vitro phagocytosis and clearance assays. |
| Limulus Amebocyte Lysate (LAL) Assay Kit | Critical for quantifying endotoxin levels. High endotoxin causes immune stimulation and skews biodistribution. |
| Trehalose, Molecular Biology Grade | Cryoprotectant for lyophilization and long-term storage of DNA nanodevices, preventing aggregation. |
Technical Support Center: Troubleshooting DNA Nanodevice Biodistribution
This technical support center provides targeted guidance for common experimental challenges in optimizing the PK of DNA-based nanodevices, framed within the thesis context of improving their biodistribution profiles.
FAQs & Troubleshooting Guides
Q1: Our DNA nanodevice is cleared from circulation too rapidly (<5 min in murine models). How can we extend its plasma half-life? A: Rapid clearance is often due to opsonization and uptake by the mononuclear phagocyte system (MPS). Implement these troubleshooting steps:
- Verify Surface Charge: Use dynamic light scattering (DLS) to measure zeta potential. A highly negative or positive surface charge promotes opsonization. Target a slightly negative to neutral charge (~ -10 to +5 mV).
- Assess PEGylation Density: Inadequate polyethylene glycol (PEG) shielding is a common cause. Use a colorimetric assay (e.g., iodine assay) or NMR to quantify PEG density. Aim for densities >10 PEG chains per 100 nm² surface area.
- Check for Aggregation: Aggregates are rapidly cleared. Filter sterilize (0.22 µm) the final formulation and measure the hydrodynamic diameter by DLS immediately after preparation and in biological media (e.g., 90% serum). An increase >20% indicates instability.
Q2: We achieved long circulation half-life, but cellular uptake into our target tissue (e.g., tumor) is now insufficient. How do we balance stealth with delivery? A: This is the core PK balancing act. The solution often involves active targeting.
- Confirm Ligand Accessibility: Use fluorescence quenching assays or Förster resonance energy transfer (FRET) to ensure targeting ligands (e.g., peptides, aptamers) are not sterically hidden by the PEG corona. Employ cleavable PEG linkages or shorter, heterobifunctional PEGs.
- Titrate Ligand Density: Systematically vary ligand density. High densities can paradoxically increase non-specific MPS uptake. Find the optimal range (typically 2-5 ligands per device) using the protocol below.
- Validate Specificity: Perform competitive inhibition assays with free ligands. Uptake should be reduced by >70% with a 100-fold molar excess of free ligand.
Q3: We observe high non-specific accumulation in the liver and spleen, overshadowing our target site. What are the primary mitigation strategies? A: High MPS accumulation indicates a need for better "stealth" properties.
- Characterize the Protein Corona: Isolate the nanodevice from plasma in vitro, separate the hard corona via centrifugation, and analyze proteins by LC-MS/MS. A corona rich in complement proteins (C3, C1q) or immunoglobulins confirms opsonization.
- Modify Surface Topology: Switch from linear PEG to brush-like or multi-arm PEG architectures for denser shielding.
- Employ "Self" Markers: Functionalize with CD47-mimetic peptides to signal "self" to macrophage receptors (e.g., SIRPα), inhibiting phagocytosis.
Key Experimental Protocols
Protocol 1: Determining Optimal Targeting Ligand Density
Objective: To find the ligand density that maximizes cellular internalization while minimizing non-specific MPS uptake.
Materials: DNA nanodevice with activatable conjugation sites, fluorescently labeled targeting ligand, quenching buffer (low pH), flow cytometer or confocal microscope.
Methodology:
- Prepare a series of nanodevices with increasing ligand densities (e.g., 0, 1, 2, 5, 10 ligands/particle) using controlled stoichiometric conjugation.
- In vitro: Incubate each formulation with target cells (positive receptor) and control cells (negative receptor) for 2 hours at 37°C.
- Wash cells with quenching buffer to remove surface-bound nanodevices, leaving only internalized signal.
- Quantify mean fluorescence intensity (MFI) per cell via flow cytometry.
- In vivo: Administer each formulation intravenously to murine models. Harvest target tissue (e.g., tumor), liver, and spleen at 24h post-injection.
- Homogenize tissues, measure fluorescence or qPCR for a DNA barcode, and calculate % injected dose per gram (%ID/g).
Data Analysis: Plot ligand density vs. (Target Organ Uptake / Liver Uptake) ratio. The density yielding the peak ratio is optimal.
Protocol 2: AssessingIn VivoPharmacokinetics and Biodistribution
Objective: To quantitatively measure circulation half-life and organ distribution.
Materials: Radionuclide (e.g., ⁶⁴Cu, ¹¹¹In) or near-infrared (NIR) dye-labeled DNA nanodevice, animal imager (PET/SPECT or IVIS), well counter.
Methodology:
- Administer labeled nanodevice via tail vein injection.
- For PK: Collect serial blood samples (5-10 µL) from the retro-orbital plexus at 2 min, 15 min, 30 min, 1h, 2h, 4h, 8h, and 24h.
- Measure radioactivity or fluorescence in blood samples, normalize to the 2-min time point (100%).
- For biodistribution: Euthanize cohorts at predetermined timepoints (e.g., 4h, 24h, 48h). Harvest organs of interest (blood, heart, lung, liver, spleen, kidneys, tumor).
- Weigh organs and quantify signal. Calculate %ID/g for each.
Table 1: Impact of Surface Modifications on PK Parameters of DNA Nanodevices
| Modification Type | Avg. Hydrodynamic Diameter (nm) | Zeta Potential (mV) | Plasma t₁/₂α (min) | Plasma t₁/₂β (h) | Liver Uptake (%ID/g at 24h) |
|---|---|---|---|---|---|
| Unmodified | 25 ± 3 | -35 ± 5 | <2 | ~0.2 | 45 ± 8 |
| Linear PEG (5kDa) | 32 ± 4 | -12 ± 3 | 25 ± 6 | 3.5 ± 0.8 | 28 ± 5 |
| Branched PEG (20kDa) | 38 ± 5 | -8 ± 2 | 45 ± 10 | 8.2 ± 1.5 | 18 ± 4 |
| PEG + Active Target | 40 ± 5 | -10 ± 3 | 40 ± 9 | 6.5 ± 1.2 | 22 ± 4 / Tumor: 8 ± 2 |
Table 2: Troubleshooting Guide: Symptoms, Likely Causes, and Solutions
| Experimental Symptom | Primary Likely Cause | Recommended Diagnostic Experiment | Solution |
|---|---|---|---|
| Rapid blood clearance (t₁/₂β < 1 h) | Aggregation in serum; Opsonization | DLS in 90% serum; Protein corona analysis | Improve colloidal stability; Increase PEG density/quality. |
| High liver/spleen uptake, low target | Insufficient stealth; Non-specific binding | Surface charge measurement; In vivo imaging time-course | Optimize PEGylation; Introduce "self" peptides (e.g., CD47 mimetic). |
| Good circulation, poor cellular uptake | PEG stealth too effective; Ligand inactivity | FRET/Quenching assay for ligand accessibility | Use stimuli-responsive (pH, enzyme) PEG linkages; Optimize ligand density. |
| Batch-to-batch variability in PK | Inconsistent conjugation or purification | Analyze size and charge distribution for each batch | Implement stringent quality control (HPLC, AFM) post-conjugation. |
Visualizations
Title: Troubleshooting PK Balance for DNA Nanodevices
Title: In Vivo PK and Biodistribution Experimental Workflow
The Scientist's Toolkit: Key Research Reagent Solutions
| Item/Category | Example Product/Technique | Primary Function in PK Optimization |
|---|---|---|
| PEGylation Reagents | Heterobifunctional PEG-NHS esters (e.g., NHS-PEG-Maleimide), Branched PEGs (MW: 2k-40kDa) | Provides a hydrophilic corona to reduce protein opsonization, extending circulation half-life. Different architectures and lengths allow tuning of stealth vs. ligand accessibility. |
| Bio-orthogonal Conjugation Kits | Click Chemistry Kits (DBCO-Azide, TCO-Tetrazine) | Enables controlled, high-efficiency coupling of targeting ligands (peptides, antibodies, aptamers) to the nanodevice surface for active targeting. |
| Advanced Characterization Instruments | Dynamic Light Scattering (DLS) / Nanoparticle Tracking Analysis (NTA) | Measures hydrodynamic size, size distribution, and zeta potential, critical for predicting in vivo stability and clearance. |
| In Vivo Imaging Agents | Near-Infrared (NIR) Dyes (e.g., Cy7.5), Chelators for Radionuclides (⁶⁴Cu-DOTA, ¹¹¹In-DTPA) | Allows non-invasive longitudinal tracking of biodistribution and pharmacokinetics using IVIS, PET, or SPECT imaging. |
| Protein Corona Analysis | Fast Protein Liquid Chromatography (FPLC), Liquid Chromatography-Tandem Mass Spectrometry (LC-MS/MS) | Isolates and identifies proteins adsorbed to the nanodevice surface in biological fluids, linking composition to clearance pathways. |
| Stimuli-Responsive Linkers | pH-sensitive linkers (e.g., hydrazone), Enzyme-cleavable peptides (e.g., MMP-9 substrate) | Enables "shielding-on" during circulation and "shielding-off" at the target site (e.g., tumor microenvironment) to balance PK and cellular uptake. |
Technical Support Center
Troubleshooting Guide
Issue 1: Low Transfection Efficiency Despite High Cellular Uptake
- Problem: Your DNA nanodevice shows excellent cellular internalization via fluorescence microscopy or flow cytometry, but protein expression (e.g., luciferase, GFP) is minimal.
- Likely Cause: Endosomal entrapment and degradation. The device is internalized but fails to escape the endosome before fusion with acidic, enzyme-rich lysosomes.
- Solution Steps:
- Quantify Co-localization: Perform a quantitative imaging experiment (e.g., using confocal microscopy) to measure the Pearson's correlation coefficient between your labeled nanodevice and an endosomal/lysosomal marker (e.g., Rab5, LAMP1). A coefficient >0.8 after 4-6 hours indicates significant entrapment.
- Titrate Endosomolytic Agents: Co-formulate or pre-treat cells with a titrated amount of a known endosomolytic agent (e.g., chloroquine from 50-200 µM). A significant boost in expression confirms the diagnosis.
- Reformulate Device: Integrate an endosomolytic component (see Table 1 and "Research Reagent Solutions").
Issue 2: High Cytotoxicity with New Endosomolytic Polymer
- Problem: A new cationic polymer designed for endosomal escape is killing your cell line, confounding efficiency results.
- Likely Cause: Disruption of the plasma membrane or induction of apoptosis due to excessive positive charge or concentration.
- Solution Steps:
- Perform an MTS/MTT Assay: Create a full dose-response curve of the polymer alone (without DNA) to determine its IC50. Use concentrations well below this value.
- Check Membrane Integrity: Use a lactate dehydrogenase (LDH) release assay alongside transfection. Optimize the polymer:DNA (N:P) ratio to balance escape and toxicity.
- Switch Mechanism: Consider a less toxic, pH-sensitive mechanism (e.g., HA2 peptide derivatives) or lipid-based fusogenic agents.
Issue 3: Inconsistent Escape Efficiency Between Cell Lines
- Problem: Your nanodevice works perfectly in HEK-293 cells but fails in primary macrophages.
- Likely Cause: Cell-type variation in endosomal maturation rates, pH gradients, and protease activity.
- Solution Steps:
- Characterize Endosomal pH: Use pH-sensitive dyes (e.g., LysoSensor) or pH-rodo labeled devices to measure the pH of the compartments your device traffics through in each cell type.
- Modulate Trafficking: Test chemical modulators like Bafilomycin A1 (a V-ATPase inhibitor that neutralizes endosomal pH) to see if rescue occurs in stubborn cell lines. This informs if pH-sensitivity is the key issue.
- Adapt Formulation: You may need a cell-specific formulation. Macrophages, for instance, may require a stronger fusogenic lipid or a polymer that responds to a broader pH range.
Frequently Asked Questions (FAQs)
Q1: What is the most reliable in vitro assay to confirm endosomal escape has occurred? A: There is no single gold standard. A combination is best:
- Direct Observation: Live-cell imaging with dyes that fluoresce only upon endosomal rupture (e.g., galectin-8-GFP recruitment assay).
- Functional Readout: Quantification of cytosolic delivery using a functional β-lactamase reporter assay, where cleavage of a substrate only occurs if the reporter reaches the cytosol.
- Co-localization Quantification: As in the troubleshooting guide, a decrease in co-localization with late endosome/lysosome markers over time (e.g., from 2 to 8 hours) can indicate successful escape.
Q2: How do I choose between the "proton sponge" effect and fusogenic peptides for my DNA origami structure? A: The choice depends on your nanodevice's properties and application goals.
- Proton Sponge Agents (e.g., PEI): Best for cationic, compacted DNA structures. They buffer the endosome, causing osmotic swelling and rupture. Can be cytotoxic at high doses.
- Fusogenic Peptides (e.g., HA2, GALA): Best for surface-functionalized devices. They undergo conformational change at low pH, inserting into and destabilizing the endosomal membrane. Generally lower cytotoxicity. See Table 1 for a comparison.
Q3: How can I improve the endosomal escape of my system for in vivo applications, considering biodistribution? A: This is central to improving biodistribution profiles. Systemic applications require stealth and specificity.
- Use Masked Agents: Employ pH-sensitive linkers to attach endosomolytic peptides or polymers, so they are only active in the acidic endosome, not in blood.
- Targeted Formulations: Conjugate targeting ligands (e.g., antibodies, aptamers) to direct your device to specific cell types, increasing local concentration and reducing off-target escape/toxicity.
- Biodegradable Carriers: Use histidine-rich or acetalated polymers that are active in the endosome but degrade into non-toxic metabolites, improving safety profiles for biodistribution studies.
Data Presentation
Table 1: Comparison of Major Endosomal Escape Mechanisms
| Mechanism | Example Agents | Typical Efficiency (Reported Range)* | Key Advantage | Primary Limitation |
|---|---|---|---|---|
| Proton Sponge | Polyethylenimine (PEI), Polyamidoamine (PAMAM) dendrimers | 25-60% (Luciferase assay) | High escape potential, well-studied | High cytotoxicity, non-biodegradable |
| Membrane Fusion | Dioleoylphosphatidylethanolamine (DOPE), INF7 peptide | 15-40% (GFP+ cells) | Biomimetic, often lower toxicity | Serum sensitivity, can be less potent |
| Pore Formation | Melittin, GALA peptide | 30-70% (Cytosolic delivery) | Very efficient at pore formation | High lytic activity, risk of membrane toxicity |
| Photochemical | Photosensitizers (e.g., TPPS2a) | 50-80% (upon light trigger) | Spatiotemporal control | Requires light exposure, complex setup |
| Physical Disruption | Carbon nanotubes, Magnetic nanoparticles | 10-30% (with stimulus) | Can be externally triggered | Potential for physical cell damage, complex fabrication |
*Efficiency is highly dependent on cell line, formulation, and measurement method. Values are illustrative from recent literature.
Experimental Protocols
Protocol 1: Galectin-8-GFP Recruitment Assay for Visualizing Endosomal Rupture Principle: Cytosolic galectin-8 binds to exposed β-galactosides on damaged endosomes, forming puncta. Steps:
- Seed HeLa cells stably expressing Galectin-8-GFP in an imaging dish 24h prior.
- Transfect cells with your DNA nanodevice complexed with a cationic carrier (e.g., Lipofectamine 2000 or your polymer).
- At 2-4 hours post-transfection, image live cells using a confocal microscope (488 nm for GFP, appropriate channel for your device label).
- Quantify the number of Galectin-8-GFP puncta per cell that co-localize with your nanodevice signal. An increase over a non-endosomolytic control (e.g., naked DNA) indicates membrane disruption.
Protocol 2: Quantifying Cytosolic Delivery via β-Lactamase (BlaM) Assay Principle: A CCF2-AM substrate fluoresces green intact but shifts to blue upon cleavage by cytosolic β-lactamase. Steps:
- Prepare Nanodevice: Create a DNA nanodevice encoding a β-lactamase gene with a nuclear localization signal (NLS-BlaM).
- Transfect Cells: Incubate target cells (e.g., U2OS) with your NLS-BlaM nanodevice for 4-6 hours.
- Load Substrate: Use the GeneBLAzer Detection Kit. Load cells with CCF2-AM for 2 hours per manufacturer's instructions.
- Read & Analyze: Use a fluorescence plate reader with 409 nm excitation. Calculate the ratio of blue (450 nm) to green (520 nm) emission. A higher blue:green ratio correlates with greater cytosolic delivery and nuclear import of BlaM.
Diagrams
Title: Endosomal Trafficking & Escape Pathways for DNA Nanodevices
Title: Proton Sponge Mechanism of Endosomal Escape
The Scientist's Toolkit: Research Reagent Solutions
| Item | Function & Role in Endosomal Escape |
|---|---|
| Chloroquine Diphosphate | A lysosomotropic agent that neutralizes endosomal pH, used as a positive control and diagnostic tool to test if pH-sensitive escape is a bottleneck. |
| Bafilomycin A1 | A specific V-ATPase inhibitor that blocks endosomal acidification. Used to experimentally prove pH-dependence of an escape mechanism. |
| Endo-Porter | A peptide-based delivery reagent designed to escape endosomes without membrane disruption, useful as a comparative agent. |
| DOPE (Lipid) | A fusogenic phospholipid that transitions to hexagonal phase at low pH, facilitating membrane fusion/destabilization in lipid nanoparticle formulations. |
| Poly-L-histidine | A pH-responsive, biodegradable polymer that buffers endosomes via imidazole groups (pKa ~6.0), offering a lower-toxicity alternative to PEI. |
| LysoTracker Dyes | Cell-permeant fluorescent probes that accumulate in acidic organelles. Used to label endo-lysosomal compartments for co-localization studies. |
| GALA Peptide | A synthetic 30-amino acid peptide that forms an α-helix at low pH, inserting into and porating the endosomal membrane. |
| Galectin-8-GFP Plasmid | A reporter construct for visualizing endosomal damage. Galectin-8 translocates to ruptured endosomes, forming fluorescent puncta. |
Technical Support Center
Troubleshooting Guides & FAQs
Q1: Our DNA nanodevice shows highly variable organ accumulation (especially in the liver and spleen) between mice in the same study group. What are the primary factors to check? A: Inconsistent biodistribution in preclinical models often stems from variability in nanodevice formulation or animal handling. Follow this systematic checklist:
- Nanoparticle Characterization: Verify size (PDI < 0.2), zeta potential, and purity (HPLC or gel electrophoresis) for each batch before injection. Even minor aggregation dramatically alters clearance by the mononuclear phagocyte system (MPS).
- Dosing Solution Preparation: Always prepare the final injectate in a consistent, sterile, and particle-free buffer (e.g., 1x PBS, pH 7.4). Use the same vortexing/sonication protocol to resuspend particles prior to each injection.
- Administration Technique: Standardize the injection procedure. For intravenous (IV) tail-vein injections, ensure consistent:
- Animal temperature (use a warming pad for vasodilation).
- Needle gauge (e.g., 29-30G).
- Injection volume and rate (use a syringe pump for critical studies).
- Site of injection (lateral tail veins).
- Animal Model Health Status: Use age- and sex-matched animals from a single source. Monitor for underlying infections that can activate the MPS and increase off-target liver/spleen sequestration.
Q2: When scaling up DNA nanodevice synthesis from research (µg) to preclinical (mg) batches, we observe a shift in pharmacokinetics. How can we maintain consistency? A: Scaling chemical or enzymatic synthesis introduces physicochemical changes. Implement these Quality Control (QC) steps:
- Process Analytical Technology (PAT): Monitor key synthesis parameters (temperature, pH, reagent addition rate) in real-time.
- Enhanced Purification: Move from spin columns to HPLC or tangential flow filtration (TFF) for large-scale purification to consistently remove incomplete assemblies and free oligonucleotides.
- Rigorous QC Table: Every scaled batch must pass the following specifications before use in vivo:
| QC Parameter | Target Specification (e.g., for a 20nm Tetrahedron) | Analytical Method | Impact on Biodistribution if Out of Spec |
|---|---|---|---|
| Hydrodynamic Diameter | 20.0 nm ± 1.5 nm | DLS / NTA | Altered renal clearance/MPS uptake. |
| Polydispersity Index (PDI) | ≤ 0.15 | DLS | Indicates heterogeneity, leading to variable organ profiles. |
| Zeta Potential | -15 mV ± 3 mV | Electrophoretic Light Scattering | Changes surface interaction with serum proteins and cell membranes. |
| Endotoxin Level | < 0.25 EU/mL | LAL Assay | Inflammatory response, MPS activation. |
| Assembly Yield/Purity | > 95% full assembly | Agarose Gel / HPLC | Free DNA fragments can compete for targets and alter PK. |
| Concentration | Verified by UV-Vis & Fluorometry | A260 / dye-based assay | Dosing inaccuracies. |
Q3: What is the most reliable method to quantify biodistribution of DNA nanodevices across tissues? A: The optimal method depends on your label. Use this comparative guide:
| Quantification Method | Label Used | Sensitivity | Pros | Cons | Recommended Protocol |
|---|---|---|---|---|---|
| Radioactive | ³²P, ¹²⁵I, ⁶⁴Cu | Very High (pg) | Gold standard, quantitative, direct tissue counting. | Regulatory hurdles, radioactive waste. | Label via 5'-end phosphorylation (³²P) or chelator (⁶⁴Cu). Inject dose. Sacrifice at timepoints. Digest or homogenize organs. Count radioactivity via gamma counter. Calculate %ID/g. |
| Fluorescent | Cy5, Cy7, FAM | Moderate-High (ng-low µg) | Easily accessible, enables imaging. | Susceptible to quenching, tissue autofluorescence. | Inject dose. Sacrifice. Image organs ex vivo (IVIS). Homogenize tissues in lysis buffer. Measure fluorescence with a plate reader using a standard curve from spiked control tissues. |
| qPCR | Sequence-specific | Very High (pg-fg) | No label needed, specific to construct sequence. | Measures DNA mass, not necessarily intact device. | Homogenize tissues. Extract total DNA. Perform qPCR using primers/probe specific for a conserved sequence in your nanodevice. Quantify against a standard curve of the nanodevice in control tissue DNA. |
Protocol: Quantitative Biodistribution via Radiolabeling (⁶⁴Cu)
- Chelator Conjugation: Functionalize your DNA nanodevice with DOTA or NOTA chelators via a 5' or internal amino-modified nucleotide.
- Radiolabeling: Incubate the conjugated device (50 µg) with ⁶⁴CuCl₂ (5-10 mCi) in ammonium acetate buffer (0.1 M, pH 5.5) at 37°C for 1 hour.
- Purification: Remove free ⁶⁴Cu using a NAP-5 size-exclusion column equilibrated with 1x PBS.
- QC: Verify radiochemical purity (>95%) via instant thin-layer chromatography (iTLC).
- Dosing: Adminstrate a known radioactive dose (µCi) and mass dose (mg/kg) via IV injection.
- Tissue Collection: At predetermined times (e.g., 1, 4, 24 h), euthanize animals (n=5/timepoint). Collect blood and organs of interest. Weigh each tissue.
- Counting: Measure radioactivity in each tissue using a calibrated gamma counter. Calculate percentage of injected dose per gram of tissue (%ID/g).
Q4: How do serum proteins affect the biodistribution of DNA nanodevices, and how can we account for this? A: Serum proteins form a "corona" that defines the biological identity of the nanoparticle. This corona influences hydrodynamic size, charge, and cellular recognition.
- Primary Concern: Opsonization (adsorption of immunoglobulins, complement) leads to rapid MPS clearance. Adsorption of apolipoproteins can alter tissue targeting.
- Experimental Protocol to Assess Corona:
- Incubate your DNA nanodevice (0.1 mg/mL) with 50% mouse or human serum in PBS at 37°C for 1 hour.
- Separate the protein-nanoparticle complex from free serum proteins using centrifugation (ultracentrifuge) or size-exclusion chromatography (SEC).
- Elute the bound proteins and identify them via SDS-PAGE followed by mass spectrometry (LC-MS/MS).
- Mitigation Strategy: Conjugate dense polyethylene glycol (PEG) brushes ("PEGylation") or engineered "stealth" peptides to the nanodevice surface to minimize nonspecific protein adsorption.
Workflow Diagram: Ensuring Reproducible Biodistribution
Signaling Pathway: MPS Clearance of Opsonized Nanodevices
The Scientist's Toolkit: Research Reagent Solutions
| Item | Function in Biodistribution Studies |
|---|---|
| Size-Exclusion Chromatography (SEC) Columns (e.g., Superdex 200 Increase) | High-resolution purification of scaled nanodevice batches to remove aggregates and unassembled strands. Critical for consistent size. |
| Dynamic Light Scattering (DLS) / Nanoparticle Tracking Analysis (NTA) Instrument | Measures hydrodynamic diameter, size distribution (PDI), and concentration. Essential pre-injection QC. |
| Syringe Pump (e.g., Aladdin AL-1000) | Ensures precise, consistent, and slow intravenous injection rates, eliminating a major source of biodistribution variability. |
| IVIS Spectrum or similar In Vivo Imaging System | Enables non-invasive, longitudinal tracking of fluorescently labeled nanodevices and ex vivo organ imaging. |
| Gamma Counter (e.g., PerkinElmer Wizard2) | For highly sensitive, quantitative measurement of radiolabeled nanodevices in tissues. Gold standard for PK/BD. |
| LC-MS/MS System | For characterizing the serum protein corona by identifying proteins bound to the nanodevice after in vitro or ex vivo incubation. |
| Endotoxin-Free Reagents & Kits (e.g., LAL Assay) | Endotoxin contaminates samples, causing inflammation and skewed liver/spleen uptake. Use only molecular biology-grade, endotoxin-tested water and buffers. |
| Stable Cell Lines Expressing Target Receptors | For in vitro validation of targeted nanodevice binding and uptake before moving to complex in vivo models. |
Technical Support Center: Troubleshooting & FAQs
FAQ 1: Why is my DNA nanodevice showing rapid clearance and poor tumor accumulation despite successful drug loading in vitro?
Answer: Rapid clearance is often linked to the loading method altering surface charge or revealing hydrophobic payload domains. Intercalation methods (e.g., Doxorubicin) can destabilize the DNA structure, increasing nonspecific protein adsorption (opsonization) and recognition by the mononuclear phagocyte system (MPS). Solution: Consider a covalent conjugation method via click chemistry or a cleavable linker. This shields the drug within the nanostructure core, preserving the hydrophilic, negatively-charged DNA shell for improved stealth. Post-loading, re-purify devices using size-exclusion chromatography (SEC) to remove aggregates that accelerate clearance.
FAQ 2: Our intercalated nanodevices show high liver/spleen sequestration. How can we improve the biodistribution profile?
Answer: High hepatic sequestration indicates MPS recognition. The primary culprits are:
- Increased Hydrophobicity: From the intercalated drug.
- Surface Opsonin Deposition: Complement proteins bind to altered surfaces. Protocol for Analysis & Mitigation:
- Diagnostic Experiment: Incubate your loaded nanodevices with 10% mouse serum for 30 min at 37°C. Run via agarose gel electrophoresis (0.8% gel, 70V, 45 min in 1x TBE). A significant smear or band shift confirms protein corona formation.
- Mitigation Strategy: Synthesize nanodevices with a dense surface of polyethylene glycol (PEG) spacers (e.g., 5kDa) prior to drug loading. This creates a steric barrier. Load the drug via a linker attached to the PEG terminus (not intercalation). This maintains the stealth layer throughout the process.
FAQ 3: We observe premature payload release in circulation before reaching the target. How do we ensure stable retention?
Answer: Premature release is a critical failure mode for biodistribution.
- For Intercalated Payloads: Ensure your buffer conditions (pH, ionic strength) match physiological pH 7.4. Low ionic strength buffers used in vitro can cause false-negative stability readings. Perform a serum stability assay: Incubate devices in 50% serum at 37°C. Sample at 0, 1, 2, 4, 8, 24h. Quantify released drug via fluorescence (for fluorescent drugs) or HPLC. >20% release by 1h indicates instability.
- For Covalently-Linked Payloads: Verify linker stability. Use a non-cleavable linker (e.g., amide bond) for circulation stability, paired with an active targeting moiety for specific cellular uptake and intracellular enzymatic release.
FAQ 4: After switching to a covalent loading method, our cellular uptake efficiency dropped significantly. What went wrong?
Answer: Covalent conjugation can mask or sterically hinder targeting ligands (e.g., folate, aptamers) if not strategically placed. Troubleshooting Guide:
- Ligand Placement: Ensure the targeting strand is positioned on the outermost accessible face of the nanodevice, not near conjugation sites.
- Confirm Ligand Activity: Perform a cell binding competition assay. Pre-incubate target cells with 10x free ligand for 20 min, then add your nanodevice. If fluorescence (from labeled device) is not blocked, your conjugated ligand is inactive or inaccessible.
- Conjugation Site: Re-design the nanodevice so the payload is conjugated to an internal strand, leaving terminal ends of ligand strands free.
Table 1: Impact of Loading Method on Key Pharmacokinetic Parameters of DNA Nanodevices
| Parameter | Intercalation (Doxorubicin) | Covalent Conjugation (via SMCC Linker) | Encapsulation (in DNA Cage Cavity) |
|---|---|---|---|
| Loading Efficiency (%) | 85 ± 5 | 65 ± 8 | 45 ± 12 |
| Serum Half-life (t₁/₂, min) | 22 ± 4 | 98 ± 15 | 75 ± 10 |
| % Injected Dose / g in Liver (30 min) | 45 ± 6 | 18 ± 3 | 25 ± 4 |
| % Injected Dose / g in Tumor (24h) | 1.2 ± 0.3 | 4.8 ± 0.7 | 3.5 ± 0.6 |
| Premature Release in Serum at 1h (%) | 35 ± 7 | <5 | 15 ± 4 |
Table 2: Reagent Solutions for Modulating Biodistribution
| Research Reagent / Material | Function & Role in Improving Biodistribution |
|---|---|
| PEGylated DNA Strands (5'-Thiol or DBCO) | Imparts "stealth" properties, reduces opsonization, extends circulation half-life. |
| Maleimide Crosslinkers (e.g., SMCC) | Enables stable, covalent thiol-based conjugation of payloads/ligands. |
| Size-Exclusion Chromatography (SEC) Columns | Critical for post-loading purification to remove aggregates and unreacted drug. |
| Trigger-Responsive Linkers (e.g., pH-sensitive, MMP-9 cleavable) | Enables controlled, site-specific payload release, minimizing premature leakage. |
| Density Gradient Media (Iodixanol) | Used for isolating nanodevices with a uniform protein corona for study. |
Experimental Protocols
Protocol 1: Assessing Serum Stability and Premature Release
- Incubation: Mix 100 µL of purified, loaded nanodevices (1 mg/mL in PBS) with 100 µL of fetal bovine serum (FBS).
- Time Course: Incubate at 37°C in a thermal shaker. Aliquot 20 µL at time points: 0, 0.5, 1, 2, 4, 8, 24 hours.
- Separation: At each point, immediately load aliquot into a 30 kDa molecular weight cut-off (MWCO) centrifugal filter. Spin at 14,000g for 10 min.
- Quantification: Recover the filtrate (contains released free drug). Measure drug concentration via its intrinsic fluorescence (e.g., Dox: Ex/Em 480/590 nm) or HPLC against a standard curve. The retentate contains intact nanodevices.
Protocol 2: In Vivo Biodistribution Study via Fluorescent Imaging
- Nanodevice Labeling: Conjugate a near-infrared fluorescent dye (e.g., Cy5.5 or Alexa Fluor 750) to a specific DNA strand during synthesis. Purify via SEC.
- Animal Model: Use tumor-bearing nude mice (subcutaneous xenograft, ~100-150 mm³ tumor volume).
- Administration: Inject 200 µL of Cy5.5-labeled nanodevices (5 nmol per mouse) via tail vein (n=5 per group).
- Imaging: Anesthetize mice and image at 1, 4, 8, 24, and 48h post-injection using an IVIS Spectrum or similar system (Ex/Em filters for Cy5.5).
- Ex Vivo Quantification: At terminal time point (e.g., 24h), sacrifice mice, harvest organs (heart, liver, spleen, lungs, kidneys, tumor). Image organs ex vivo. Use imaging software to quantify fluorescence intensity as Radiant Efficiency ([p/s/cm²/sr] / [µW/cm²]).
Visualizations
Diagram 1: Loading Methods & In Vivo Fate Pathways
Title: Loading Methods Lead to Different In Vivo Fates
Diagram 2: Experimental Workflow for Biodistribution Analysis
Title: From Loading to In Vivo Analysis Workflow
Proving Efficacy: In Vivo Validation and Benchmarking DNA Nanodevices
Fluorescence, Radiolabeling, and PET Imaging for Quantitative Biodistribution
Technical Support Center for Biodistribution Studies
FAQs and Troubleshooting Guides
Q1: My fluorescently labeled DNA nanodevice shows unexpectedly high background signal in the liver and spleen in vivo. What could be the cause? A: This is a common issue in Improving biodistribution profiles of DNA-based nanodevices. High background often stems from nanoparticle aggregation and non-specific uptake by the reticuloendothelial system (RES). Troubleshoot by:
- Check Labeling Efficiency: Use UV-Vis spectroscopy to confirm the dye-to-nanodevice ratio. A ratio >4 can cause quenching and aggregation.
- Verify Stability: Run agarose gel electrophoresis post-labeling. Smearing indicates aggregation or degradation.
- Include Controls: Inject free dye to differentiate nanodevice signal from cleaved label.
- Surface Modification: Consider adding a polyethylene glycol (PEG) spacer between the nanodevice and fluorophore to reduce hydrophobicity-driven aggregation.
Q2: After radiolabeling with Copper-64 (⁶⁴Cu), my DNA nanodevice shows lower radiochemical yield (RCY) than expected. How can I improve this? A: Low RCY for chelator-based radiolabeling (e.g., using DOTA or NOTA) often relates to suboptimal reaction conditions.
- pH Check: Ensure the reaction buffer pH is optimal for the chelator-metal complex. For ⁶⁴Cu-DOTA, pH 5.5-6.0 at 37-40°C is typical.
- Purification: Use a PD-10 desalting column or HPLC immediately post-labeling to separate bound from free radioisotope. Calculate RCY as (Activity in product fraction / Total initial activity) x 100%.
- Chelator Integrity: Ensure the bifunctional chelator (e.g., maleimide-DOTA) is freshly prepared and conjugated to the nanodevice under non-denaturing conditions to preserve DNA structure.
Q3: My PET imaging and subsequent tissue homogenate gamma counting show a significant quantitative discrepancy for the same organ. Which data should I trust for quantitative biodistribution? A: This discrepancy is critical for accurate data in your thesis. PET provides non-invasive, longitudinal spatial distribution but can be affected by partial volume effects (for organs <2x the imaging resolution) and attenuation. Gamma counting of ex vivo tissues is the absolute quantitative gold standard.
- Primary Trust: Rely on ex vivo gamma counting for final, quantitative biodistribution percentages of injected dose per gram of tissue (%ID/g).
- Use PET Data For: Confirming the in vivo distribution pattern, kinetics, and targeting over time. Always calibrate PET ROI values with a phantom of known activity.
Q4: How do I correct for radioactive decay and different isotope half-lives when comparing time points or planning experiments?
A: Always decay-correct all quantitative data to a common reference time (e.g., time of injection). Use the decay correction formula:
A_t = A_0 * e^(-λt), where λ = ln(2) / t½.
The table below shows critical parameters for common isotopes.
Table 1: Key Radiological Properties for Quantitative Biodistribution
| Isotope | Half-Life (t½) | Primary Emission (Imaging) | Key Application in DNA Nanodevices |
|---|---|---|---|
| ⁶⁴Cu | 12.7 hours | β⁺ (PET), γ | Ideal for 24-48 hr biodistribution studies; requires chelator (DOTA/NOTA). |
| ⁸⁹Zr | 78.4 hours | β⁺ (PET) | Excellent for long-term (up to 7-day) fate studies; requires specific chelator (DFO). |
| ¹²⁵I | 59.4 days | γ (Gamma Counting) | Exclusively for ex vivo tissue counting; can be direct-labeled via tyrosine. |
| ¹¹¹In | 2.8 days | γ (SPECT) | For SPECT imaging and gamma counting; requires chelator (DTPA). |
Q5: What is the standard protocol for a terminal quantitative biodistribution study using radiolabeling? A: Detailed Experimental Protocol for Ex Vivo Biodistribution
- Objective: Quantify the %ID/g of a radiolabeled DNA nanodevice in tissues at a terminal time point.
- Materials: Radiolabeled nanodevice, syringes, anesthetic, dissection tools, pre-weighed tubes, gamma counter, dose calibrator.
- Dosing: Inject a known activity (μCi) and mass (μg) of the purified radiolabeled nanodevice via the desired route (e.g., IV) into experimental animals (n=5/group).
- Euthanasia & Collection: At the predetermined time point, euthanize the animal. Perfuse with saline via cardiac puncture to clear blood from organs. Dissect and collect all tissues of interest (blood, liver, spleen, kidney, heart, lung, tumor, etc.). Weigh each tissue immediately.
- Counting: Place each tissue in a tube and measure radioactivity in a calibrated gamma counter. Count a known aliquot of the injected dose (ID) as a reference standard.
- Calculation: Decay-correct all counts to the time of injection. Calculate %ID/g = (Activity in tissue sample / Weight of tissue) / (Total injected Activity) x 100%.
The Scientist's Toolkit
Table 2: Research Reagent Solutions for Biodistribution Studies
| Item | Function & Application |
|---|---|
| Bifunctional Chelator (e.g., Maleimide-DOTA) | Links radioisotope (⁶⁴Cu, ¹¹¹In) to thiol-modified DNA nanodevices. |
| Size-Exclusion HPLC System | Critical for purifying radiolabeled nanodevices from free isotope; assesses stability. |
| ITLC Strips & Radio-TLC Scanner | Rapid quality control to determine radiochemical purity post-labeling. |
| PEG Spacer (e.g., NHS-PEG-SH) | Modifies surface hydrophilicity to reduce RES uptake and improve circulation time. |
| Gamma Counter with Well Detector | Essential for precise, quantitative measurement of radioactivity in ex vivo tissues. |
| Phantom for PET Calibration | Contains known radioactivity concentrations to calibrate PET image voxel values to μCi/cc. |
Experimental Workflow Diagrams
Title: Decision Workflow for Biodistribution Tracking Method
Title: Protocol for Radiolabeling DNA Nanodevice with ⁶⁴Cu
Technical Support Center: Troubleshooting & FAQs
FAQ: Biodistribution & Targeting
Q1: Why is my DNA nanodevice showing high non-specific accumulation in the liver and spleen? A: This is a common issue related to opsonization and clearance by the mononuclear phagocyte system (MPS). To improve biodistribution profiles:
- Surface PEGylation: Increase the density and molecular weight of conjugated polyethylene glycol (PEG) chains (e.g., from 2kDa to 5kDa) to create a stronger steric barrier.
- Ligand Density Optimization: Excess targeting ligands (e.g., peptides, aptamers) can paradoxically increase MPS uptake. Titrate ligand density (recommended range: 5-20 molecules per device) and use spacer arms.
- Size Control: Ensure device size is consistently below 100 nm via stringent purification (e.g., HPLC or agarose gel electrophoresis). Aggregates >200 nm are rapidly cleared.
Q2: My lipid nanoparticle (LNP) formulation successfully encapsulates DNA but shows poor endosomal escape in vitro. What are the key troubleshooting steps? A: Poor endosomal escape is often linked to ionizable lipid composition and buffer conditions.
- pKa Check: Verify the effective pKa of your ionizable lipid is between 6.0-6.5 using an TNS assay. This ensures protonation and membrane disruption in the acidic endosome.
- Helper Lipid Ratio: Re-optimize the cholesterol:phospholipid (e.g., DSPC) ratio. A typical starting point is 40-50% ionizable lipid, 10% DSPC, 38-40% cholesterol, 1.5-2% PEG-lipid.
- Buffer Exchange: Perform thorough dialysis or tangential flow filtration against a pH 7.4 buffer post-formulation to remove residual ethanol and stabilize particle structure.
Q3: How can I reduce the cytotoxicity of my polymeric vector (e.g., PEI-based) without completely sacrificing transfection efficiency? A: Cytotoxicity stems from polymer-mediated membrane disruption and positive charge density.
- Polymer Modification: Shift from branched PEI (25 kDa) to lower molecular weight linear PEI (e.g., 10 kDa) or use biodegradable polymers like poly(β-amino esters).
- N/P Ratio Titration: Systematically lower the Nitrogen (polymer) to Phosphate (DNA) ratio. Test N/P ratios from 5:1 to 15:1; optimal is often the lowest ratio yielding acceptable encapsulation and transfection.
- Post-Transfection Protocol: Include a medium change step 4-8 hours post-transfection to remove excess free polymer.
Experimental Protocol: Assessing Biodistribution via Fluorescent Labeling
- Objective: Quantify organ-level accumulation of a DNA nanodevice compared to LNP and polymeric vector controls.
- Materials: Cy5- or Alexa Fluor 750-labeled nucleic acid payload; formulation components; IVIS imaging system.
- Method:
- Formulation: Incorporate labeled payload into DNA nanodevice, LNP (via microfluidics), and polyplex (via complexation).
- Purification: Purify all formulations using size-exclusion chromatography (Zeba Spin Columns) to remove unencapsulated dye.
- Validation: Confirm encapsulation efficiency (>90%) via fluorescence quenching assay with external quencher.
- Administration: Inject 100 µL of each formulation (equivalent 1 µg DNA dose) intravenously into separate mouse cohorts (n=5).
- Imaging: Acquire whole-body fluorescence images at 1, 4, 12, 24, and 48 hours post-injection under isoflurane anesthesia.
- Ex Vivo Analysis: Euthanize animals at 48h, harvest major organs (liver, spleen, heart, lungs, kidneys, tumor), image ex vivo, and homogenize for quantitative fluorometry.
- Key Calculation: Express data as % Injected Dose per Gram of tissue (%ID/g).
Table 1: Quantitative Comparison of Delivery Vector Properties
| Property | DNA Nanodevice | Lipid Nanoparticle (LNP) | Polymeric Vector (e.g., PEI) |
|---|---|---|---|
| Typical Size Range (nm) | 10 - 150 | 70 - 120 | 50 - 500 (poly-disperse) |
| Encapsulation Efficiency | ~100% (structural) | 80 - 95% | 70 - 90% |
| Zeta Potential (mV) | Slightly negative to neutral (-10 to +5) | Slightly negative (-5 to +5) | Highly positive (+20 to +40) |
| In Vitro Transfection Efficiency | Moderate to High | Very High | High |
| In Vivo Serum Stability | High (hours to days) | Moderate (hours) | Low to Moderate (minutes to hours) |
| Primary Clearance Organs | Liver, Spleen (MPS) | Liver, Spleen (MPS) | Lungs, Liver |
| Key Toxicity Concerns | Low immunogenicity, potential CpG effects | Reactogenicity, liver enzyme elevation | Membrane toxicity, inflammation |
| Manufacturing Scalability | Challenging (enzymatic assembly) | High (microfluidics) | Moderate (bulk complexation) |
| Payload Flexibility | Intrinsic: oligonucleotides; Cargo: small drugs, proteins | High (RNA, DNA, proteins, small molecules) | Moderate (DNA, siRNA, proteins) |
Research Reagent Solutions Toolkit
| Reagent / Material | Function in Research |
|---|---|
| Ionizable Lipid (e.g., DLin-MC3-DMA, SM-102) | Critical LNP component; protonates in endosome to enable membrane fusion/escape. |
| Poly(ethylene glycol)-lipid (PEG-lipid) | Stabilizes particles during formation, reduces aggregation, modulates PK and biodistribution. |
| Staple Strands (for DNA origami) | Chemically synthesized oligonucleotides to fold scaffold strand into precise 2D/3D nanostructures. |
| Branched Polyethylenimine (bPEI, 25 kDa) | Gold-standard cationic polymer; compacts DNA via electrostatic interaction, promotes endosomal escape via "proton sponge" effect. |
| Cy5-dUTP or Alexa Fluor Labeled Oligonucleotides | Fluorescent tagging of DNA payload for tracking encapsulation, stability, and biodistribution. |
| TNS (6-(p-Toluidino)-2-naphthalenesulfonic acid) | Fluorometric probe for determining the pKa of ionizable lipids in LNPs. |
| HPLC System with Size-Exclusion Column | Critical for purifying and analyzing monodisperse formulations of DNA nanodevices and LNPs. |
| Microfluidic Mixer (e.g., NanoAssemblr) | Enables reproducible, scalable manufacturing of LNPs with low polydispersity. |
Diagram 1: Optimization Pathway for DNA Nanodevice Biodistribution
Diagram 2: Lipid Nanoparticle (LNP) Formulation Workflow
Diagram 3: Comparison of Key In Vivo Mechanisms
FAQs & Troubleshooting Guides
Q1: In our syngeneic mouse model, the DNA nanodevice shows excellent tumor accumulation in imaging studies, but therapeutic outcome (e.g., tumor growth inhibition) is poor. What are the primary suspects?
A: This core discrepancy between biodistribution and efficacy can arise from several key issues. Follow this troubleshooting cascade:
- Check Payload Release Kinetics: High tumor accumulation does not guarantee intracellular payload release. Use a FRET-based DNA nanodevice where therapeutic activation quenches a donor/acceptor pair. Image the tumor ex vivo to confirm disassembly.
- Assess Target Engagement: If the payload is a siRNA or antisense oligonucleotide, extract tumor RNA and quantify target gene knockdown via qPCR. Good biodistribution with poor knockdown indicates endosomal trapping.
- Evaluate Immune Activation (for immunotherapies): For CpG or STING agonist payloads, profile tumor cytokines (e.g., IFN-γ, TNF-α) via Luminex assay. Low cytokine levels despite high accumulation suggest immunosuppressive tumor microenvironment or agonist deactivation.
Table 1: Primary Troubleshooting Targets for Biodistribution-Efficacy Discordance
| Observation | Potential Cause | Diagnostic Experiment | Possible Solution |
|---|---|---|---|
| High tumor signal, no efficacy | Payload not released in active form | FRET imaging; HPLC of tumor lysates | Modify linker stability; incorporate environment-sensitive (e.g., pH, GSH) triggers. |
| High tumor signal, no efficacy | Payload not reaching intracellular target | Confocal microscopy with endosomal/lysosomal markers (e.g., LAMP1); assess target knockdown. | Incorporate endosomolytic agents (e.g., cationic lipids, HA2 peptides). |
| High tumor signal, low immune activation | Immunosuppressive tumor microenvironment (TME) | Flow cytometry for MDSCs, Tregs in tumor; cytokine panel. | Co-deliver immune checkpoint inhibitors (e.g., anti-PD-1 scFv encoded) or TME-modulating drugs. |
| Variable efficacy between animal models | Differential uptake by target vs. non-target cells | Tumor dissociation & flow cytometry for cell-type-specific uptake (using fluorescent device). | Re-engineer surface ligands for higher selectivity to tumor cells or specific immune subsets. |
Q2: We observe high off-target accumulation in the liver and spleen, leading to systemic toxicity. How can we refine the biodistribution profile of our DNA nanostructure?
A: Excessive reticuloendothelial system (RES) uptake is common. Your optimization strategy should be iterative:
Reduce Non-Specific Opsonization:
- Protocol: PEGylation Density Screen. Conjugate linear PEG (5kDa) at varying molar ratios (e.g., 0:1, 2:1, 5:1, 10:1 PEG:nanodevice). Radiolabel (e.g., with ⁹⁹mTc) or fluorescently label each formulation. Inject intravenously in mice (n=3/group). Harvest organs (blood, liver, spleen, tumor, kidney) at 24h. Measure % injected dose per gram (%ID/g) via gamma counting or fluorescence imaging system. Optimal PEG density maximizes tumor:liver ratio.
- Alternative: Use shorter, cleavable PEGs or zwitterionic coatings (e.g., phosphorylcholine) to further reduce RES recognition.
Implement Active Targeting:
- Protocol: Ligand Density Optimization. Once PEGylated, conjugate a tumor-targeting ligand (e.g., folate, anisamide, or a DNA aptamer). Test 3-4 different ligand densities. Perform biodistribution as above. The goal is to shift accumulation from liver/spleen to the tumor. Critical Control: Include a group with a scrambled or non-functional ligand sequence.
Modulate Size and Shape:
- Protocol: Size-Fractionation and Testing. Use filtration (e.g., 50kDa, 100kDa cutoff) or HPLC to isolate narrow size ranges of your nanodevice (e.g., 20-30nm vs. 80-100nm hydrodynamic diameter). Test each fraction in the biodistribution protocol. Spherical vs. rod-like shapes can also be explored.
Q3: For DNA nanodevices carrying immunostimulatory signals (e.g., CpG), we see strong efficacy in immunogenic tumors but none in "cold" tumors. How can we improve response in immunosuppressed models?
A: This highlights the need for combination strategies that remodel the TME.
- Experimental Workflow: Combine your immunostimulatory DNA nanodevice with a second agent that targets a complementary pathway.
- Group 1: Saline control.
- Group 2: Immunostimulatory DNA nanodevice alone.
- Group 3: TME-modulating agent (e.g., low-dose cyclophosphamide to deplete Tregs, or an anti-angiogenic (e.g., axitinib)).
- Group 4: Combination of Group 2 & 3.
- Analysis: Monitor tumor growth. At endpoint, perform multiplex IHC or flow cytometry on tumors to quantify changes in CD8⁺ T cells, Tregs, myeloid-derived suppressor cells (MDSCs), and M1/M2 macrophage polarization.
Title: Combination Strategy to Overcome Immunosuppressive TME
Q4: What are the critical controls for in vivo biodistribution and efficacy studies to ensure data robustness?
A: Always include these control groups:
- Biodistribution: A non-targeted version of your nanodevice (no active ligand). A "free payload" group (unencapsulated drug/agonist). A group pre-dosed with a blocking dose of free ligand (to demonstrate specificity).
- Efficacy: Vehicle control (buffer). Free payload control. Non-targeted nanodevice control. If using a therapeutic oligonucleotide, include a scrambled sequence control nanodevice with identical structure.
The Scientist's Toolkit: Key Research Reagent Solutions
Table 2: Essential Materials for Biodistribution & Efficacy Studies
| Reagent / Material | Function in Experiments | Key Consideration |
|---|---|---|
| Near-Infrared (NIR) Dyes (Cy5.5, IRDye800CW) | In vivo and ex vivo fluorescence imaging of nanodevice biodistribution. | Ensure dye conjugation does not alter nanodevice assembly or targeting. Use dye with emission >800nm to reduce tissue autofluorescence. |
| HPLC System with SEC Column | Purify and characterize nanodevice assembly, confirm monodisperse size. | Critical for removing unassembled strands, free dyes, or ligands. Size impacts biodistribution. |
| Animal Imaging System (IVIS or similar) | Non-invasive, longitudinal tracking of fluorescent or bioluminescent signals. | Standardize imaging parameters (exposure, binning) across all animals and time points. |
| Gamma Counter | Quantify radiolabeled (e.g., ⁹⁹mTc, ¹¹¹In) nanodevice accumulation in tissues with high sensitivity. | Gold standard for quantitative biodistribution (%ID/g). Requires radiochemistry expertise. |
| Tissue Homogenizer | Homogenize organs (liver, tumor) for quantitative analysis of payload (qPCR, HPLC, fluorescence). | Use ceramic beads for tough tissues; keep samples cold to prevent payload degradation. |
| MALDI-TOF Mass Spectrometer | Verify molecular weights of synthesized DNA strands and conjugated components (PEG, ligands). | Essential for quality control before complex assembly. |
| Endotoxin Removal Resin & LAL Assay Kit | Remove and detect endotoxin from DNA preparations. | High endotoxin levels (>1 EU/mg) can cause immune toxicity, confounding efficacy studies. |
Title: Core Workflow for DNA Nanodevice In Vivo Testing
Technical Support Center
Troubleshooting Guide & FAQs
Q1: Our DNA nanodevice shows excellent in vitro potency but rapid clearance in vivo, failing to reach the target tissue. What could be causing this?
A: This is a classic biodistribution issue, often linked to immune recognition and sequestration. The most likely causes are:
- Unintended Immune Activation: Unmodified phosphodiester DNA backbones are recognized by Toll-like Receptor 9 (TLR9) in endosomes of immune cells (e.g., plasmacytoid dendritic cells), leading to cytokine release and rapid clearance by the mononuclear phagocyte system (MPS).
- Serum Nuclease Degradation: Linear DNA or unstable structures are degraded in serum, reducing effective dose.
- Poor Stability in Physiological Salt Conditions: Aggregation or unfolding can occur.
Protocol: Assessing Serum Stability & Nuclease Resistance
- Incubate: Mix 500 nM DNA nanodevice in 90% fetal bovine serum (FBS) or mouse/human serum. Incubate at 37°C.
- Sample: Withdraw 20 µL aliquots at time points (0, 0.5, 1, 2, 4, 8, 24h).
- Stop Reaction: Add 5 µL of 0.5 M EDTA (chelates Mg2+/Ca2+ required for nucleases).
- Analyze: Run samples on a 2-3% agarose gel or native PAGE. Compare band intensity over time using gel densitometry.
Q2: We observe elevated levels of pro-inflammatory cytokines (e.g., IFN-α, IL-6) in mouse serum post-injection. How do we identify the specific immune pathway activated?
A: Elevated cytokines indicate innate immune sensing. A systematic pathway analysis is required.
Protocol: In Vitro Immune Cell Reporter Assay
- Cell Lines: Use engineered HEK293 reporter cells expressing specific human Pattern Recognition Receptors (PRRs).
- TLR9 Reporter: HEK293-hTLR9 cells with a SEAP (secreted embryonic alkaline phosphatase) reporter under an NF-κB/IRF promoter.
- cGAS-STING Reporter: THP1-Dual cells (KO-STING) can be used to detect cytosolic DNA sensing via the STING pathway.
- Stimulation: Seed cells in a 96-well plate. Treat with your DNA nanodevice (1-100 nM), positive controls (CpG ODN 2006 for TLR9, herring testis DNA + Lipofectamine for cGAS-STING), and negative controls (PBS, scrambled sequence).
- Incubation: 18-24 hours at 37°C, 5% CO2.
- Quantification: For SEAP, use QUANTI-Blue substrate and read absorbance at 635nm. For THP1-Dual, assay SEAP (NF-κB) and Lucia luciferase (IRF) according to manufacturer instructions.
Q3: How can we quantitatively compare the toxicity profiles of different DNA nanodevice formulations?
A: A multi-parameter cytotoxicity assay is essential. The table below summarizes key assays.
Table 1: Suite of Cytotoxicity & Immunogenicity Assays
| Assay | Target Metric | Protocol Summary | Key Reagents/Equipment |
|---|---|---|---|
| LDH Release | Membrane integrity (necrosis) | Measure lactate dehydrogenase in supernatant using enzymatic colorimetric kit. | Cytotoxicity Detection Kit, microplate reader (490nm ref 650nm). |
| MTS/PrestoBlue | Metabolic activity (viability) | Add tetrazolium dye, incubate 1-4h, measure formazan product absorbance/fluorescence. | CellTiter 96 AQueous, plate reader. |
| Annexin V/PI Flow Cytometry | Apoptosis vs. Necrosis | Stain cells with Annexin V-FITC & Propidium Iodide, analyze by flow cytometry. | Annexin V binding buffer, flow cytometer. |
| Hemolysis Assay | Erythrocyte toxicity | Incubate nanodevice with red blood cells, measure hemoglobin release at 540nm. | Human/Rat RBCs, PBS, Triton X-100 controls. |
| Cytokine Multiplex (ELISA/MSD) | Immune activation profile | Quantify panel of cytokines (IFN-α/β, IL-6, TNF-α, IFN-γ) from serum or supernatant. | ProcartaPlex or V-PLEX ELISA kits, MSD SECTOR imager. |
Q4: What are the best chemical modification strategies to improve biodistribution by reducing immunogenicity?
A: The goal is to evade innate immune sensors while maintaining structural integrity. Efficacy is pathway-specific.
Table 2: Modification Strategies for Improved Profiles
| Modification Target | Specific Strategy | Primary Effect | Potential Trade-off |
|---|---|---|---|
| DNA Backbone | Replace phosphodiester with phosphorothioate (PS) linkages. | Increases nuclease resistance, reduces TLR9 activation. | Can increase non-specific protein binding, altering pharmacokinetics. |
| Nucleobases | Methylate cytosine bases (e.g., 5-methylcytosine). | Specifically reduces TLR9 activation. | Minimal impact on structure; synthesis complexity. |
| Sugar Backbone | Incorporate 2'-O-methyl (2'-O-Me) RNA residues. | Reduces immune recognition, enhances stability. | Can alter thermodynamic stability of assemblies. |
| Conjugation | PEGylate surface of nanodevice with polyethylene glycol. | Creates "stealth" effect, reduces MPS uptake, increases circulation half-life. | Can hinder target cell uptake or active targeting ligand accessibility. |
| Co-administration | Use TLR9 inhibitors (e.g., Chloroquine, ODN inhibitors). | Pharmacologically blocks immune sensing. | Transient effect, adds complexity to therapeutic regimen. |
The Scientist's Toolkit: Research Reagent Solutions
Table 3: Essential Reagents for DNA Nanodevice Profiling
| Item | Function & Rationale |
|---|---|
| Phosphoramidites (2'-deoxy, PS, 2'-O-Me) | Building blocks for solid-phase synthesis of modified DNA strands for device assembly. |
| Lipofectamine 2000/3000 | Standard cationic lipid transfection reagent for in vitro studies of cytosolic delivery and cGAS-STING pathway activation. |
| CpG ODN 2006 (Class B) & ODN 2395 (Class C) | Positive control agonists for TLR9 signaling in immune cell assays. |
| Poly(dA:dT) or herring sperm DNA | Standard ligands for activating the cytosolic cGAS-STING DNA sensing pathway. |
| Chloroquine diphosphate | Endosomal acidification inhibitor; used to confirm TLR9-mediated (endosomal) vs. cytosolic sensing. |
| Recombinant Human DNase I | To pre-treat samples and confirm that observed immune effects are due to DNA structure, not contaminant. |
| Mouse IFN-α/β Receptor Blocking Antibody | In vivo tool to block type I interferon signaling and assess its role in clearance and toxicity. |
| Size-exclusion Spin Columns (e.g., Illustra MicroSpin) | For rapid purification of assembled nanodevices from free strands and aggregates before in vivo use. |
Visualizations
Technical Support Center
FAQs & Troubleshooting for Biodistribution Studies of DNA Nanodevices
FAQ 1: Why is my DNA nanodevice showing rapid clearance by the liver and spleen, preventing tumor accumulation?
Answer: This is the most common biodistribution hurdle. Rapid clearance by the mononuclear phagocyte system (MPS), primarily in the liver and spleen, is often due to serum protein adsorption (opsonization) on the nanodevice surface. Key factors include:
- Surface Charge: Highly negative or positive surfaces promote nonspecific protein binding.
- Hydrophobicity: Hydrophobic patches attract serum proteins.
- Size: Devices >100 nm are more readily filtered by the spleen's interendothelial slits.
Solution: Implement surface "stealth" functionalization.
- Protocol - Polyethylene Glycol (PEG) Conjugation:
- Synthesize DNA nanodevice with 5' or 3' amine-modified oligonucleotide strands.
- React amine groups with NHS-ester terminated PEG (e.g., mPEG-SVA, MW: 2-5 kDa) in 0.1M sodium phosphate buffer (pH 8.5) for 2 hours at room temperature.
- Purify using size-exclusion chromatography (SEC) or centrifugal filtration to remove unreacted PEG.
- Confirm conjugation and grafting density via gel shift assay or MALDI-TOF.
FAQ 2: How can I accurately quantify the in vivo biodistribution of my DNA nanodevice to different organs?
Answer: Reliable quantification requires sensitive, specific labels. Radioisotopes and near-infrared (NIR) fluorophores are gold standards.
Protocol - Radiolabeling with Zirconium-89 (⁸⁹Zr) for Longitudinal PET Imaging:
- Functionalization: Incorporate a chelator (e.g., desferrioxamine, DFO) into the nanodevice via a modified oligonucleotide.
- Labeling: Incubate the DFO-nanodevice with ⁸⁹Zr-oxalate in 1M HEPES buffer (pH 7.0-7.5) for 60 minutes at 37°C with gentle shaking.
- Purification: Use a PD-10 desalting column equilibrated with PBS to remove free ⁸⁹Zr.
- QC: Measure radiochemical purity via instant thin-layer chromatography (iTLC). Aim for >95%.
- Administration & Imaging: Inject IV into animal models. Image at multiple time points (e.g., 1, 24, 48, 72h) using a microPET/CT scanner. Use organ region-of-interest (ROI) analysis to calculate percentage of injected dose per gram of tissue (%ID/g).
Table 1: Quantitative Biodistribution Data from Recent Early-Stage Trials (Selected Studies)
| DNA Nanodevice Type | Targeting Ligand | Label | Key Finding (%ID/g at 24h) | Clinical Translation Challenge Highlighted |
|---|---|---|---|---|
| DNA Origami Tube (90 nm) | None (PEGylated) | ⁸⁹Zr | Liver: 35.2 ± 4.1, Spleen: 18.5 ± 2.3, Tumor: 0.8 ± 0.2 | High MPS sequestration despite PEGylation. |
| Spherical Nucleic Acid (15 nm) | Anti-EGFR Aptamer | Cy5.5 | Liver: 12.1 ± 1.8, Tumor: 3.5 ± 0.6 | Improved tumor uptake with active targeting, but significant liver signal remains. |
| Tetrahedral Framework (10 nm) | Folic Acid | ⁶⁴Cu | Kidney: 45.3 ± 5.2, Tumor: 2.1 ± 0.4 | Small size leads to rapid renal clearance, limiting circulation time and tumor exposure. |
| DNA Cube (50 nm) | Transferrin | Alexa Fluor 750 | Liver: 8.5 ± 1.2, Spleen: 5.2 ± 0.9, Tumor: 5.8 ± 0.7 | Successful active targeting to tumors, but batch-to-batch reproducibility in ligand density is a major scaling issue. |
FAQ 3: My nanodevice shows good tumor accumulation in mice but fails to penetrate deeply into the tumor mass. How can I improve penetration?
Answer: This relates to the enhanced permeability and retention (EPR) effect heterogeneity and high tumor interstitial pressure. Penetration is limited by size, charge, and stroma density.
Solution:
- Size Reduction: Design devices <20 nm for improved diffusion.
- Enzymatic Remodeling: Design devices that respond to tumor microenvironment enzymes (e.g., MMPs) to break into smaller components upon arrival.
- Protocol - Testing Penetration in 3D Tumor Spheroids:
- Grow tumor cell spheroids (~500 µm diameter) in ultra-low attachment plates.
- Incubate spheroids with fluorescently labeled DNA nanodevices for 4-24 hours.
- Wash, fix with 4% PFA, and image using confocal microscopy with z-stacking.
- Quantify fluorescence intensity from the spheroid rim to the core. Plot normalized intensity vs. penetration depth.
Diagram 1: DNA Nanodevice Biodistribution & Clearance Pathways
Diagram 2: Workflow for In Vivo Biodistribution Study
The Scientist's Toolkit: Key Research Reagent Solutions
Table 2: Essential Materials for DNA Nanodevice Biodistribution Studies
| Item | Function & Rationale | Example Product/Catalog |
|---|---|---|
| Amine-/Thiol-Modified Oligonucleotides | Enables covalent conjugation of targeting ligands, PEG, or imaging labels. | Integrated DNA Tech (IDT), Sigma-Aldrich. |
| NHS-Ester Functionalized PEG | Creates a hydrophilic "stealth" corona to reduce protein adsorption and MPS uptake. | BroadPharm (BP-26181, mPEG-SVA, 5kDa). |
| Desferrioxamine (DFO) Chelator | Binds radioisotopes like ⁸⁹Zr for sensitive, quantitative PET imaging. | Macrocycles (DFO-p-SCN). |
| Near-Infrared (NIR) Fluorophores | For non-radioactive, real-time in vivo imaging (IVIS) and ex vivo tissue analysis. | Lumiprobe (Cy5.5, Cy7 NHS esters). |
| Size-Exclusion Chromatography (SEC) Columns | Critical for purifying labeled/conjugated nanodevices from free labels/reactants. | Cytiva (Sephadex G-25, Superdex 200 Increase). |
| Dynamic Light Scattering (DLS) Instrument | Measures hydrodynamic diameter and polydispersity pre- and post-modification. | Malvern Panalytical Zetasizer. |
| Low-Protein-Bind Microtubes & Tips | Minimizes loss of nanodevice material during handling and sample preparation. | Eppendorf Protein LoBind Tubes. |
| Matrigel Basement Membrane Matrix | For establishing more physiologically relevant subcutaneous tumor models with stroma. | Corning (356231). |
Conclusion
Optimizing the biodistribution of DNA-based nanodevices is a multifaceted endeavor that requires convergence from foundational design, advanced engineering, empirical troubleshooting, and rigorous validation. As this review synthesizes, success hinges on a holistic approach: creating structurally robust, stealth-coated, and actively targeted architectures that navigate biological barriers to achieve site-specific accumulation. While challenges like RES clearance and endosomal escape persist, the field is rapidly advancing with innovative chemical modifications and stimuli-responsive mechanisms. Comparative studies confirm the unique programmability and biocompatibility of DNA platforms against conventional vectors. The future direction points toward multi-functional, logic-gated devices capable of complex in vivo decision-making, paving the way for a new generation of precision nanomedicines. For researchers, the imperative is to integrate pharmacokinetic analysis early in the design phase, fostering a translational pipeline that moves these sophisticated nanodevices from proof-of-concept to transformative clinical therapies in oncology, gene therapy, and beyond.