Machine Learning Optimized Carbon Nanolattices: Designing the Next Generation of Biomaterials
This article explores the groundbreaking integration of machine learning (ML) with the design and optimization of carbon nanolattices, a class of nano-architected materials.
Machine Learning Optimized Carbon Nanolattices: Designing the Next Generation of Biomaterials
Abstract
This article explores the groundbreaking integration of machine learning (ML) with the design and optimization of carbon nanolattices, a class of nano-architected materials. We detail how multi-objective Bayesian optimization is used to create structures with unprecedented mechanical properties, such as the strength of carbon steel at the density of Styrofoam. For researchers and drug development professionals, we examine the methodological advances in ML-driven design, address key optimization challenges, and validate performance through comparative analysis. The discussion extends to the transformative potential of these optimized nanolattices in biomedical applications, including advanced drug delivery systems, lightweight implantable devices, and diagnostic tools.
The New Paradigm of Nano-Architected Materials
Defining Carbon Nanolattices and Their Structural Principles
Definition and Basic Principles
Carbon Nanolattices are a class of nano-architected materials composed of tiny building blocks or repeating units measuring a few hundred nanometers in size—it would take more than 100 of them patterned in a row to reach the thickness of a human hair [1] [2]. These building blocks, composed of carbon, are arranged in complex three-dimensional structures called nanolattices [1] [2]. They achieve exceptional mechanical properties through a combination of structurally efficient geometries, high-performance constituent materials, and nanoscale size effects [3].
The fundamental structural principle involves treating "material" as a geometry problem, asking which internal architecture at the nanoscale distributes stress perfectly and wastes nothing [4]. Unlike traditional materials that are carved down from larger blocks, nano-architected materials are built up using precise geometries that leverage the "smaller is stronger" effect—as features shrink to nanoscale dimensions, flaws diminish, interfaces strengthen, and performance climbs [4] [1] [2].
Frequently Asked Questions (FAQs) & Troubleshooting
FAQ 1: What causes premature failure in traditional nanolattice designs, and how does machine learning address this?
- Problem: Traditional nano-architected designs with conventional topologies (uniform beam elements with sharp intersections and corners) exhibit poor stress distributions and induce premature nodal failure, which limits their overall potential [1] [3]. Stress concentrations at these sharp corners lead to early local failure and breakage [1] [2].
- ML Solution: Machine learning, specifically the multi-objective Bayesian optimization algorithm, designs non-intuitive geometries that redistribute material to minimize stress concentrations [4] [3]. The optimized designs often thicken near nodes, slenderize in mid-spans, and curve in ways that neutralize stress concentrations, resulting in a lattice that shares the load everywhere rather than cracking at the joints [4] [5]. This approach has led to improvements in strength by up to 118% and Young's modulus by up to 68% compared to standard lattices of equivalent density [3] [6].
FAQ 2: Why is the reduction of strut diameter to ~300 nm critical for enhanced performance?
- Problem: Larger strut diameters (e.g., 600 nm) in pyrolytic carbon do not fully exploit nanoscale size effects, resulting in lower specific strength and stiffness [3].
- Solution & Principle: Reducing strut diameters to approximately 300 nm triggers beneficial size effects [4] [3] [6]. At this scale, there are fewer defects, and the pyrolysis process creates a unique radial gradient atomic architecture with a stiffer, cleaner outer shell rich in sp² aromatic carbon (up to 94%) and low oxygen impurities [4] [3] [6]. This gradient structure significantly enhances mechanical properties, with experimental results showing as much as 75% enhancement in stiffness and 79% enhancement in strength compared to larger struts [3]. However, reducing strut diameters below 300 nm often leads to loss of geometric fidelity due to voxel print resolution and warping during pyrolysis [3].
FAQ 3: We are experiencing warping and defects when scaling nanolattices to macroscopic dimensions. How can this be mitigated?
- Problem: Scaling nanolattices from microscopic to macroscopic dimensions (millimeter-scale and beyond) introduces challenges such as pyrolysis-induced warping and defects when stitching together multiple fields of view during printing [4].
- Troubleshooting Steps:
- Process Control during Pyrolysis: Meticulously control the heating and cooling rates during the pyrolysis process to minimize thermal stresses that cause warping, especially for larger parts [4].
- Advanced Printing Techniques: Utilize multi-focus two-photon polymerization (2PP) systems instead of single-focus systems. This technology can print millions of unit cells in parallel, significantly increasing throughput and reducing stitching defects [4] [3] [6]. One study successfully fabricated a macroscopic nanolattice consisting of 18.75 million lattice cells using this approach [3] [6].
- Hybrid Manufacturing Approach: For current limitations, employ a hybrid approach: print high-value, complex lattice cores and then overmold them with a conventional material to create a composite structure. This bridges the gap until full-scale direct printing matures [4].
FAQ 4: Our AI-designed lattice geometries appear non-intuitive and complex. How can we validate their performance prior to fabrication?
- Problem: Machine learning-generated lattice geometries are often non-intuitive, featuring curves and tapers that a human designer might not conceive, raising questions about their validity [4] [3].
- Validation Protocol:
- Finite Element Analysis (FEA): Perform high-fidelity FEA simulations on the AI-proposed designs to analyze stress distribution under compressive and shear loads. The goal is to confirm a uniform stress distribution and the absence of high-stress concentrations at the nodes [3] [5].
- Benchmarking: Compare the simulated mechanical properties (Young's modulus, shear modulus, and predicted strength) of the new design against simulated data from traditional lattice geometries (e.g., standard CFCC or CBCC lattices) at the same density [3].
- Iterative Refinement: Use a closed-loop system where the initial FEA data trains the Bayesian optimizer. The algorithm then proposes improved designs, which are again validated through simulation before being selected for fabrication (
Simulate → Print → Pyrolyze → Test → Refit the model) [4].
Key Experimental Data
Table 1: Mechanical Performance Comparison: Traditional vs. AI-Optimized Nanolattices
| Property | Traditional Nanolattices | AI-Optimized Nanolattices | Improvement | Citation |
|---|---|---|---|---|
| Specific Strength | Lower, varies with design | 2.03 MPa·m³/kg (record value) | >1 order of magnitude higher than equivalent low-density materials | [3] [6] |
| Compressive Strength | Lower, limited by nodal failure | 180 - 360 MPa (comparable to carbon steel) | Up to 118% increase | [4] [3] [6] |
| Young's Modulus | Lower, limited by stress concentrations | 2.0 - 3.5 GPa (comparable to soft woods) | Up to 68% increase | [3] [6] [5] |
| Density | ~125-215 kg/m³ (Foam-like) | ~125-215 kg/m³ (Foam-like) | No significant change (optimized at equivalent density) | [4] [3] |
Table 2: Key Material and Process Parameters for Optimized Carbon Nanolattices
| Parameter | Optimal Value / Description | Impact / Rationale | Citation |
|---|---|---|---|
| Strut Diameter | ~300 nm | Maximizes nanoscale "smaller is stronger" effect; promotes sp² carbon formation. | [4] [3] [6] |
| Carbon Bonding | ~94% sp² aromatic carbon (at 300 nm struts) | Creates a stiffer, stronger atomic structure; approaches diamond-like specific strength. | [3] [6] |
| Pyrolysis Temperature | 900 °C | Converts polymer precursor to glassy, sp²-rich carbon; shrinks structure to 20% of original size. | [3] [6] |
| ML Algorithm | Multi-objective Bayesian Optimization | Efficiently explores design space with high-quality, small datasets (~400 data points). | [1] [3] [7] |
Experimental Protocols
Protocol 1: AI-Driven Design and Optimization Workflow
This protocol describes the end-to-end process for designing and manufacturing AI-optimized carbon nanolattices.
AI-Driven Design and Manufacturing Workflow
Step-by-Step Procedure:
- Problem Definition: Define the multi-objective optimization goals, typically to maximize effective Young's modulus (
E) and shear modulus (μ) while minimizing relative density (ρ) [3]. - Algorithm Initialization: The multi-objective Bayesian optimization algorithm begins by randomly generating an initial set of 400 lattice beam geometries within the design space [1] [3].
- Finite Element Analysis (FEA): Each randomly generated geometry is evaluated using FEA to calculate its relative density, effective Young's modulus, and effective shear modulus. This creates a high-quality initial dataset [3].
- Iterative Optimization: The Bayesian optimization algorithm uses the FEA data to build a predictive model. It then iteratively explores the design space, focusing on regions likely to contain optimal trade-offs between the objectives (the Pareto front). This process continues for about 100 iterations [3].
- Design Selection: From the optimized results, select generative designs that approach the Pareto-optimal surface, often those that maximize a combined metric like
[E/ρ · μ/ρ]^0.5to account for multi-modal loading [3]. - 3D Model Generation: Convert the optimized 2D beam profile into a 3D strut by revolving the Bézier curve, then symmetrically apply these struts to the nodes of a chosen lattice topology (e.g., Cubic-Face Centered Cubic - CFCC) to create a full 3D unit cell [3].
- Pattern Replication: Pattern the unit cell into a larger lattice (e.g., 5x5x5) for fabrication and testing [3].
Protocol 2: Fabrication and Pyrolysis for Carbon Nanolattices
This protocol details the manufacturing process following the digital design phase.
Step-by-Step Procedure:
- Two-Photon Polymerization (2PP) Printing:
- Use a high-resolution 3D printer (e.g., Nanoscribe Photonic Professional GT2) [8].
- "Write" the designed nanolattice directly into a photosensitive resin using a laser, creating voxels a few hundred nanometers wide [4]. This process is called Two-Photon Polymerization and enables 3D printing at the micro and nano scale [1] [2].
- For scalability, employ a multi-focus 2PP system that can print millions of unit cells in parallel, significantly increasing throughput compared to single-focus methods [4] [3] [6].
- Pyrolysis Conversion:
- Place the 3D-printed polymer structure in a high-temperature furnace under an inert atmosphere.
- Heat to 900°C [3] [6].
- This process, called pyrolysis, converts the crosslinked polymer into a glassy, sp²-rich carbon by burning away other substances [4] [9].
- The structure will shrink to approximately 20% of its original printed size, locking in the final, dense carbon architecture [4] [3].
The Scientist's Toolkit: Essential Research Reagents & Materials
Table 3: Essential Materials and Equipment for Carbon Nanolattice Research
| Item Name | Function / Role in the Workflow | Key Specifications / Notes |
|---|---|---|
| Two-Photon Polymerization (2PP) Lithography System | High-resolution additive manufacturing to create the 3D polymer nanostructure. | e.g., Nanoscribe Photonic Professional GT2; enables printing with voxels of a few hundred nanometers [8]. Multi-focus systems are key for scalability [4]. |
| Photosensitive Resin | The raw material that is solidified by the laser during the 2PP process to form the polymer scaffold. | A proprietary, crosslinkable polymer resin designed for high-resolution lithography and subsequent pyrolysis [3]. |
| Pyrolysis Furnace | High-temperature oven used to convert the 3D-printed polymer structure into pure carbon. | Must be capable of reaching and maintaining 900°C under a controlled (inert) atmosphere to prevent oxidation [3] [6]. |
| Multi-Objective Bayesian Optimization Software | The machine learning algorithm that generates the optimal lattice geometries. | Efficiently explores complex design spaces with limited, high-quality data (~400 points) [1] [3]. |
| Finite Element Analysis (FEA) Software | Simulates the mechanical response (stress, strain) of proposed lattice designs under load. | Used to generate the high-quality training data for the ML algorithm and to validate designs before fabrication [3]. |
| Sputter Coater | Applies a thin, conductive metal layer (e.g., gold, platinum) to the polymer lattice before electron microscopy. | Necessary for high-quality imaging with a Scanning Electron Microscope (SEM), as the polymer and carbon are not inherently conductive. |
| Nanomechanical Test System (e.g., Nanoindenter) | Measures the mechanical properties (Young's modulus, strength) of the fabricated nanolattices. | Must be capable of performing uniaxial compression tests on micro- to nano-scale samples [3]. |
Technical Support Center: FAQs and Troubleshooting
This section addresses frequently asked questions and common experimental challenges encountered when researching nanoscale materials and machine learning-optimized nanostructures.
Frequently Asked Questions (FAQs)
Q1: What is the "smaller is stronger" effect, and what are its limits? The "smaller is stronger" effect describes the phenomenon where the mechanical strength of a material increases as its physical dimensions are reduced to the nanoscale. This is often due to the fact that in small, defect-free volumes, higher stresses are required to nucleate dislocations to mediate plastic deformation [10]. However, this relationship is not monotonic. For nanoparticles, a complex, non-monotonic dependence of strength on size has been observed, with a peak strength typically occurring at sizes around 30–60 nm, followed by weakening in single-digit nanometer sizes where diffusive deformation dominates [11].
Q2: My carbon nanolattices are failing at the nodes. How can I improve their strength? Traditional nanolattice designs with uniform struts and sharp corners are prone to stress concentrations at the nodes and junctions, leading to premature failure [12] [3]. To mitigate this, utilize a multi-objective Bayesian optimization (MBO) algorithm to generatively design lattice geometries. This machine learning approach can create non-intuitive, curved beam elements that redistribute material toward the nodes, thinning the mid-beam regions to achieve a more homogeneous stress distribution and eliminate nodal stress concentrations [3].
Q3: What are the best practices for fabricating high-strength carbon nanolattices? A robust protocol involves two key steps:
- Two-Photon Polymerization (2PP): Use this high-resolution 3D printing technology to create a polymeric nanostructure from a photosensitive resin. This technique enables patterning at the nanoscale, producing features with diameters as small as 200-300 nm [3] [13].
- Pyrolysis: Convert the polymeric structure into glassy carbon by heating it under vacuum at temperatures around 900 °C. This process transforms the polymer into a high-performance, aromatic carbon structure and causes isotropic shrinkage of approximately 80%, resulting in the final, ultra-strong nanolattice [3] [13].
Q4: Why are my nanotube solutions forming aggregates, and what is their shelf life? Aqueous nanotube solutions stabilized with surfactants have a limited shelf life. The recommended "Best-If-Used-By" (BIUB) date is typically 6 months after production. Beyond this, nanotubes and surfactants can begin to irreversibly aggregate, forming darkened spots and white strands. For best results, use the solutions within 3 months of purchase and store them at room temperature without direct sunlight [14].
Troubleshooting Guide
| Problem | Potential Cause | Solution |
|---|---|---|
| Low specific strength in nanolattices | Suboptimal geometry causing stress concentrations; Strut diameter too large [3]. | Implement Bayesian optimization for generative design. Reduce strut diameter to 300 nm or less to enhance nanoscale confinement effects [3]. |
| Irreversible aggregation in nanotube solutions | Solution is past its shelf-life; surfactant has degraded [14]. | Check the BIUB code on the solution container. For new orders, plan experiments to use the solution within 3 months of receipt [14]. |
| Weakening in single-digit nm nanoparticles | Shift in deformation mechanism from dislocation-mediated to diffusive, "liquid-like" deformation [11]. | This is a fundamental size effect. Account for this regime in experimental design; strength may be described by zero-creep analysis rather than traditional models [11]. |
| Geometric fidelity loss during pyrolysis | Strut diameters are below the resolution limit of the fabrication process [3]. | Ensure printed polymer strut diameters are sufficiently large to account for ~80% shrinkage during pyrolysis. Struts below ~300 nm pre-pyrolysis may not retain shape [3]. |
Experimental Protocols for Key Methodologies
Protocol 1: Machine Learning-Optimized Fabrication of Carbon Nanolattices
This protocol details the synthesis of high-strength carbon nanolattices using a generative machine-learning approach [12] [3].
Generative Design via Bayesian Optimization:
- Objective: Define the optimization goals: maximize effective Young's modulus ((E)), maximize effective shear modulus ((\mu)), and minimize relative density ((\bar{\rho})) [3].
- Algorithm: Employ a Multi-Objective Bayesian Optimization (MBO) algorithm.
- Process:
- Generate an initial dataset of 400 random lattice geometries.
- Use Finite Element Analysis (FEA) to evaluate (E), (\mu), and (\bar{\rho}) for each geometry.
- The algorithm iteratively expands a 3D hypervolume to identify the Pareto optimum surface, predicting new geometries that balance the three objectives.
- Output: An optimized unit cell design, typically featuring curved beam elements with material thinned at the mid-beam and thickened near the nodes.
Nanoscale Additive Manufacturing:
- Technique: Two-Photon Polymerization (2PP).
- Material: Use a photocurable acrylic polymer resin.
- Process: The optimized 3D model is printed using a 2PP system to create a polymeric nanolattice. The printed structure is a scaled-up version of the final product.
Pyrolysis Conversion:
- Process: Place the polymer nanolattice in a vacuum furnace.
- Temperature: Heat to 900 °C.
- Outcome: The polymer converts to glassy carbon via pyrolysis. The structure undergoes isotropic shrinkage to approximately 20% of its original size, resulting in the final, ultra-strong carbon nanolattice with strut diameters of ~300 nm [3].
The workflow for this synthesis is summarized in the following diagram:
Protocol 2: Probing the Size-Strength Relationship via In Situ Nanoparticle Compression
This protocol describes a method for directly observing the "smaller is stronger" effect and its limits in metal nanoparticles [11].
Sample Preparation:
- Materials: Au, Ag, or Pt nanoparticles with sizes ranging from 3 nm to 130 nm.
- Support: Deposit nanoparticles onto a substrate suitable for Transmission Electron Microscopy (TEM).
In Situ Mechanical Testing:
- Equipment: In situ TEM holder equipped with a nanoindentation system.
- Process:
- Position a flat-punch diamond indenter tip above a single nanoparticle.
- Compress the nanoparticle while simultaneously recording a live TEM video.
- Continue compression until the nanoparticle undergoes catastrophic failure.
- Data Collection: Record the applied load and displacement to generate a stress-strain curve. Correlate the mechanical data with the direct visual observation of the failure mechanism (e.g., dislocation activity, diffusion, fracture).
Data Analysis:
- Strength Calculation: Calculate the compressive strength from the peak load in the stress-strain data.
- Mechanism Correlation: Link the calculated strength to the specific deformation mechanism observed in the TEM video for that particle size. This reveals the transition from dislocation-based plasticity to diffusive deformation [11].
The Scientist's Toolkit: Research Reagent Solutions
The following table details key materials and their functions in nano-architected material research.
Table: Essential Materials for Nano-Architected Material Research
| Material / Solution | Function / Application | Key Details / Considerations |
|---|---|---|
| Photosensitive Acrylic Resin | Base material for creating 3D nanostructures via Two-Photon Polymerization (2PP) [3]. | Converts to glassy carbon during pyrolysis. The initial print is scaled to account for ~80% isotropic shrinkage [13]. |
| PureTube / IsoNanotube Aqueous Solutions | Provide pre-dispersed carbon nanotubes for composite integration or fundamental studies [14]. | Concentration: 0.25 mg/mL (PureTube) or 0.01 mg/mL (IsoNanotube). Shelf-life: Use within 3-6 months; check BIUB code. Contains surfactants that may require removal [14]. |
| Polystyrene Nanospheres | Model system for studying self-assembly and structural coloration phenomena at the nanoscale [15]. | Typical diameter ~400 nm. Can be self-assembled into monolayers and modified via reactive ion etching to tune optical properties [15]. |
| High-Purity Metal Precursors | Synthesis of metal nanoparticles (Au, Ag, Pt) for fundamental studies of size-dependent mechanical properties [11]. | Critical for producing nanoparticles (3-130 nm) with controlled size and purity for compression testing [11]. |
Visualizing the "Smaller is Stronger" Effect and Its Underlying Mechanisms
The relationship between size and mechanical strength at the nanoscale is complex and governed by competing deformation mechanisms, as illustrated below.
Troubleshooting Guides
Guide: Identifying and Mitigating Geometric Stress Concentrations
Problem: A component with a sharp corner or a small fillet radius is failing prematurely under cyclic loading. Cracks are initiating at the geometric discontinuity.
Background: Stress concentrations are localized regions where stress is significantly higher than the surrounding nominal stress, quantified by the stress concentration factor (Kt = σmax / σnominal) [16] [17]. In traditional designs, sharp corners act as "stress raisers," where the theoretical stress can approach infinity as the radius of curvature approaches zero [16]. This leads to premature failure, especially under fatigue loading [18].
Investigation & Solution:
| Step | Action | Expected Outcome |
|---|---|---|
| 1. Identify | Locate all sharp corners, small fillet radii, holes, or abrupt section changes in the load path [17]. | A list of potential high-risk stress risers. |
| 2. Analyze | Perform a Finite Element Analysis (FEA) with a convergence study. Refine the mesh at critical features until peak stress values stabilize [18]. | A accurate stress map identifying the maximum localized stress. |
| 3. Mitigate | Redesign the geometry to incorporate a large, smooth transition. Replace sharp corners with fillets whose radius is maximized relative to the connected features [17] [16]. | A significant reduction in peak stress and Kt. |
| 4. Validate | Re-run FEA on the modified design to confirm the reduction in peak stress. | A validated design with a more uniform stress distribution and higher predicted fatigue life. |
Example from Practice: In a roller support component, increasing a fillet radius from 0.010 inches to 0.080 inches reduced the localized stress from 14,419 psi to 3,873 psi, despite the more severe load case being in tension on the opposite side [17].
Guide: Addressing Premature Nodal Failure in Architected Materials
Problem: A traditional nanolattice structure with uniform struts is failing at the nodes (junctions) under compression, well below its theoretical strength.
Background: Standard lattice designs with uniform beam elements and sharp intersections are prone to stress concentrations at the nodes. This leads to early local failure, limiting the material's overall strength and stiffness [3] [12].
Investigation & Solution:
| Step | Action | Expected Outcome |
|---|---|---|
| 1. Confirm Failure Mode | Use electron microscopy to examine fractured samples. Confirm that cracking initiates at the nodes. | Verified nodal failure as the primary failure mechanism. |
| 2. Optimize Geometry | Employ a multi-objective Bayesian optimization algorithm. The algorithm will non-intuitively redistribute material, often thickening struts near nodes and thinning them in mid-spans to create curved geometries [4] [3]. | A generative design that promotes uniform stress distribution and eliminates nodal stress concentrations. |
| 3. Fabricate & Test | Manufacture the optimized design using high-resolution 3D printing (e.g., two-photon polymerization) followed by pyrolysis to create a glassy carbon structure [6] [3]. | A experimentally validated nanolattice with significantly enhanced mechanical properties. |
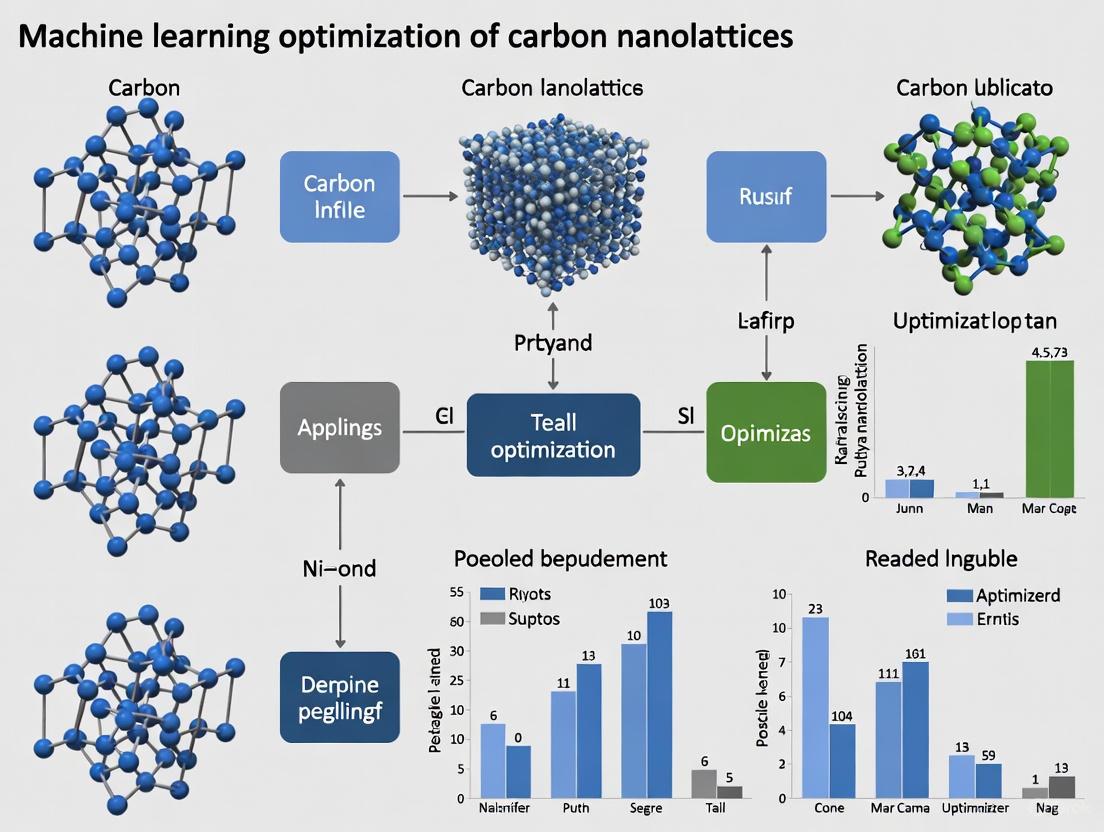
Example from Practice: Using this approach, researchers created Bayesian-optimized carbon nanolattices that demonstrated a 118% increase in strength and a 68% improvement in Young's modulus compared to standard lattice geometries of the same density [6] [3].
Frequently Asked Questions (FAQs)
Q1: What is the fundamental difference between the stress concentration factor (Kt) and the stress intensity factor (KI)?
A: The stress concentration factor (Kt) is a dimensionless parameter used in linear-elastic analysis of uncracked components. It quantifies the amplification of stress due to geometric features like holes or notches [16]. In contrast, the stress intensity factor (KI) is a fracture mechanics parameter used for components with existing cracks. It quantifies the severity of the stress field near the crack tip and predicts whether the crack will grow [16].
Q2: Why does increasing the mesh density in my FEA model show stresses that keep rising without converging?
A: This is a classic sign of a stress singularity [18]. It occurs when modeling geometrically sharp re-entrant corners (e.g., a perfect 90-degree angle with no fillet). The theoretical stress at an infinitely sharp corner is infinite. The FEA model is correctly reflecting this mathematical reality, but the result is not physically meaningful. To obtain accurate results, you must model the actual fillet radius and perform a mesh convergence study on the filleted geometry [18].
Q3: My component is made from a ductile metal. How critical is it to accurately model stress concentrations for strength analysis?
A: The necessity for accuracy depends on the failure mode. For static loading of ductile materials, localized yielding at a stress concentration can redistribute stress without causing total failure. In such cases, a simplified analysis might suffice [18]. However, for fatigue analysis (cyclic loading), accurate peak stresses are crucial as they directly dictate the component's life. Similarly, for brittle materials, accurate peak stress is always critical for predicting failure under both static and dynamic loads [18].
Q4: What is the role of the "smaller is stronger" effect in nanoarchitected materials?
A: At the nanoscale, materials often exhibit a "smaller is stronger" effect because the probability of containing a critical-sized flaw decreases as the volume of material shrinks [12] [19]. For pyrolytic carbon nanolattices, reducing strut diameters to ~300 nm minimizes defects and, combined with a pyrolysis-induced gradient that creates a high-purity sp²-bonded carbon shell, leads to exceptional specific strength [6] [3].
Experimental Protocols
Protocol: Bayesian Optimization of Nanolattice Geometries
This protocol details the workflow for using machine learning to design nanolattices that are resistant to stress concentrations.
Diagram 1: AI-driven material design and fabrication workflow.
Procedure:
Generative Modeling:
- An initial set of 400 random lattice geometries is generated within a defined design space for strut length and shape [3].
- Finite Element Analysis (FEA) is used to simulate the linear elastic response of each geometry under compression and shear, calculating its relative density (ρ̄), effective Young's modulus (Ē), and effective shear modulus (μ̄) [3].
- A multi-objective Bayesian optimization (MBO) algorithm uses this high-quality dataset to iteratively explore the design space. It aims to maximize the hypervolume defined by the normalized mechanical properties while minimizing density, seeking the Pareto-optimal surface [3].
- The process runs until convergence (typically around 100 MBO-generated points), resulting in non-intuitive, optimized beam shapes that thicken near nodes and slenderize in mid-spans to eliminate stress concentrations [4] [3].
Fabrication via Two-Photon Polymerization & Pyrolysis:
- The optimized digital design is converted into a 3D unit cell and patterned into a larger lattice (e.g., 5x5x5 unit cells) [3].
- The structure is fabricated using a Nanoscribe Photonic Professional GT2 or similar two-photon polymerization (2PP) 3D printer. This system uses a photosensitive resin (e.g., IP-Dip photoresist) and writes the structure with voxels a few hundred nanometers wide, creating a polymeric nanolattice [6] [12] [19].
- The polymer structure is placed in a vacuum furnace and subjected to pyrolysis at 900°C. This process converts the cross-linked polymer into a glassy, sp²-rich pyrolytic carbon and shrinks the entire structure to about 20% of its original size, locking in the final nanoscale dimensions and gradient atomic architecture [3] [19].
Validation via Nano-compression Testing:
- The mechanical properties of the fabricated nanolattices are determined using nanoscale uniaxial compression tests [3].
- A nanoindenter or similar instrument is used to compress the sample while measuring the applied load and displacement.
- The resulting stress-strain data is used to calculate the compressive strength and Young's modulus of the optimized nanolattice [3].
Performance Data: Traditional vs. AI-Optimized Nanolattices
The following table summarizes the quantitative performance gains achieved by applying Bayesian optimization to carbon nanolattices, compared to traditional uniform designs.
Table 1: Mechanical performance comparison of traditional and AI-optimized nanolattices.
| Property | Traditional Uniform Lattices | Bayesian Optimized Lattices | Improvement | Test Conditions / Notes |
|---|---|---|---|---|
| Specific Strength | Varies by design | 2.03 MPa m³ kg⁻¹ [3] | >1 order of magnitude vs. many low-density materials [3] | Density: <215 kg m⁻³ |
| Compressive Strength | Baseline | 180–360 MPa [4] [6] [3] | Up 118% [6] [3] | Comparable to carbon steel [4] [3] |
| Young's Modulus | Baseline | 2.0–3.5 GPa [3] | Up 68% [6] [3] | Comparable to soft woods [3] |
| Density | ~125–215 kg m⁻³ | ~125–215 kg m⁻³ [3] | Unchanged (equivalent density comparison) | Comparable to Styrofoam/expanded polystyrene [6] [3] |
| Primary Failure Mode | Crack initiation at nodes [3] [12] | Uniform stress distribution; failure no longer nodal [4] | Shift from brittle to more robust failure | Observed during compression testing [4] |
The Scientist's Toolkit
Table 2: Essential research reagents and equipment for nanolattice experimentation.
| Item | Function / Application |
|---|---|
| IP-Dip Photoresist | A photosensitive polymer resin used as the base material for two-photon polymerization. It is cross-linked by the laser to form the initial 3D polymer scaffold [19]. |
| Two-Photon Polymerization (2PP) System | A high-resolution 3D lithography technique (e.g., Nanoscribe Photonic Professional GT2) that enables direct laser writing of complex 3D structures with features down to a few hundred nanometers [6] [12]. |
| Multi-Focus 2PP Attachment | An upgrade to standard 2PP that uses multiple laser foci to print millions of unit cells in parallel, significantly increasing fabrication throughput for scalable production [6] [3]. |
| Tube Furnace | A high-temperature furnace used for the pyrolysis process. It heats the polymer lattice in a vacuum or inert atmosphere to ~900°C, converting it to pyrolytic carbon [3] [19]. |
| Multi-Objective Bayesian Optimization Algorithm | The machine learning core that drives the generative design process. It efficiently explores the design space with minimal data to find geometries that optimally balance multiple mechanical objectives [3] [1]. |
| Finite Element Analysis (FEA) Software | Used to simulate the mechanical response (stress, strain, deformation) of virtual lattice models, providing the training data for the optimization algorithm [16] [3]. |
| Nanoindenter / Microtester | An instrument for mechanical characterization, used to perform uniaxial compression tests on the fabricated nanolattices to measure their Young's modulus and compressive strength [3]. |
The Confluence of Materials Science, AI, and Nanotechnology
Technical Support Center: Machine Learning Optimization of Carbon Nanolattices
This guide provides troubleshooting and methodological support for researchers working at the intersection of AI-driven design and nanoscale materials engineering, specifically for developing high-strength, lightweight carbon nanolattices.
Frequently Asked Questions (FAQs) & Troubleshooting
1. FAQ: Why does my machine learning model for nanolattice design require extensive computational resources and time? Troubleshooting Guide: This often stems from inefficient data handling or suboptimal algorithm selection.
- Problem: Model training is slow.
- Solution: Implement a Multi-objective Bayesian Optimization (MBO) algorithm. This method is designed to work effectively with smaller, high-quality datasets (e.g., around 400 data points), drastically reducing computational load compared to algorithms requiring tens of thousands of data points [1] [3].
- Problem: The model fails to predict geometries with improved mechanical properties.
- Solution: Ensure your training data incorporates multiple objectives simultaneously. The algorithm should be set up to optimize for competing goals, such as maximizing Young's modulus and shear modulus while minimizing density [3].
2. FAQ: My 3D-printed nanolattice structures show poor geometric fidelity, especially with complex, AI-designed curves. How can I improve this? Troubleshooting Guide: This is typically related to the limitations of the nanoscale additive manufacturing process.
- Problem: Strut warping or loss of detail, particularly for strut diameters approaching 300 nm.
- Solution: This may be a hardware limitation. Optimize the two-photon polymerization (2PP) parameters and note that further reducing strut diameters below 300 nm can lead to a loss of fidelity due to voxel print resolution and subsequent warping during pyrolysis [3].
- Problem: Non-conformal final geometry compared to the AI-generated model.
- Solution: Cross-validate the manufactured structure with the model using Field-Emission Scanning Electron Microscopy (FESEM). This helps identify specific stages (printing, pyrolysis) where geometric distortions are introduced [3].
3. FAQ: How can I address the "black box" nature of AI and gain physical insights from my nanolattice models? Troubleshooting Guide: This is a common challenge in AI for science.
- Problem: The AI suggests a high-performing geometry, but the physical reason for its performance is unclear.
- Solution: Couple your AI workflow with localized structural and atomic characterization. Techniques like FESEM and molecular dynamics simulations can reveal the physical mechanisms behind the performance, such as identifying a radial gradient of sp² bonding in pyrolytic carbon struts that contributes to enhanced strength [3].
- Problem: The model's predictions are not interpretable.
- Solution: Employ a "human-in-the-loop" system where the AI presents its observations and hypotheses in natural language, allowing researchers to integrate their domain expertise [20].
4. FAQ: My experimental results for nanolattice strength and stiffness are inconsistent and not reproducible. Troubleshooting Guide: Irreproducibility can be caused by subtle variations in synthesis and processing.
- Problem: Inconsistent material properties between batches.
- Solution: Integrate computer vision and vision language models to monitor experiments in real-time. These systems can detect millimeter-scale deviations in sample shape or procedural errors and suggest corrective actions [20].
- Solution: Meticulously control the pyrolysis process. The conversion of polymer to glassy aromatic carbon at high temperatures (e.g., 900°C) must be highly consistent, as it affects the final carbon purity and atomic structure [3].
Experimental Protocols & Data
Detailed Methodology: Bayesian-Optimized Carbon Nanolattice Workflow
The following protocol is adapted from research that achieved carbon nanolattices with the strength of carbon steel at the density of Styrofoam [3].
Generative Modeling via Multi-Objective Bayesian Optimization
- Input: Define a base lattice structure (e.g., Cubic-Face Centered Cubic - CFCC).
- Parameterization: Break the lattice into constituent struts. Represent each strut's profile using a Bézier curve controlled by four randomly distributed points within the design space.
- Data Generation: Use Finite Element Analysis (FEA) on 400 randomly generated geometries to calculate three key properties:
- Relative density (( \bar{\rho} ))
- Effective Young's Modulus (( \bar{E} ))
- Effective Shear Modulus (( \bar{\mu} ))
- Optimization: The MBO algorithm iteratively expands a 3D hypervolume defined by the normalized values of the three properties above. The goal is to identify the Pareto optimum surface, maximizing the multi-objective function ( [\frac{\bar{E}}{\bar{\rho}} \cdot \frac{\bar{\mu}}{\bar{\rho}}]^{0.5} ) for combined compressive and shear performance.
Nanoscale Additive Manufacturing
- Process: Use Two-Photon Polymerization (2PP) to fabricate the AI-designed lattice from a photocurable acrylic polymer resin.
- Output: A 3D polymeric nanostructure that is a precise replica of the computational model.
Pyrolysis Conversion to Carbon
- Process: Heat the polymeric structure in an inert atmosphere to 900°C.
- Result: The polymer pyrolyzes, converting into a glassy, aromatic carbon structure. The final part shrinks to approximately 20% of its original size, achieving strut diameters as low as 300 nm.
Mechanical Characterization & Validation
- Test: Perform nanoscale uniaxial compression tests on the pyrolyzed carbon nanolattices.
- Measure: Record the experimental Young's Modulus (E) and compressive strength (σ) and compare them against the model's predictions and standard (non-optimized) lattices of equivalent density.
Experimental Workflow Diagram
The diagram below outlines the key stages of the Bayesian-optimized carbon nanolattice development process.
Quantitative Performance Data of Optimized Carbon Nanolattices
The table below summarizes the experimentally measured performance enhancements achieved through the Bayesian optimization of carbon nanolattices, benchmarked against standard designs [3].
Table 1: Experimental Mechanical Properties of MBO-Optimized vs. Standard Carbon Nanolattices
| Lattice Type | Strut Diameter | Density (kg/m³) | Young's Modulus (GPa) | Compressive Strength (MPa) | Specific Strength (MPa m³/kg) | Key Improvement Over Standard Design |
|---|---|---|---|---|---|---|
| CFCC MBO-3 | 600 nm | 180 | 3.5 | 360 | 2.03 | Strength increased by 118% |
| CFCC MBO-1 | 600 nm | 215 | 3.2 | 295 | 1.37 | Stiffness increased by 68% |
| CFCC Standard | 600 nm | ~180 | ~2.0 | ~165 | ~0.92 | Baseline for comparison |
| CBCC MBO | 300 nm | 125 | 2.0 | 180 | 1.44 | Strength enhanced by 79% (vs. 600nm) |
The Scientist's Toolkit: Research Reagent Solutions
Table 2: Essential Materials and Equipment for AI-Optimized Carbon Nanolattice Research
| Item | Function / Role in the Workflow |
|---|---|
| Photocurable Acrylic Polymer Resin | The base material for two-photon polymerization (2PP); forms the initial 3D nanostructure [3]. |
| Multi-Objective Bayesian Optimization Algorithm | The core AI software that generates optimal lattice geometries by efficiently navigating the complex design space with multiple competing objectives [3]. |
| Two-Photon Polymerization (2PP) System | A high-precision nanoscale 3D printer that uses a laser to solidify the polymer resin into the complex AI-designed lattice structures [1] [3]. |
| Tube Furnace (Inert Atmosphere) | Used for the pyrolysis step, heating the polymer structure to 900°C in an oxygen-free environment to convert it into a pure, glassy carbon structure [3]. |
| Nanoindenter / Microcompression Tester | Equipment for mechanically characterizing the pyrolyzed nanolattices, measuring critical properties like Young's modulus and compressive strength [3]. |
| Field-Emission Scanning Electron Microscope (FESEM) | Used for high-resolution imaging to validate the printed geometry, measure strut diameters, and inspect for defects before and after mechanical testing [3]. |
| Finite Element Analysis (FEA) Software | Generates the initial training data for the AI model by simulating the mechanical response (density, Young's modulus, shear modulus) of thousands of virtual lattice designs [3]. |
Leveraging AI for Predictive Material Design and Biomedical Applications
Multi-Objective Bayesian Optimization (MOBO) has emerged as a powerful data-efficient machine learning strategy for optimizing multiple, often competing, black-box objective functions when evaluations are expensive. This approach is particularly valuable in scientific domains where experimental data is scarce and computational resources are limited. By combining probabilistic modeling with intelligent decision-making, MOBO sequentially selects the most informative experiments to perform, rapidly converging toward optimal solutions while minimizing resource consumption.
In materials science and drug discovery, researchers frequently face scenarios where multiple performance metrics must be balanced simultaneously. For instance, when designing carbon nanolattices, engineers must optimize for both strength and lightweight properties, while drug developers might seek compounds that maximize efficacy while minimizing toxicity. Traditional experimentation approaches would require exhaustive testing of countless possibilities, but MOBO strategically navigates these complex design spaces by building surrogate models of objective functions and using acquisition functions to guide the selection of promising candidates. This methodology has demonstrated remarkable success in applications ranging from the development of ultra-strong carbon nanolattices to the design of novel pharmaceutical compounds, establishing itself as an indispensable tool for modern research and development.
Core Concepts of Multi-Objective Bayesian Optimization
Foundational Principles
MOBO extends standard Bayesian optimization to scenarios with multiple competing objectives. The fundamental goal is to identify the Pareto-optimal set - a collection of solutions where no objective can be improved without worsening at least one other objective. Formally, a solution ( x^* ) is Pareto-optimal if there does not exist another solution ( x' ) such that ( fi(x') \leq fi(x^) ) for all objectives ( i ) and ( f_j(x') < f_j(x^) ) for at least one objective ( j ) [21].
Unlike single-objective optimization that converges to a single optimum, MOBO maps the entire Pareto front - the multidimensional surface representing the best possible trade-offs between objectives. This provides decision-makers with a comprehensive view of available options and their inherent compromises. The methodology is particularly valuable when objective functions are expensive to evaluate, as it minimizes the number of experiments required to characterize these trade-offs.
Key Methodological Components
MOBO employs several interconnected components to efficiently navigate complex design spaces:
Surrogate Modeling: Gaussian Processes (GPs) typically model each expensive black-box objective function, providing both predictions and uncertainty estimates for unexplored regions of the design space [21]. These probabilistic models capture our belief about each objective's behavior between experimental observations.
Acquisition Functions: Specialized functions balance exploration and exploitation to recommend the most promising candidates for subsequent evaluation. The Expected Hypervolume Improvement (EHVI) is a prominent Pareto-compliant acquisition function that measures the expected increase in the volume dominated by the Pareto set when adding a new point [21].
Preference Integration: Advanced MOBO frameworks incorporate user preferences to focus computational resources on relevant regions of the Pareto front. This includes preference-order constraints that prioritize certain objectives and utility-based methods that learn decision-maker preferences through interactive feedback [21].
MOBO in Practice: Carbon Nanolattices Case Study
Experimental Framework and Workflow
The application of MOBO to carbon nanolattice development demonstrates its transformative potential in materials science. Researchers at the University of Toronto employed a sophisticated workflow combining computational optimization with advanced manufacturing to create nanolattices with exceptional specific strength [22] [6] [23].
Table: Key Performance Metrics of Bayesian-Optimized Carbon Nanolattices
| Performance Metric | Traditional Design | MOBO-Optimized | Improvement |
|---|---|---|---|
| Specific Strength (MPa m³ kg⁻¹) | Not reported | 2.03 | Benchmark |
| Density (kg m⁻³) | Not reported | <215 | Maintained low |
| Strength | Baseline | +118% | Significant |
| Young's Modulus | Baseline | +68% | Substantial |
| Compressive Strength (MPa) | Not applicable | 180-360 | Comparable to carbon steel |
The optimization process targeted both maximal mechanical strength and minimal density, two naturally competing objectives. Through iterative design refinement, the MOBO algorithm successfully identified lattice geometries that distributed stress more uniformly, eliminating nodal stress concentrations that caused premature failure in conventional designs [22] [6].
Material Synthesis and Characterization Protocols
The experimental realization of optimized nanolattice designs involved sophisticated fabrication and processing techniques:
Two-Photon Polymerization Direct Laser Writing: A high-resolution 3D printing technique that uses UV-sensitive resin added layer by layer, where the material becomes a solid polymer at points where two photons meet [24] [6]. This approach enabled the creation of intricate lattice structures with plate faces as thin as 160 nanometers.
Pyrolysis Transformation: The 3D-printed polymer structures underwent pyrolysis at 900°C in a vacuum for one hour, converting them to glassy carbon with superior mechanical properties [6]. This process induced an atomic gradient of 94% sp² aromatic carbon with low oxygen impurities, significantly enhancing structural integrity [22] [23].
Scalable Manufacturing: Researchers implemented multi-focus multi-photon polymerization to produce millimeter-scale metamaterials consisting of 18.75 million lattice cells with nanometer dimensions, addressing previous challenges in production scalability [22].
The resulting carbon nanolattices achieved an exceptional specific strength of 2.03 MPa m³ kg⁻¹ at densities below 215 kg m⁻³, demonstrating strength comparable to carbon steel while maintaining a density similar to expanded polystyrene [22] [6] [23].
Essential Research Reagents and Materials
Table: Key Research Materials for MOBO-Guided Nanolattice Development
| Material/Reagent | Function/Application | Experimental Notes |
|---|---|---|
| UV-Sensitive Resin | Primary material for two-photon polymerization | Polymerizes at two-photon meeting points; enables intricate 3D nanostructures [24] |
| Pyrolytic Carbon | Final structural material | Formed through pyrolysis at 900°C; exhibits 94% sp² aromatic carbon content [22] [6] |
| Glassy Carbon | High-strength nanolattice composition | Result of pyrolysis process; provides exceptional strength-to-weight ratio [6] |
| Two-Photon Lithography System | Nanoscale 3D printing | Enables creation of features down to 160 nm; critical for lattice fabrication [24] [6] |
| Vacuum Furnace | Pyrolysis processing | Maintains oxygen-free environment at 900°C for structural transformation [6] |
Frequently Asked Questions
Theoretical Foundations
Q: How does Multi-Objective Bayesian Optimization differ from traditional optimization approaches? A: Unlike traditional gradient-based methods or grid searches, MOBO is specifically designed for scenarios where objective functions are expensive to evaluate (computationally or experimentally), lack known analytical forms, and involve multiple competing metrics. MOBO builds probabilistic surrogate models of these black-box functions and uses acquisition functions to sequentially select the most informative experiments, dramatically reducing the number of evaluations needed to identify optimal trade-offs [21].
Q: What is the Pareto front and why is it important? A: The Pareto front represents the set of optimal trade-offs between competing objectives - solutions where improving one objective necessarily worsens another. Identifying this front is crucial for informed decision-making, as it provides a comprehensive view of available options and their inherent compromises. In carbon nanolattice design, the Pareto front reveals the fundamental trade-off between strength and density, allowing researchers to select designs appropriate for specific applications [21].
Implementation Considerations
Q: What are the most common acquisition functions in MOBO and how do I choose? A: The Expected Hypervolume Improvement (EHVI) is a popular Pareto-compliant acquisition function that measures expected improvement in the volume dominated by the Pareto set [21]. Alternative approaches include random scalarization (ParEGO) and information-theoretic measures. Selection depends on your specific context: EHVI generally performs well but has computational overhead; scalarization approaches are simpler but may miss concave Pareto regions; information-theoretic methods prioritize uncertainty reduction.
Q: How can I incorporate domain knowledge or preferences into MOBO? A: Preference-aware MOBO strategies allow integration of domain knowledge through preference-order constraints (specifying that one objective is more important than another) or utility-based methods that learn decision-maker preferences [21]. For carbon nanolattices, researchers might prioritize strength over density for structural applications, constraining the search to regions of the design space that reflect this preference.
Troubleshooting Guide
Optimization Performance Issues
Problem: Slow convergence or poor Pareto front approximation
Insufficient Surrogate Model Flexibility: Standard Gaussian Processes with common kernels may struggle with complex, high-dimensional objective functions. Solution: Implement more flexible surrogate models such as deep kernel learning or ensemble approaches that can capture intricate response surfaces. In nanolattice optimization, this might involve developing custom kernels that incorporate physical knowledge of stress distribution.
Inadequate Exploration-Exploitation Balance: Overly greedy acquisition functions may converge to local optima. Solution: Adjust acquisition function parameters to increase exploration, particularly in early optimization rounds. The Hypervolume Improvement-based approaches automatically balance this, but parameters governing uncertainty weight might need tuning [21].
Problem: Computational bottlenecks in high-dimensional spaces
Curse of Dimensionality: Standard MOBO becomes computationally expensive as design dimensions increase. Solution: Implement trust region methods (like MORBO) that partition the space into local regions modeled by separate GPs, reducing cubic computational costs [21]. For nanolattice design, leverage symmetry and periodicity to reduce effective dimensionality.
Batch Selection Inefficiencies: Sequential evaluation becomes impractical with parallel experimental capabilities. Solution: Employ batch selection strategies with diversity penalties that ensure proposed experiments are spread across both design space and objective space [21].
Experimental Integration Challenges
Problem: Discrepancy between model predictions and experimental results
Model Inadequacy for Extreme Designs: Surrogate models may perform poorly when extrapolating beyond the data range. Solution: Implement conservative design selection with constraints that prevent evaluation of radically different designs until model uncertainty is reduced. In nanolattice fabrication, this might involve gradually expanding the design space as model confidence increases.
Stochastic Experimental Outcomes: Noisy measurements obscure true objective function values. Solution: Incorporate noise-aware GP models that explicitly account for observation uncertainty. For mechanical testing of nanolattices, this might involve repeated measurements at key design points to characterize variability.
Problem: Scalability limitations in fabrication and testing
Manufacturing Constraints Overlooked: Optimized designs may be theoretically sound but practically unfabricatable. Solution: Incorporate manufacturing constraints directly into the optimization framework as feasibility constraints. In nanolattice development, this includes minimum feature size limitations of two-photon polymerization systems [6].
Experimental Throughput Limitations: Physical experiments cannot keep pace with optimization recommendations. Solution: Implement asynchronous MOBO frameworks that update models as results become available and strategically select designs that provide maximal information per experiment [21].
Advanced Methodologies and Future Directions
Emerging MOBO Extensions
The MOBO landscape continues to evolve with several advanced methodologies addressing specific challenges:
Multi-Objective Causal Bayesian Optimization (MO-CBO): This extension incorporates causal relationships between variables to identify optimal interventions more efficiently. By leveraging causal graph structures, MO-CBO reduces the search space and decomposes complex problems into simpler multi-objective optimization tasks [25].
Coverage Optimization for Collective Performance: Rather than identifying a complete Pareto front, this approach finds a small set of solutions that collectively "cover" multiple objectives. In drug discovery, this might involve identifying a limited number of antibiotics that collectively treat a wide range of pathogens [26].
Non-Myopic and RL-Based Sequence Planning: Recent advances employ reinforcement learning and transformer models to plan sequences of evaluations, considering long-term optimization trajectories rather than just immediate gains. These approaches demonstrate improved Pareto front recovery within tight evaluation budgets [21].
Application Frontiers
MOBO is expanding into increasingly sophisticated domains:
Drug Discovery and Molecular Design: AI-powered molecular innovation leverages MOBO to balance multiple drug properties simultaneously, such as efficacy, safety, and synthesizability. The generative AI drug discovery market is projected to reach $1.7 billion in 2025, with MOBO playing a critical role in de novo molecular design [27].
Personalized Medicine and Therapeutic Optimization: MOBO frameworks are being adapted to optimize treatment regimens for individual patients, balancing therapeutic benefits against side effects and personal tolerance levels [27].
Sustainable Material Development: The methodology is increasingly applied to green chemistry and material science, optimizing for both performance and environmental impact metrics such as energy efficiency, recyclability, and carbon footprint [27].
As MOBO methodologies continue to mature, their integration with experimental science promises to accelerate innovation across numerous domains, from ultra-strong nanomaterials to life-saving pharmaceuticals, demonstrating the transformative potential of data-efficient optimization strategies.
Generative Modeling and Finite Element Analysis (FEA) for Virtual Prototyping
Frequently Asked Questions (FAQs)
Q1: What is the primary advantage of combining generative modeling with FEA in nanolattice research?
A1: The integration allows for the automated discovery of high-performance nanolattice geometries that are often non-intuitive. Multi-objective Bayesian optimization uses FEA-derived data to generate designs that maximize specific strength and stiffness while minimizing density, leading to experimental improvements of up to 118% in strength and 68% in stiffness compared to standard lattices [3].
Q2: Our FEA predictions for nanolattice failure do not match experimental results. What could be causing this discrepancy?
A2: This is commonly due to oversimplified material properties in the FEA model. Unlike bulk materials, nanoscale pyrolytic carbon exhibits a radial atomic gradient and a high concentration of sp² aromatic bonds (94%) in the outer shell, significantly influencing mechanical behavior [3]. Ensure your FEA input properties are calibrated from nanoscale tests on printed and pyrolyzed structures, not bulk material data sheets.
Q3: Why is Bayesian Optimization particularly suited for this design workflow compared to other ML algorithms?
A3: Bayesian Optimization is highly data-efficient, capable of identifying optimal designs with a small, high-quality dataset (e.g., ~400 FEA simulations) [1] [3]. This is crucial because generating each FEA data point for complex nanolattices is computationally expensive. It effectively explores the design space and predicts geometries that balance multiple competing objectives, such as compression strength, shear modulus, and density [3].
Q4: We observe warping and loss of geometric fidelity during the pyrolysis step. How can this be mitigated?
A4: Warping is often a result of non-uniform shrinkage or thermal gradients. Strategies to mitigate this include:
- Strut Diameter: Avoid strut diameters below 300 nm, as this can push against the limits of print resolution and lead to failure during pyrolysis [3].
- Process Control: Implement a controlled, slow pyrolysis ramp rate to minimize internal stresses.
- Design Compensation: Account for the ~80% volumetric shrinkage during pyrolysis in the initial generative design phase by pre-scaling the digital model [4].
Q5: What are the key computational resource requirements for running these coupled simulations?
A5: While cloud-solving can offload resources, local FEA setup for complex nanolattices demands substantial power. General recommendations include [28]:
- RAM: 16 GB or higher (32 GB recommended for desktops).
- Software: Professional-grade FEA software (e.g., Autodesk Nastran, Ansys) capable of handling non-linear material models and large-scale problems.
Troubleshooting Guides
Issue: Generative Model Produces Geometries That Are Unmanufacturable
| Possible Cause | Solution |
|---|---|
| Overly complex curves/angles violating 3D printer resolution. | Constrain the generative algorithm's design space (e.g., limit curvature radius, enforce minimum feature size >300 nm) [3]. |
| Unsupported overhangs in the generated design. | Integrate manufacturability checks (support structure need analysis) within the optimization loop. |
Issue: FEA Simulation Fails to Converge
| Possible Cause | Solution |
|---|---|
| Poor quality mesh with highly distorted elements. | Refine the mesh, especially at node junctions where stress concentrates. Use a finer mesh density and check element quality metrics [28]. |
| Incorrect or unphysical boundary conditions applied to the model. | Revisit and simplify boundary conditions to ensure they accurately represent the physical compression/shear test setup. |
Issue: High Variance in Experimental Strength of Printed Nanolattices
| Possible Cause | Solution |
|---|---|
| Inconsistent strut diameter due to printing or pyrolysis defects. | Calibrate the Two-Photon Polymerization (2PP) system and optimize laser power/exposure time. Characterize printed struts via SEM to ensure uniformity [3]. |
| Contamination or impurities in the carbon structure post-pyrolysis. | Control the pyrolysis environment (inert gas flow) to achieve low oxygen impurities, which is critical for high strength [3]. |
Experimental Protocols
Protocol 1: Workflow for ML-Driven Design and Validation of Carbon Nanolattices
This protocol details the end-to-end process for creating and testing AI-optimized carbon nanolattices, as demonstrated in foundational research [3].
ML-FEA Integration Workflow
1. Define Objectives and Constraints:
- Objectives: Typically, to maximize effective Young's Modulus ((E)) and shear modulus ((\mu)) while minimizing relative density ((\bar{\rho})) [3].
- Constraints: Define the printable strut diameter range (e.g., 300–600 nm) and the maximum unit cell size.
2. Generate Initial Training Data with FEA:
- Randomly generate a set of initial lattice geometries (e.g., 400 designs) within the defined design space [3].
- For each geometry, run FEA simulations to calculate its relative density, effective Young's modulus under compression, and effective shear modulus.
- FEA Settings: Use linear elastic material properties for the polymer precursor. Apply appropriate boundary conditions and meshing to capture stress concentrations at nodes.
3. Multi-Objective Bayesian Optimization (MBO):
- Use an MBO algorithm to iteratively expand a 3D hypervolume based on the normalized ((E), (\mu), (\bar{\rho})) data.
- The algorithm will propose new geometries that are predicted to lie on the "Pareto front" – the set of optimal trade-off designs [3].
- After a set number of iterations (e.g., 100), select the top-performing generative designs from the Pareto surface.
4. Fabrication via Two-Photon Polymerization (2PP):
- Convert the optimal digital designs into a 3D model patterned into a lattice (e.g., 5x5x5 unit cells).
- Use a 2PP nanoscale 3D printer to fabricate the structure from a photosensitive acrylic resin. This process uses a focused laser to solidify the resin at precise points, creating features with diameters as small as 300 nm [3].
5. Pyrolysis:
- Place the printed polymer lattice in a furnace with an inert atmosphere (e.g., argon or nitrogen).
- Heat to 900°C using a controlled temperature ramp. This process converts the organic polymer into a glassy, sp²-rich aromatic carbon material and shrinks the structure to approximately 20% of its original size [3] [4].
6. Mechanical Validation:
- Perform uniaxial compression tests on the pyrolyzed carbon nanolattices using a nanoindenter or similar instrument.
- Measure the experimental Young's modulus (E) and compressive strength (σ) for direct comparison with the FEA predictions.
Protocol 2: Key FEA Setup for Nanolattice Analysis
1. Geometry and Meshing:
- Import the generative model. Use a tetrahedral or hex-dominant mesh.
- Apply a mesh refinement at the nodes and junctions, which are critical stress concentration points [29] [28].
- Perform a mesh sensitivity analysis to ensure results are not dependent on element size.
2. Material Properties:
- For polymer precursor: Use linear elastic properties typical of the specific acrylic resin.
- For pyrolytic carbon: Use properties derived from tested nanopillars. Key properties include: High Young's Modulus and linear-elastic behavior until brittle fracture [3]. Note: These properties are size-dependent and must be empirically determined for your specific process.
3. Boundary Conditions and Loading:
- Fix the bottom surface of the lattice.
- Apply a displacement-controlled load to the top surface to simulate uniaxial compression.
- For shear modulus analysis, apply appropriate shear displacements.
4. Solving and Post-Processing:
- Run a static structural analysis.
- Analyze results for total deformation, von Mises stress (to identify yield regions), and strain energy.
Research Reagent Solutions & Essential Materials
The following table details key materials and equipment used in the featured research on machine learning-optimized carbon nanolattices [3].
| Item | Function/Benefit |
|---|---|
| Two-Photon Polymerization (2PP) System | Enables nanoscale 3D printing of initial polymer lattices with strut diameters of 300-600 nm [3]. |
| Photosensitive Acrylic Resin | The polymer precursor used in 2PP to create the "green" body of the nanolattice [3]. |
| Tube Furnace (Inert Atmosphere) | Used for the pyrolysis step, converting the polymer lattice to carbon at 900°C in a controlled environment [3]. |
| Nanoindenter / Micromechanical Tester | Measures the mechanical properties (Young's modulus, compressive strength) of the final pyrolyzed nanolattices [3]. |
| Finite Element Analysis Software | Simulates the mechanical performance of generative designs to create data for the ML algorithm [28] [3]. |
| Multi-Objective Bayesian Optimization Algorithm | The core ML tool that efficiently explores the design space to discover optimal lattice geometries [1] [3]. |
| Field-Emission Scanning Electron Microscope (FESEM) | Used for high-resolution imaging to verify print fidelity, strut diameter, and structural integrity post-pyrolysis [3]. |
Troubleshooting Guides and FAQs
This technical support center addresses common challenges encountered in the fabrication of carbon nanolattices via Two-Photon Polymerization (TPP) and pyrolysis, a process critical for advancing research in machine learning-optimized materials.
Fabrication Troubleshooting Guide
| Problem Phenomenon | Potential Root Cause | Diagnostic Steps | Recommended Solution |
|---|---|---|---|
| Structural Delamination or Cracking during Pyrolysis | Excessive internal stress in the polymer precursor; mismatch of thermal expansion coefficients with substrate; overly rapid heating rate. | Inspect pre-pyrolysis structure for existing cracks or warping using SEM. Check pyrolysis furnace temperature profile and ramp rates. | Implement a slower, multi-stage pyrolysis ramp (e.g., 5°C/min to 300°C, 1h dwell, then 5°C/min to 900°C, 1h dwell) [30]. Ensure use of adhesion promoters on substrate [31]. |
| Uncontrolled or Non-Uniform Shrinkage | Inconsistent TPP exposure parameters; non-uniform polymer cross-linking; geometry-dependent shrinkage effects. | Measure feature sizes (e.g., beam diameters) pre- and post-pyrolysis using SEM. Correlate shrinkage with laser power and scanning speed settings. | Calibrate shrinkage factors for specific geometries. For SU-8, expect ~75% volumetric shrinkage; adjust original CAD model to compensate [30]. Optimize TPP laser power and scan speed for uniform exposure. |
| Structure Buckling or Collapse | High aspect ratio structural elements (e.g., >30:1); insufficient mechanical strength to withstand pyrolysis-induced stresses. | Calculate aspect ratio (length/diameter) of beams. Visually inspect for Euler buckling modes post-pyrolysis. | Redesign the nanolattice to reduce the aspect ratio of beams. For necessary high-aspect-ratio features, increase the TPP exposure dose to create thicker, stronger polymer beams [30]. |
| Failure to Achieve Target Resolution (< 200 nm) | Sub-optimal TPP exposure parameters; diffraction-limited laser spot; unsuitable photoresist. | Print and develop test structures (e.g., single lines) at varying laser powers and scan speeds to find the polymerization threshold. | Use high-resolution resins like IP-Dip or SZ2080. Operate the laser at the minimum power required for polymerization to minimize voxel size. Post-pyrolysis shrinkage can further enhance resolution [32] [31]. |
| Poor Carbon Quality or Mechanical Weakness after Pyrolysis | Incomplete carbonization due to insufficient final temperature or time; oxygen contamination during pyrolysis. | Perform Raman spectroscopy on pyrolyzed sample to assess the D/G band ratio, indicating carbon structure quality. | Ensure pyrolysis reaches a minimum of 900°C in a high-purity inert gas (Argon/Nitrogen) atmosphere with sufficient dwell time (e.g., 1 hour) [30] [19]. |
Frequently Asked Questions (FAQs)
Q1: How much shrinkage should we anticipate during pyrolysis, and how can we design for it?
Shrinkage is a fundamental characteristic of the pyrolysis process and must be accounted for in the initial design phase. The degree of shrinkage is dependent on the photoresist, pyrolysis parameters, and the structure's geometry.
- Quantitative Data: The table below summarizes typical shrinkage values for common photoresists based on research findings [30] [31].
| Photoresist | Pyrolysis Temperature | Volumetric Shrinkage | Linear Shrinkage (Approx.) | Resulting Material |
|---|---|---|---|---|
| IP-Dip | 900°C | Up to 75% [30] | Varies by geometry | Glassy Carbon [31] |
| SZ2080 | 690°C | ~70% [31] | ~40% [31] | Ceramic (Si-Zr-O) [31] |
| OrmoComp | 450°C | ~40% [31] | ~20% [31] | Not Fully Carbonized [31] |
- Design Protocol: To compensate, you must inversely scale your original CAD model. For instance, if a 80% linear shrinkage is expected, the TPP structure should be fabricated at 500% of the target final size. Empirical calibration for your specific resin and geometry is essential.
Q2: Our structures consistently detach from the silicon substrate during pyrolysis. How can we improve adhesion?
Adhesion failure is a common issue due to stress buildup during thermal degradation. The following protocol can significantly improve adhesion [31]:
- Substrate Preparation: Meticulously clean the silicon wafer with acetone, isopropyl alcohol, and distilled water.
- Surface Activation: Treat the substrate with an oxygen plasma or "piranha solution" (a 3:1 mixture of concentrated sulfuric acid and hydrogen peroxide) for 30 minutes. Warning: Piranha solution is extremely corrosive and must be handled with extreme care.
- Adhesion Promoter: Apply an appropriate silane-based adhesion promoter (e.g., (3-Aminopropyl)triethoxysilane) to the activated substrate before spin-coating the photoresist.
Q3: What is the typical pyrolysis protocol to convert IP-Dip polymer structures into glassy carbon?
A standard and reliable protocol for achieving high-quality glassy carbon from IP-Dip is as follows [30]:
- Atmosphere: Continuous flow of high-purity argon (or nitrogen) to maintain an inert environment and prevent oxidation.
- Temperature Ramp:
- Heat from room temperature to 300°C at a slow ramp rate of 5°C per minute.
- Hold at 300°C for 1 hour to facilitate gradual degassing and prevent violent decomposition.
- Continue heating from 300°C to 900°C at 5°C per minute.
- Hold at 900°C for 1 hour to ensure complete carbonization.
- Allow the furnace to cool down slowly to room temperature naturally.
Q4: How can machine learning be integrated into this fabrication workflow to optimize the process?
Machine learning (ML) serves as a powerful tool to navigate the complex parameter space of TPP and pyrolysis, accelerating the discovery of optimal designs and processes [19] [33] [6].
- Objective: An ML model, such as Multi-Objective Bayesian Optimization (MBO), can be trained to find the ideal balance between competing goals, like maximizing mechanical strength while minimizing density.
- Input Parameters: The model considers design parameters (e.g., beam diameter, unit cell topology) and fabrication parameters (e.g., TPP laser power, pyrolysis temperature).
- Output: The ML algorithm suggests new parameter sets to test, which are then fabricated and mechanically characterized. The results are fed back to the model, creating a closed-loop optimization cycle that rapidly converges on the best-performing structures without exhaustive trial-and-error.
Machine Learning-Optimized Fabrication Workflow
The Scientist's Toolkit: Research Reagent Solutions
| Item | Function & Role in Fabrication | Key Considerations |
|---|---|---|
| IP-Dip Photoresist | An acrylic-based, negative-tone photoresist for high-resolution TPP. It carbonizes into glassy carbon during pyrolysis [31]. | Excellent for creating complex 3D structures with fine features (~100-200 nm). The resulting carbon has a high sp² content and good mechanical properties [19]. |
| SZ2080 Photoresist | A hybrid organic-inorganic sol-gel photoresist. Upon pyrolysis, it transforms into a ceramic material (based on Si-Zr-O) rather than carbon [31]. | Known for low shrinkage during TPP and high mechanical and thermal stability post-pyrolysis. Requires pre-baking before TPP fabrication [31]. |
| OrmoComp Photoresist | A hybrid organic-inorganic photoresist (ORMOCER). It is biocompatible and suitable for optical applications but is not ideal for pure carbon structures [31]. | Does not fully carbonize; at 450°C it shrinks significantly but retains an organic-inorganic hybrid composition [31]. |
| PGMEA (Propylene Glycol Monomethyl Ether Acetate) | A standard developer for IP-Dip photoresist. It dissolves the non-polymerized areas after TPP exposure [31]. | Typical development time is 20-30 minutes, followed by rinsing in isopropyl alcohol. Must be handled in a well-ventilated area. |
| Adhesion Promoters (e.g., Silanes) | Chemicals applied to the substrate (e.g., silicon wafer) to create a strong covalent bond between the substrate and the photoresist [31]. | Critical for preventing delamination during the development and pyrolysis steps. Common types include amino-silanes for epoxy-based resists. |
This technical support center provides essential guidance for researchers working at the intersection of machine learning (ML)-optimized material design and advanced drug delivery systems. The core thesis explores how the exceptional properties of ML-designed carbon nanolattices—notably their ultra-light weight and high strength—can be functionally translated into next-generation therapeutic carriers. This involves a paradigm shift from traditional, passive drug carriers to active, "smart" systems where the carrier itself contributes to the therapeutic outcome [34] [35].
The following sections address specific experimental challenges, provide detailed protocols, and list critical reagents to support your research in this emerging field.
Troubleshooting Guides & FAQs
FAQ 1: How can we adapt the high strength-to-weight ratio of carbon nanolattices for drug delivery applications?
The high strength-to-weight ratio, a key feature of ML-optimized carbon nanolattices [1], is directly translatable to drug delivery. This property allows for the design of carriers that are robust enough to survive the circulatory system and reach their target, yet light enough for efficient distribution. Furthermore, the extensive surface area and porosity inherent in these nanolattices can be harnessed for high-capacity drug loading, moving towards minimal-carrier drug delivery systems (MCDDS) that reduce excipient burden and potential toxicity [35].
FAQ 2: Our nanocarrier shows high drug loading but premature release. How can this be resolved?
Premature release is a common challenge when using highly porous carriers. Solution strategies include:
- Stimuli-Responsive Gatekeeping: Incorporate a stimuli-sensitive coating or moieties that remain sealed during circulation but open at the target site. For example, diselenide-containing nanocarriers disassemble and release their payload upon exposure to the high ROS levels found in the tumor microenvironment [34].
- Surface Functionalization: Cloak the nanolattice with a cancer-cell-derived membrane fragment. This biomimetic approach can enhance target specificity and prevent off-target release [34].
- Cross-linking: Gently cross-link the porous structure of the carrier using biodegradable linkers (e.g., disulfide bonds) that break under specific biological conditions, thereby controlling the release kinetics [36].
FAQ 3: We are encountering high toxicity with our first-generation nanocarrier. What are the potential causes?
Toxicity can stem from the carrier material itself or its degradation products. To address this:
- Shift to Bioactive/Pharmacoactive Carriers: Instead of inert materials, use carriers with inherent therapeutic benefits. For instance, Selenium (Se) or Manganese Dioxide (MnO₂) nanoparticles not only serve as structural carriers but also act as Reactive Oxygen Species (ROS) scavengers, protecting healthy tissues from oxidative stress and reducing side effects [34].
- Use Biodegradable Components: Prioritize materials that break down into non-toxic, metabolizable byproducts. This avoids long-term accumulation and associated toxicity [35].
- Employ Minimal-Carrier Designs: Formulate drugs into self-assembling nanoparticles that require minimal or no exogenous carrier materials, thereby eliminating toxicity from excipients [35].
Key Experimental Protocols
Protocol for Fabricating an ML-Optimized Carbon Nanolattice Carrier
This protocol outlines the synthesis of a carbon-based nanolattice drug carrier based on a design optimized by a multi-objective Bayesian algorithm [1].
Materials: Precursor polymer resin (e.g., photoresist), Solvents (e.g., isopropanol), Supercritical CO₂ drying system, Two-photon polymerization 3D printer.
Method:
- Digital Design Import: Load the ML-optimized lattice geometry (e.g., STL file) into the two-photon polymerization printer software. The algorithm predicts geometries that enhance stress distribution and strength-to-weight ratios [1].
- Two-Photon Polymerization: Fabricate the polymer template by focusing a laser beam into the precursor resin according to the digital design. This creates a 3D nanolattice structure with high precision [1].
- Solvent Development: Immerse the printed structure in a suitable solvent (e.g., isopropanol) to remove non-polymerized resin.
- Supercritical Drying: Transfer the gel-like structure to a supercritical CO₂ drying chamber. This critical step removes the liquid solvent without causing capillary forces that would collapse the delicate porous structure, resulting in a stable aerogel-like nanolattice [36].
- Pyrolysis (Optional): For enhanced mechanical strength, pyrolyze the polymer lattice in an inert atmosphere to convert it into a carbon nanolattice.
Troubleshooting:
- Structural Collapse: Ensure the supercritical drying process is correctly calibrated. Incomplete solvent exchange or rapid pressure changes can cause pore collapse.
- Poor Resolution: Optimize laser power and scanning speed in the two-photon printer to accurately reproduce the ML-designed features.
Protocol for Evaluating ROS-Scavenging Activity of a Therapeutic Carrier
This protocol assesses the inherent bioactivity of a carrier material, such as one made from MnO₂, by measuring its ability to scavenge hydrogen peroxide (H₂O₂), a common ROS [34].
Materials: Hydrogen peroxide (H₂O₂) solution, Colorimetric peroxide probe (e.g., Titanium oxysulfate), Phosphate Buffered Saline (PBS), UV-Vis spectrophotometer or microplate reader.
Method:
- Sample Preparation: Prepare a suspension of your ROS-scavenging nanocarrier (e.g., MnO₂ nanoparticles) in PBS. Create a control group with PBS only.
- Reaction Setup: In a series of tubes or a microplate, mix a known concentration of H₂O₂ (e.g., 100 µM) with either the nanocarrier suspension or the PBS control.
- Incubation: Allow the reaction to proceed at 37°C for a set period (e.g., 30 minutes).
- Quantification: Add a colorimetric peroxide probe to each mixture. The probe reacts with residual H₂O₂ to produce a colored product.
- Measurement: Measure the absorbance of the solution using a spectrophotometer. A lower absorbance in the nanocarrier sample compared to the control indicates successful scavenging of H₂O₂.
Analysis:
The scavenging efficiency can be calculated as:
Scavenging Efficiency (%) = [1 - (Abs_sample / Abs_control)] * 100
Visualization of Concepts and Workflows
Therapeutic Carrier Design Workflow
This diagram illustrates the integrated workflow of using machine learning to design a nanocarrier with inherent therapeutic functions.
ROS-Scavenging Signaling Pathway
This diagram shows the mechanism by which a therapeutic carrier, such as a MnO₂ or Se-based nanoparticle, scavenges Reactive Oxygen Species (ROS) in the Tumor Microenvironment (TME).
The Scientist's Toolkit: Research Reagent Solutions
The following table details key materials used in the synthesis and functionalization of advanced therapeutic nanocarriers.
Table 1: Essential Research Reagents for Advanced Therapeutic Carrier Development
| Item Name | Function/Application | Key Characteristics |
|---|---|---|
| Two-Photon Polymerization Printer | Fabrication of complex 3D nanolattice structures from a digital ML model. | Enables high-resolution 3D printing at micro and nano scales [1]. |
| Selenium (Se) Nanoparticles | Acts as a bioactive carrier with inherent ROS-scavenging ability. | Diselenide bonds are cleaved by oxidants like H₂O₂, enabling stimulus-responsive drug release and antioxidant effects [34]. |
| Manganese Dioxide (MnO₂) Nanoparticles | Serves as a therapeutic carrier that modulates the tumor microenvironment. | Catalyzes the decomposition of H₂O₂ into oxygen, scavenging ROS and alleviating hypoxia [34]. |
| Nanohybrid Aerogel Components | Creates ultra-lightweight, highly porous platforms for high-capacity drug loading. | Composed of materials like nanocellulose or graphene; offers ultra-low density, high porosity, and large surface area [36]. |
| Supercritical CO₂ Dryer | Drying of synthesized gel nanostructures without pore collapse. | Essential for producing aerogel-based carriers by replacing solvent with gas without damaging the porous structure [36]. |
| Multi-objective Bayesian Optimization Algorithm | Computational tool for designing nanolattice geometries with optimal properties. | Efficiently predicts geometries that enhance stress distribution and strength-to-weight ratio using limited, high-quality data [1]. |
Overcoming Synthesis and Scalability Challenges
Optimizing Complex Multivariable Systems with Limited Data
Troubleshooting Guides
Problem 1: Algorithm Fails to Escape Local Optima
Q: My optimization algorithm appears to be trapped in a local optimum and cannot find a globally superior solution. What can I do?
A: This is a common challenge when the search space is highly nonlinear. Implement mechanisms like local backpropagation and conditional selection to help the algorithm escape local maxima [37].
- Solution 1: Enable Local Backpropagation: Configure your tree search to update visitation data only between the root and the selected leaf node, rather than the entire path. This prevents irrelevant nodes from influencing the current decision and creates local gradients that can guide the search away from the current optimum [37].
- Solution 2: Implement Conditional Selection: During the tree search, if the root node's value (based on a metric like DUCB) is higher than all leaf nodes, continue the search from the same root. If a leaf node has a higher value, make it the new root. This encourages the exploration of higher-value regions [37].
Problem 2: Poor Performance in High-Dimensional Spaces
Q: My surrogate model's performance and the quality of discovered solutions degrade significantly as the dimensionality of the problem increases beyond 100 dimensions.
A: Traditional models struggle with the "curse of dimensionality." Transition to a deep neural network (DNN) surrogate model within an active optimization pipeline [37].
- Solution 1: Utilize a DNN Surrogate: DNNs are better suited for approximating complex, high-dimensional nonlinear distributions compared to models that rely on strong prior assumptions or manual feature engineering [37].
- Solution 2: Adopt the DANTE Pipeline: Employ a pipeline that combines a DNN surrogate with a tree search guided by a data-driven upper confidence bound (DUCB). This method has been validated to find superior solutions in problems with up to 2,000 dimensions, starting with only about 200 initial data points [37].
Problem 3: Optimization is Too Data-Intensive
Q: The real-world experiments or simulations in my nanolattice design project are extremely costly. How can I optimize with minimal data?
A: Leverage Multi-objective Bayesian Optimization (MBO) which is designed for high-quality, small datasets [3] [1].
- Solution: Implement Multi-objective Bayesian Optimization: This algorithm can effectively expand a Pareto optimum surface using a small initial dataset. For example, successful generative design of nanolattices has been achieved starting with only 400 data points from Finite Element Analysis, far fewer than the 20,000+ points required by some other algorithms [3] [1].
Frequently Asked Questions (FAQs)
FAQ 1: What is the difference between Bayesian Optimization and the DANTE pipeline?
A: While both are active optimization frameworks, Bayesian Optimization (BO) primarily utilizes kernel methods and uncertainty-based acquisition functions [37]. DANTE generalizes this approach by employing a deep neural surrogate model and a tree search exploration method modulated by a data-driven UCB, which enhances its ability to handle high-dimensional, nonconvex problems with limited data [37].
FAQ 2: What are the minimum contrast ratio requirements for diagrams and charts?
A: To ensure accessibility for all researchers, visual elements must meet WCAG 2 AA guidelines [38]. The minimum contrast ratios between text and background colors are:
- Standard Text: At least 4.5:1
- Large-Scale Text (approx. 18pt+ or 14pt+bold): At least 3:1 [38]
FAQ 3: How do I validate optimized designs experimentally?
A: The standard workflow involves:
- Generative Modeling: Use an optimizer (e.g., MBO) to produce optimal unit cell geometries [3].
- Additive Manufacturing: Fabricate the designs using Two-Photon Polymerization (2PP) at the micro/nano scale [3] [1].
- Pyrolysis: Convert the 3D-printed polymer structure into a glassy carbon nanolattice by heating it to 900°C in an inert atmosphere, which shrinks the part to about 20% of its original size [3].
- Mechanical Testing: Perform uniaxial compression tests to measure the Young's Modulus and ultimate strength of the fabricated nanolattices [3].
Experimental Data & Protocols
The following table summarizes key performance data for carbon nanolattices designed using machine learning optimization, benchmarked against standard designs and common materials [3].
Table 1: Performance Metrics of Optimized Carbon Nanolattices
| Metric | Standard CFCC Nanolattice (600nm strut) | MBO-Optimized CFCC Nanolattice (600nm strut) | Improvement | Material Benchmark (for context) |
|---|---|---|---|---|
| Specific Strength | Not Reported (Base) | 2.03 MPa m³ kg⁻¹ (Max value) | >100% | ~5x higher than titanium [1] |
| Young's Modulus | Base | Up to 68% higher | +68% | Comparable to soft woods (2.0-3.5 GPa) [3] |
| Compressive Strength | Base | Up to 118% higher | +118% | Strength of carbon steel (180-360 MPa) at Styrofoam density (125-215 kg/m³) [3] [1] |
| Initial Training Data Size | N/A | 400 data points (for MBO) | N/A | Far less data-intensive than other algorithms [1] |
Detailed Experimental Protocol: Multi-objective Bayesian Optimization for Nanolattices
Objective: To generate a carbon nanolattice design that maximizes specific stiffness and strength under compression and shear while minimizing density [3].
Methodology:
- Parametrize Geometry: Define the lattice strut using a Bézier curve controlled by four points randomly distributed within the design space [3].
- Generate Initial Dataset: Create 400 random geometries and use Finite Element Analysis (FEA) to compute their relative density (( \rho )), effective Young's modulus (( E )), and effective shear modulus (( \mu )) [3].
- Iterative Optimization: Use the Multi-objective Bayesian Optimization algorithm to iteratively expand the 3D hypervolume defined by the normalized ( E ), ( \mu ), and ( \rho ) until a Pareto surface is identified. This typically requires about 100 iterations via MBO [3].
- Design Selection: From the Pareto-optimal designs, select a structure that maximizes the function ( [E/\rho \cdot \mu/\rho]^{0.5} ) to ensure high performance under multimodal loading [3].
- Fabrication and Testing:
Workflow and System Diagrams
Diagram 1: DANTE Optimization Pipeline
Diagram 2: Neural-Surrogate-Guided Tree Exploration (NTE)
The Scientist's Toolkit: Research Reagent Solutions
Table 2: Essential Materials and Tools for ML-Optimized Nanolattice Research
| Item | Function / Description | Key Detail |
|---|---|---|
| Two-Photon Polymerization (2PP) System | A high-resolution 3D printer for fabricating nano- and micro-architected structures from a photosensitive polymer resin [3] [1]. | Enables creation of complex, optimized geometries with strut diameters as small as 300 nm [3]. |
| Pyrolysis Furnace | A high-temperature oven with an inert atmosphere used to convert 3D-printed polymer structures into glassy carbon [3]. | Process typically occurs at 900°C, converting polymer to a carbon structure with high sp² bond content, shrinking parts to ~20% original size [3]. |
| Finite Element Analysis (FEA) Software | Software used to simulate the mechanical response (e.g., Young's modulus, shear modulus) of generated lattice designs under load [3]. | Generates the high-quality data needed to train the machine learning optimizer where physical experiments are too costly [3]. |
| Multi-objective Bayesian Optimization Algorithm | A machine learning algorithm that iteratively searches for the best design candidates by balancing multiple, often competing, objectives [3]. | Effective with small, high-quality datasets (~400 points); used to maximize stiffness and strength while minimizing density [3] [1]. |
| Nanomechanical Testing System | A device for performing uniaxial compression tests on micro-scale samples to measure mechanical properties like Young's modulus and compressive strength [3]. | Essential for experimentally validating the performance of optimized nanolattices fabricated via 2PP and pyrolysis [3]. |
Addressing Nodal Stress Concentrations through Algorithmic Redesign
Frequently Asked Questions (FAQs)
1. What are nodal stress concentrations and why are they a critical failure point in nanolattices?
Nodal stress concentrations are areas of significantly elevated stress that occur at the intersections or joints (nodes) of a nanolattice structure. Under compressive load, these sharp corners and intersections act as stress risers, leading to early local failure and crack initiation, which limits the overall strength and durability of the material [1] [4]. In traditional lattice designs with sharp corners, failure typically begins at these nodes.
2. How can machine learning redesign nanolattices to mitigate these stress concentrations?
Machine learning, specifically Multi-Objective Bayesian Optimization, can be used to algorithmically explore millions of potential beam shapes and node topologies. It learns which design changes improve performance and predicts non-intuitive geometries that distribute stress more evenly. The resulting designs often feature curved struts, thickened regions near nodes, and slenderized mid-spans, which neutralizes stress concentrations and changes the failure mode from "crack at the joint" to "shared load distribution" [1] [4].
3. What quantitative performance improvements can be expected from ML-optimized designs?
Experimental testing has demonstrated that optimized nanolattices can achieve the following improvements over standard designs at equal density [6]:
- 118% increase in strength
- 68% increase in Young's Modulus (stiffness) These designs achieve an ultrahigh specific strength of up to 2.03 MPa m³ kg⁻¹ [6].
4. Which fabrication techniques are essential for producing these optimized nanolattices?
The primary technique is Two-Photon Polymerization (2PP), a high-resolution 3D printing method that uses a laser to write intricate nanoscale designs into a photosensitive resin. This is followed by Pyrolysis, a heat treatment process (typically at 900°C in a vacuum) that converts the polymer structure into a glassy, sp²-rich pyrolytic carbon, significantly enhancing its mechanical properties [19] [6].
Troubleshooting Guides
Problem: Premature Fracture at Lattice Nodes During Compression Testing
Symptoms:
- Cracks first appear at the intersections of struts.
- Overall compressive strength is lower than simulated values.
- Brittle failure occurs with minimal deformation.
Possible Causes and Solutions:
| Cause | Solution |
|---|---|
| Sharp nodal junctions in the design. | Implement algorithmic smoothing. Use the ML optimizer to generate fillets and curved transitions at nodes. The Bayesian optimization algorithm is particularly effective at identifying optimal curvature to reduce stress risers [1] [4]. |
| Fabrication defects at nodes from the 2PP process. | Optimize printing parameters. Calibrate laser power and scanning speed to ensure complete polymerization at nodal points, which often have higher material volume. Conduct SEM imaging to verify print fidelity [6]. |
| Inadequate strut diameter relative to nodal mass. | Use ML to re-balance the mass distribution. The optimization algorithm can be constrained to maintain a minimum strut diameter while thickening nodal areas to create a more uniform stress distribution [4]. |
Problem: Structural Warping or Collapse During Pyrolysis
Symptoms:
- The final carbon structure is distorted or misshapen.
- The lattice exhibits uneven shrinkage.
- Struts are fractured or collapsed.
Possible Causes and Solutions:
| Cause | Solution |
|---|---|
| Excessive heating rate during pyrolysis. | Implement a controlled, gradual temperature ramp. A slower ramp (e.g., 5-10°C per minute) up to the 900°C pyrolysis temperature allows for more uniform conversion and reduces internal stresses [19]. |
| Non-uniform strut thickness creating differential shrinkage. | Review and optimize the initial design for uniformity. The ML design process should include constraints on the maximum thickness variation between connecting struts to ensure consistent material behavior during pyrolysis [4]. |
| Resin contamination or incomplete development. | Ensure pristine resin and thorough development. Filter the photoresist before use and follow a strict post-development cleaning process to remove all uncured resin, which can lead to uneven carbonization [19]. |
Problem: Machine Learning Model Suggests Designs That Are Unmanufacturable
Symptoms:
- The optimized design has features smaller than the resolution of the 2PP printer.
- The design includes unsupported overhangs that cannot be printed.
- Simulation performance and experimental validation do not match.
Possible Causes and Solutions:
| Cause | Solution |
|---|---|
| Lack of manufacturing constraints in the ML model. | Incorporate manufacturability as an objective. Add constraints to the optimization algorithm for minimum printable feature size (e.g., > 300 nm) and maximum overhang angle. This ensures the proposed designs are physically realizable [6] [4]. |
| Discrepancy between simulation physics and real-world behavior. | Calibrate the simulation model with experimental data. Use data from simple test structures to refine the finite element analysis (FEA) parameters, such as material properties of the polymer precursor, to improve the accuracy of the virtual testing environment [1]. |
Experimental Protocols
Protocol 1: Fabrication of Carbon Nanolattices via TPL and Pyrolysis
This is a detailed methodology for creating pyrolytic carbon nanolattices, as cited in the literature [19].
1. Direct Laser Writing with Two-Photon Lithography (TPL):
- Equipment: Two-photon lithography system (e.g., Nanoscribe Photonic Professional GT2).
- Material: IP-Dip photoresist.
- Procedure: a. Design a 3D model of the nanolattice (e.g., 5x5x5 unit cells) with target unit cell dimensions of ~2 μm. b. Use the high-speed galvo mode to write the structure layer-by-layer into the photoresist. This mode produces beams with circular cross-sections. c. Develop the printed structure in a propylene glycol monomethyl ether acetate (PGMEA) solution to remove uncured resin. d. Rinse the structure with isopropanol and allow it to dry.
2. Pyrolysis:
- Equipment: Tube furnace with vacuum capability.
- Procedure: a. Place the polymer lattice in the furnace. b. Evacuate the tube and maintain a vacuum or inert atmosphere (e.g., Argon gas). c. Heat the furnace to 900°C using a controlled heating ramp (e.g., 5-10°C per minute) to prevent warping. d. Hold at the peak temperature for one hour to ensure complete conversion. e. Cool the furnace slowly to room temperature. The resulting structure will be a pyrolytic carbon nanolattice, typically shrunk to about 20% of its original printed size [4].
Protocol 2: Multi-Objective Bayesian Optimization for Lattice Design
This protocol outlines the ML-driven design process used to create optimized geometries [1] [6].
1. Problem Formulation:
- Variables: Define the geometric parameters of the unit cell (e.g., beam curvature, nodal fillet radius, strut diameter).
- Objective Function: Elected functional combination of variables to be maximized. For example:
Maximize(Specific Strength) - Constraints: Combinations of variables expressed as inequalities that must be satisfied.
Density < 215 kg/m³Minimum_Beam_Diameter ≥ 300 nm
2. Optimization Loop:
- Algorithm: Multi-Objective Bayesian Optimization.
- Process: a. Start with an initial dataset of ~400 design configurations and their simulated performance from Finite Element Analysis (FEA) [1]. b. The algorithm uses this data to build a probabilistic model of the design space. c. It then predicts which new design configurations are most likely to improve the objective (specific strength) while satisfying constraints. d. These candidate designs are simulated, and the results are added to the dataset. e. Steps b-d are repeated iteratively. The algorithm "learns" from each iteration, progressively discovering higher-performing, non-intuitive geometries that redistribute stress away from nodes.
Quantitative Performance Data
The table below summarizes key mechanical properties of carbon nanolattices reported in recent studies, illustrating the impact of algorithmic redesign.
Table 1: Mechanical Properties of Carbon Nanolattices
| Material / Design Type | Density (kg/m³) | Compressive Strength (MPa) | Specific Strength (MPa m³ kg⁻¹) | Key Characteristics |
|---|---|---|---|---|
| ML-Optimized Carbon Nanolattice [6] | 125 - 215 | 180 - 360 | ≤ 2.03 | AI-designed geometries; reduced stress concentrations; sp²-rich carbon. |
| Traditional Pyrolytic Carbon (Octet/ISO) [19] | 240 - 1000 | 50 - 1900 | ≤ 1.90 | Designable topologies; near-theoretical strength at high density. |
| Titanium (Ti-6Al-4V) [1] | 4430 | ~1000 | ~0.22 | Reference common engineering material. |
Research Workflow and Material Solutions
Experimental Workflow Diagram
Title: ML-Driven Nanolattice Research Workflow
The Scientist's Toolkit: Essential Research Reagents & Materials
Table 2: Key Materials and Equipment for Nanolattice Research
| Item | Function / Description |
|---|---|
| IP-Dip Photoresist | A high-resolution negative-tone photoresist used as the polymer precursor in Two-Photon Lithography systems [19]. |
| Two-Photon Lithography System | A high-precision 3D printer (e.g., Nanoscribe) that uses a laser to solidify photosensitive resin at the nanoscale, enabling the creation of complex lattice structures [1] [8]. |
| Tube Furnace | A high-temperature oven capable of operating under vacuum or inert gas, required for the pyrolysis process that converts polymer lattices into pyrolytic carbon [19]. |
| Multi-Objective Bayesian Optimization Software | The algorithmic core that explores the design space, balancing competing objectives like strength and density to find optimal geometries that minimize stress concentrations [1] [6]. |
| Finite Element Analysis (FEA) Software | Used to simulate the mechanical performance (stress, strain) of virtual lattice models, providing the data needed to train the machine learning algorithm without physical testing [1]. |
Achieving Millimeter-Scale Structures with Nanometer Precision
Frequently Asked Questions (FAQs)
Q1: What does "Achieving Millimeter-Scale Structures with Nanometer Precision" mean in the context of carbon nanolattices? This refers to the challenge of creating material components that are large enough to handle and use in practical applications (millimeter-scale or larger) while ensuring that their internal nanoscale architecture is fabricated with extreme accuracy (nanometer precision). In carbon nanolattice research, the exceptional material properties like high strength-to-weight ratios stem from this precise nanoscale geometry. The core problem is that even minuscule defects or variations at the nanoscale can propagate and compromise the mechanical performance of the entire macroscopic structure [4] [12].
Q2: Our team is new to this field. What is the fundamental workflow for creating such structures? The standard integrated workflow combines machine learning (ML) for design with advanced fabrication and metrology. The process begins by using a multi-objective Bayesian optimization algorithm to design the nanolattice geometry. This ML model predicts shapes that optimally distribute stress [4] [12]. The winning design is then fabricated using a technique called two-photon polymerization (2PP), a form of high-resolution 3D printing that can create nanoscale features. The printed polymer structure is subsequently converted into glassy carbon through a heating process called pyrolysis [4] [1]. Finally, high-resolution metrology tools like scanning electron microscopy (SEM) are used to verify that the fabricated structure matches the designed nanometer-precise geometry [39] [40].
Q3: What are the most common failure modes in Two-Photon Polymerization (2PP) for this application? Failures in 2PP often relate to process parameters and material behavior. The table below summarizes key issues and their solutions.
| Common Failure Mode | Root Cause | Troubleshooting Solution |
|---|---|---|
| Structural Collapse | Inadequate support for overhanging features or weak polymerized resin. | Optimize support structure design within the ML algorithm; increase laser power slightly to achieve fuller polymerization [4]. |
| Shape Distortion | Laser power too high, causing over-curing and unwanted shrinkage; or incorrect slicing parameters for the 3D model. | Calibrate laser power and exposure time for the specific resin; verify digital model resolution matches printer capabilities [41]. |
| Failed Pyrolysis | Rapid heating or cooling rates, or structures that are too dense, leading to cracking or warping. | Implement a controlled, gradual pyrolysis ramp cycle; consider designing less massive unit cells to allow for uniform gas escape during conversion [4]. |
Q4: How can we verify nanometer precision over a full millimeter-scale structure? This is a primary challenge in nanometrology. It is not feasible to perform a high-resolution scan of the entire millimeter-scale surface, as this would generate trillions of data points [40]. The solution is a combination of strategic sampling and computational analysis.
- High-Resolution Spot-Checks: Use tools like Scanning Electron Microscopy (SEM) or Atomic Force Microscopy (AFM) to capture high-resolution, nanometer-precise images of several critical, smaller regions [39] [40].
- Large-Area Measurement: Use faster, large-area techniques like imaging ellipsometry to get lower-resolution data across the entire structure. This can cover up to 47% of a wafer surface [42].
- Computational Stitching: Employ advanced computational methods that stitch together the high-resolution data from spot-checks with the large-area data. This creates a super-resolution model that estimates nanometer-scale precision across the entire millimeter-scale component [40].
Q5: Our ML-designed nanolattices are theoretically strong but fail prematurely during mechanical testing. What could be wrong? This typically indicates a disconnect between the simulated model and the physical fabrication process. The optimizer may be designing features that are highly susceptible to real-world fabrication defects.
- Action 1: Refine the ML Training Data. Ensure your finite element analysis (FEA) simulations used to train the model incorporate realistic stochastic defects, such as Line Edge Roughness (LER) and intrinsic stress concentrations at the nanoscale. The algorithm may be designing shapes that are only optimal for perfect geometries [40].
- Action 2: Correlate Metrology with Failure Points. Use high-resolution SEM to inspect the failed structure. Identify if failure initiated at a specific node or strut, and then compare this location to the ML model's stress prediction. This will help you identify which geometric features are most vulnerable to manufacturing variations [12] [40].
Experimental Protocols & Workflows
Protocol 1: Integrated ML and Fabrication Workflow for Carbon Nanolattices
This protocol details the end-to-end process for designing, manufacturing, and processing AI-optimized carbon nanolattices.
Title: Integrated ML-Driven Nanolattice Development Workflow
Procedure:
- Define Material Objective: Formulate the goal using specific, conflicting targets for the multi-objective Bayesian optimizer. Example: "Maximize specific strength at density < 200 kg/m³, under combined compression and shear" [4].
- ML Design Phase:
- Finite Element Analysis (FEA): Generate a high-quality dataset of ~400 different lattice geometries and simulate their mechanical performance under the target conditions [12] [1].
- Bayesian Optimization: Input the FEA dataset into the multi-objective Bayesian optimization algorithm. The algorithm will learn from the simulations and propose new, non-intuitive lattice geometries that thicken near nodes and slenderize in mid-spans to neutralize stress concentrations [4] [12].
- Fabrication Phase:
- Two-Photon Polymerization (2PP): Use a system like a Nanoscribe Photonic Professional GT2 to "write" the ML-designed structure into a photosensitive resin. Key parameters include a laser wavelength tuned for two-photon absorption and voxel sizes of a few hundred nanometers [4] [41] [8].
- Pyrolysis: Place the polymer structure in a furnace with an inert atmosphere. Use a controlled thermal ramp to heat the structure to high temperatures (e.g., 900-1000°C). This process converts the polymer into a glassy, sp²-rich carbon and shrinks the entire structure to about 20% of its original printed size, locking in the final atomic architecture [4].
- Metrology & Validation:
- Use Scanning Electron Microscopy (SEM) to image the fabricated nanolattice. Compare the physical structure's dimensions (strut thickness, node geometry) and surface texture against the ML model's design with nanometer precision [12] [40].
- If the physical structure deviates from the design or shows unexpected failures, feed this data back to refine the FEA and ML model, creating a closed-loop learning system [40].
Protocol 2: Nanometrology for Large-Area Precision Verification
This protocol outlines how to verify nanometer-scale precision across a millimeter-scale sample.
Procedure:
- Sample Preparation: Mount the millimeter-scale nanolattice sample securely to prevent vibration or movement during measurement.
- Strategic High-Resolution Sampling:
- Use a high-resolution tool like an Atomic Force Microscope (AFM) or Scanning Electron Microscope (SEM).
- Define a grid of critical regions of interest (ROIs) for inspection. These should include areas around nodes, mid-spans of struts, and any complex geometric features identified by the ML model as high-stress [40].
- Acquire high-resolution images of these ROIs with a pixel size on the nanometer scale.
- Large-Area Low-Resolution Mapping:
- Use a faster, large-area technique like imaging ellipsometry to scan the entire millimeter-scale surface. This provides full coverage data on parameters like coating thickness and gross structural defects, albeit at a lower resolution [42].
- Computational Stitching and Analysis:
- Employ Fourier spectra stitching or other advanced computational methods. This process integrates the high-resolution data from the ROIs with the low-resolution large-area map to generate a synthesized, high-resolution model of the entire structure [40].
- From this model, extract quantitative metrics like surface roughness, edge placement error, and critical dimension (CD) uniformity across the full millimeter scale.
Data Presentation
Table 1: Key Performance Metrics of AI-Designed Carbon Nanolattices
The following table quantifies the exceptional properties achieved through the ML-optimization process, comparing them to conventional engineering materials.
| Material | Density (kg/m³) | Compressive Strength (MPa) | Specific Strength (MPa·m³/kg) | Key Advantage |
|---|---|---|---|---|
| AI-Designed Carbon Nanolattice | 125–215 | 180–360 | ~2.03 | Record specific strength; 5x higher than titanium [12] [1]. |
| Structural Carbon Steel | ~7,850 | 180–360 | ~0.03 | Baseline for strength comparison [4] [43]. |
| Aerospace-Grade Titanium (Ti-6Al-4V) | ~4,430 | ~1,000 | ~0.23 | Benchmark lightweight, high-strength metal [12]. |
| Styrofoam | ~125 | Negligible | Negligible | Baseline for low density [4] [8]. |
| Standard Nano-Lattice (for comparison) | ~200 | ~80-170 (pre-optimization) | <1.0 (pre-optimization) | Highlights ML improvement: 118% higher strength than standard geometries [4]. |
Table 2: Research Reagent and Equipment Solutions
This table lists the essential tools and materials required for research into ML-optimized nanolattices.
| Item | Function/Description | Example Use-Case in Workflow |
|---|---|---|
| Multi-Objective Bayesian Optimization Algorithm | Machine learning algorithm that efficiently explores design spaces to find optimal trade-offs between conflicting objectives (e.g., strength vs. density). | Proposes non-intuitive nanolattice geometries that outperform standard designs by over 100% [4] [12]. |
| Two-Photon Polymerization (2PP) 3D Printer | High-resolution additive manufacturing system that uses a laser to solidify a photosensitive resin at the nanoscale, enabling 3D complex nanostructures. | Fabricates the ML-designed polymer template with features below 300 nm [12] [41] [8]. |
| Photosensitive Resin (for 2PP) | A polymer that cures (solidifies) when exposed to specific wavelengths of light, forming the "green body" of the nanolattice. | The raw material used in the 2PP printer to create the initial structure [4] [41]. |
| Tube Furnace for Pyrolysis | A high-temperature furnace capable of operating under an inert atmosphere (e.g., Argon or Nitrogen). | Converts the polymer lattice into a strong, glassy carbon structure through controlled thermal decomposition [4]. |
| Scanning Electron Microscope (SEM) | A microscope that uses a focused beam of electrons to image surfaces with nanometer resolution. | Critical for post-fabrication validation of nanoscale features and for identifying failure points in tested samples [39] [40]. |
| Atomic Force Microscope (AFM) | A microscope that uses a physical probe to scan surfaces, providing 3D topography with atomic-level resolution. | Measures surface roughness and mechanical properties of the nanolattice at the nanoscale [39] [40]. |
Balancing Geometric Fidelity, Material Purity, and Manufacturing Cost
Troubleshooting Guides and FAQs
Frequently Asked Questions
Q1: How do I quantify the trade-off between geometric accuracy and production time in laser powder bed fusion (PBF-LB/M)? The trade-off is directly governed by your chosen layer thickness. A thinner layer improves geometric fidelity by reducing the stair-step effect on curved surfaces but increases build time. A thicker layer does the opposite. You can calculate the volumetric build rate (Bᵢ) to quantify this: Bᵢ = v ⋅ h ⋅ t, where 'v' is scanning speed, 'h' is feature height, and 't' is layer thickness [44]. A higher build rate indicates faster, more cost-effective production but potentially lower resolution.
Q2: Our machine learning models have designed a strong, lightweight nanolattice, but it fails during physical testing due to stress concentrations. What is the cause? This failure is likely due to traditional lattice geometries with sharp intersections and corners, which are points of high-stress concentration leading to premature breakage [1] [45]. The solution is to integrate a multi-objective Bayesian optimization algorithm into your design workflow. This machine learning method can predict entirely new, smoothed lattice geometries that distribute stress more evenly, more than doubling the strength of existing designs [1].
Q3: How can I apply Geometric Dimensioning and Tolerancing (GD&T) to control manufacturing costs for complex nanolattice components? GD&T helps control costs by allowing you to specify tolerances only on features critical to your component's function. Instead of applying universally tight (and expensive) tolerances, use a feature-targeted tolerance application. This approach provides greater control over critical dimensions, such as the strut angles in a nanolattice, while allowing more relaxed tolerances on non-critical features, enhancing production efficiency without compromising fit or function [46].
Q4: What is a practical method for evaluating the manufacturability of a complex part design early in the research phase? You can perform a preliminary evaluation using a linear complexity index. This index, calculated for each build direction (X, Y, Z) as C(dₓ) = LX₀ / LX_max, indicates how much of the machine's build volume a feature consumes [44]. Values close to 1 mean the part uses most of the machine's capacity in that direction, suggesting higher manufacturing complexity and longer build times. This simple metric helps you assess and optimize part geometry before committing to a physical build.
Troubleshooting Common Experimental Issues
Issue 1: High Volumetric Error and Poor Surface Finish on Curved Surfaces
- Problem: The manufactured nanolattice exhibits significant stair-stepping and poor geometric fidelity.
- Solution: Reduce the layer thickness (
t) in your PBF-LB/M process parameters. This directly improves resolution and reduces the stair-step effect by creating finer layers [44]. - Protocol:
- In your slicing software, identify the parameter for layer thickness (e.g., from 60 µm to 30 µm).
- Note that this change will increase the total number of layers and the calculated build time.
- To mitigate the time increase, you can simultaneously adjust other parameters, such as a moderate increase in laser scan speed (
v), if the material and machine allow. - Run a test build on a representative sample (e.g., a small lattice cube) to validate the improvement in surface quality.
Issue 2: Premature Mechanical Failure of Nanolattice Prototypes
- Problem: Physical tests reveal failure at the nodes or strut intersections, not achieving the strength predicted by simulation.
- Solution: Redesign the lattice unit cell using a machine learning-driven approach to minimize stress concentrations [1] [45].
- Protocol:
- Generate a dataset of ~400 different lattice geometries and simulate their stress distributions using finite element analysis (FEA).
- Feed this dataset into a multi-objective Bayesian optimization algorithm, with objectives to maximize strength-to-weight ratio and minimize maximum stress.
- Let the algorithm predict 3-5 optimal lattice geometries that your initial designs may not have considered.
- Select the top-performing design from the algorithm's prediction for prototype fabrication.
Issue 3: Escalating Manufacturing Costs for High-Precision Parts
- Problem: The cost to produce a part with the required geometric fidelity and material purity is prohibitively high.
- Solution: Systematically loosen non-critical tolerances and validate the cost impact using a digital twin [47] [46].
- Protocol:
- In your CAD model, identify all geometric tolerances and classify them as "critical" or "non-critical" for the part's primary function.
- Using a platform like aP Design, create a baseline scenario with all original, tight tolerances and note the estimated cost.
- Create a second scenario where you loosen the tolerances on non-critical features (e.g., changing a flatness tolerance from ±0.05 mm to ±0.1 mm).
- Run a comparative analysis of the two scenarios. The report will show the potential cost savings from the relaxed tolerances, helping you make a data-driven decision.
Quantitative Data for Process Parameter Selection
The following table summarizes key quantitative relationships to guide parameter selection.
Table 1: Key Process Parameters and Their Impact on Manufacturing Objectives
| Parameter | Definition | Impact on Geometric Fidelity | Impact on Manufacturing Cost & Time | Key Quantitative Relationship |
|---|---|---|---|---|
| Layer Thickness (t) | Height of each powder layer [44] | High Impact: Thinner layers reduce stair-step effect, improving accuracy [44] | High Impact: Thinner layers increase the number of layers and total build time, raising costs [44] | Build Rate (Bᵢ) = v ⋅ h ⋅ t [44] |
| Lattice Geometry | The architectural design of the unit cell (e.g., cubic, octet, ML-optimized) | Medium Impact: Smoothed, optimized geometries reduce stress concentrations [1] | Medium Impact: Complex shapes may require slower printing or more support, but ML can find designs that are both strong and efficient [45] | ML-optimized nanolattices can achieve 2.03 MPa·m³/kg specific strength, ~5x stronger than titanium [1] |
| Geometric Tolerances | Allowable variation in a part's form and size [47] | Direct Control: Tighter tolerances demand higher fidelity from the manufacturing process [46] | High Impact: Tolerances tighter than necessary exponentially increase cost due to specialized tools and higher scrap rates [46] | Use a feature-targeted approach instead of applying tight tolerances to all features universally [46] |
Experimental Protocols for Key Procedures
Protocol 1: Preliminary Manufacturability Evaluation Using Linear Complexity Index This protocol helps estimate build time and complexity before manufacturing.
- Import CAD Model: Load your part's 3D CAD file into a software like Netfabb.
- Orient the Part: Position the part within the virtual build chamber.
- Calculate Bounding Box: Use the software's analysis tool to generate the smallest possible bounding box that encloses your part.
- Measure and Calculate: For each axis (X, Y, Z):
- Measure the length of your part in that direction (
LX₀). - Measure the corresponding length of the bounding box (
LX_max). - Calculate the Linear Complexity Index: C(dₓ) = LX₀ / LX_max [44].
- Measure the length of your part in that direction (
- Interpret Results: A value of
C(d₂)(Z-axis) close to 1 indicates a tall part that will require many layers, suggesting a longer build time and higher cost.
Protocol 2: Machine Learning-Enhanced Design and Fabrication of a Nanolattice This protocol outlines the workflow for creating high-strength, lightweight nanolattices.
- Design of Experiment: Define a initial set of ~400 different unit cell geometries for your nanolattice.
- Finite Element Analysis (FEA): Run simulations on each design to collect high-quality data on their stress distributions and strength-to-weight ratios [1].
- Machine Learning Optimization: Input the FEA data into a multi-objective Bayesian optimization algorithm. The algorithm will learn from the data and predict new, high-performing geometries that were not in the initial set [1].
- Micro-Scale 3D Printing: Fabricate the top-performing designs predicted by the ML model using a two-photon polymerization 3D printer, which is capable of producing features at the nanoscale [1].
- Mechanical Validation: Perform physical compression/tensile tests on the fabricated prototypes to validate the ML model's predictions and measure the final specific strength [45].
Research Workflow and Material Solutions
Diagram 1: ML-Optimized Nanolattice Research Workflow
Table 2: Essential Research Reagent Solutions and Materials
| Item | Function in Research |
|---|---|
| Metal Powder (e.g., Stainless Steel, Titanium alloys) | The raw material for the PBF-LB/M process. Its purity and particle size distribution are critical for achieving final part density and mechanical properties [44]. |
| Two-Photon Polymerization 3D Printer | An advanced additive manufacturing system capable of printing at the micro and nanoscale, which is essential for fabricating the complex, optimized nanolattice designs [1]. |
| Multi-Objective Bayesian Optimization Algorithm | The core machine learning tool that efficiently explores the vast design space of possible lattice geometries to find optimal structures that balance strength, weight, and manufacturability [1] [45]. |
| Finite Element Analysis (FEA) Software | Software used to simulate the mechanical performance (e.g., stress, strain) of virtual lattice models, generating the high-quality dataset needed to train the machine learning algorithm [1]. |
| Geometric Dimensioning & Tolerancing (GD&T) Standard | A standardized system (e.g., ASME Y14.5) for defining tolerances on engineering drawings. It ensures design intent is communicated clearly, preventing costly manufacturing errors [47] [46]. |
Benchmarking Performance Against Existing Materials
Glossary of Key Metrics
The following table defines the core quantitative metrics used in evaluating mechanical performance, particularly for nano-architected materials.
| Metric | Definition | Formula | Key Application in Nanolattice Research |
|---|---|---|---|
| Specific Strength | The strength-to-density ratio of a material; its ability to withstand loads relative to its weight. | Strength / Density | A key performance indicator for lightweight aerospace and automotive components. Optimized carbon nanolattices have achieved an ultrahigh specific strength of 2.03 MPa m³ kg⁻¹ [6] [48] [2]. |
| Specific Stiffness | The stiffness-to-density ratio of a material; its resistance to deformation relative to its weight. | Stiffness / Density | Critical for structures where minimal deflection under load is required without adding mass. Also known as the modulus-to-density ratio. |
| Stiffness (k) | The resistance of an elastic body to deformation. Generally defined as the force required to cause a unit displacement. | ( k = F / δ ) where ( F ) is force and ( δ ) is deflection [49]. | In Finite Element Analysis (FEA), stiffness is derived from the spectral decomposition of the stiffness matrix, capturing both shape and material properties [50]. |
| Young's Modulus (E) | The modulus of elasticity, measuring a material's stiffness in tension or compression. It defines the relationship between stress and strain in the elastic region. | ( σ = E ϵ ) where ( σ ) is stress and ( ϵ ) is strain [51] [49]. | A measure of intrinsic material stiffness. In optimized carbon nanolattices, machine learning has led to a 118% increase in strength and a 68% improvement in Young's modulus [6] [52]. |
| Strength | The maximum stress a material can withstand before failure. | Stress = Force / Area [51] | For carbon nanolattices, compressive strength can range between 180–360 MPa, comparable to carbon steel, at densities similar to expanded polystyrene (125–215 kg m⁻³) [6]. |
Experimental Protocols for Metric Characterization
FAQ: How do I accurately measure the stiffness of a complex nanolattice structure?
Validating computational models requires correlating simulated stiffness with empirical data. The protocol below ensures reliable measurement.
Objective: To determine the experimental stiffness of a 3D-printed trabecular bone phantom (or nanolattice structure) via uniaxial compression testing and validate it against a simulated Finite Element Analysis (FEA) model [53].
Materials & Equipment:
- Fabricated Sample: Nanolattice or trabecular bone phantom (e.g., produced via Selective Laser Sintering (SLS) or Two-Photon Polymerization (2PP)) [53] [19].
- Mechanical Test Frame: System capable of uniaxial compression testing.
- μCT Scanner: For high-resolution 3D imaging of the printed structure [53].
Step-by-Step Procedure:
- Phantom Fabrication: Fabricate the nanolattice structure using a high-resolution method like 2PP, followed by pyrolysis at 900°C to convert the polymer into pyrolytic carbon [6] [19].
- Imaging and Model Generation: Scan the fabricated phantom using μCT. Use this scan data to generate a digital mesh model for FEA [53].
- Mechanical Testing:
- Place the phantom in the mechanical test frame.
- Apply a uniaxial compressive load.
- Record the resulting force-displacement data.
- Experimental Stiffness Calculation: Calculate the experimental stiffness (( k_{exp} )) from the linear elastic region of the force-displacement curve, where ( k = F / δ ) [49].
- In-Silico Simulation (FEA):
- Apply linear elastic μFEA to the digital model.
- Simulate the same compression and boundary conditions used in the physical test.
- Extract the simulated stiffness (( k_{FEA} )) from the model [53].
- Validation: Compare ( k{exp} ) and ( k{FEA} ) using statistical methods like Bland-Altman analysis. Good agreement (e.g., R² of 0.84) validates the FEA model for predicting mechanical properties [53].
FAQ: My material's strength is degrading unexpectedly during testing. How can I monitor damage evolution?
Unexpected failure often stems from progressive damage that begins early in the loading phase. A stiffness-sensing test can quantify this damage.
Objective: To perform a stiffness-sensing mechanical test for near-continuous measurement of damage evolution in a solid material [54].
Materials & Equipment:
- Test Specimen: Material sample (e.g., polymer, metal, composite).
- Universal Test Machine: Capable of applying a monotonic load with superimposed small unloading/reloading cycles.
Step-by-Step Procedure:
- Baseline Stiffness: Before applying significant load, perform a small load-unload cycle to measure the initial, undamaged stiffness, ( E_0 ) [54].
- Monotonic Loading with Superimposed Cycles: Subject the specimen to a continuously increasing strain or displacement. Throughout this monotonic loading, superimpose numerous, low-amplitude unloading/reloading cycles [54].
- Continuous Stiffness Extraction: For each unloading/reloading cycle, calculate the current effective elastic modulus, ( E ), from the slope of the stress-strain curve in that cycle.
- Damage Variable Calculation: Compute the damage variable, ( D ), after each cycle using the relationship: ( D = 1 - \frac{E}{E_0} ). This quantifies the material's state of damage, where D=0 is undamaged and D=1 is fully fractured [54].
- Analysis: Plot the damage variable ( D ) against the applied strain. This reveals the onset of damage (often much earlier than visible on the stress-strain curve) and its evolution toward failure [54].
The Scientist's Toolkit: Research Reagent Solutions
Essential materials and software used in the machine learning-driven development of carbon nanolattices.
| Item | Function in the Research Process |
|---|---|
| Two-Photon Polymerization (2PP) 3D Printer | A high-resolution lithographic technique for fabricating complex 3D nanolattice structures at the micro and nanoscale [6] [19]. |
| Pyrolytic Carbon | The constituent solid material created by pyrolyzing a polymer precursor at high temperature (e.g., 900°C). It provides high strength and structural integrity to the nanolattice [19]. |
| Bayesian Optimization Algorithm | A machine learning method used to efficiently explore the design space of lattice geometries with minimal data, predicting shapes that optimize strength and minimize stress concentrations [6] [48] [2]. |
| Finite Element Analysis (FEA) Software | Provides high-quality simulated data on mechanical stress and strain for training the machine learning model, eliminating the need for exhaustive physical prototyping [6] [52]. |
| Micro-Computed Tomography (μCT) | Used to non-destructively image and verify the internal microstructure and fidelity of 3D-printed nanolattice phantoms [53]. |
Advanced Workflow: ML-Driven Material Optimization
Integrating simulation, fabrication, and validation is key to designing next-generation materials.
Troubleshooting Common Experimental Issues
FAQ: My FEA-predicted stiffness does not match my experimental results. What could be wrong?
Potential Cause 1: Discrepancies between the digital model and the physical specimen.
- Solution: Use μCT to scan your 3D-printed phantom. Compare the scanned geometry to your original digital FEA model. Look for printing defects such as porosity, unsintered powder, or missing micro-features that would reduce experimental stiffness. Ensure your phantom is printed with high fidelity (e.g., Dice score >0.95) [53].
Potential Cause 2: Inaccurate application of boundary conditions.
- Solution: Meticulously ensure that the constraints and loading conditions in your FEA simulation are identical to those in your physical experimental setup. Even minor misalignments during mechanical testing can significantly alter measured stiffness [53].
Potential Cause 3: Material properties used in the simulation are incorrect.
- Solution: Characterize the actual elastic modulus of your 3D-printed material (e.g., via testing a simple, solid sample) and use this measured value in your FEA model, rather than relying on idealized material properties [53].
FAQ: The strength of my nanolattice is below theoretical predictions. How can I improve it?
Potential Cause 1: Stress concentrations at sharp nodes and junctions.
- Solution: Utilize a machine learning-driven optimization process, such as Multi-Objective Bayesian Optimization, to redesign the lattice geometry. This approach can smooth out sharp corners and create nodal geometries that distribute stress more uniformly, preventing early local failure [6] [48] [2].
Potential Cause 2: Strut diameters are too large, limiting the 'smaller is stronger' effect.
- Solution: Optimize your fabrication process to reduce strut diameters. Research shows that reducing strut diameters to ~300 nm can increase the proportion of sp²-bonded carbon to 94%, minimizing oxygen content and significantly enhancing structural integrity and strength [6].
The field of materials science increasingly relies on Ashby charts (material property charts) to visualize and identify materials with exceptional combinations of properties. These charts typically plot mechanical properties, such as strength or Young's modulus, against density, creating a landscape where each material occupies a specific position. Traditionally, this landscape has been dominated by monolithic materials and conventional foams, with well-defined performance boundaries. However, the recent integration of machine learning (ML) with nano-architected materials is creating a new class of substances that occupy previously unexplored regions on these charts.
This technical analysis positions ML-optimized carbon nanolattices within the materials landscape. These metamaterials are designed via a multi-objective Bayesian optimization algorithm and fabricated using nanoscale additive manufacturing. They exhibit a conflicting combination of properties: the compressive strength of carbon steels (180–360 MPa) with the density of Styrofoam (125–215 kg m⁻³) [3] [12]. This analysis provides the foundational knowledge and troubleshooting guidelines for researchers aiming to work with these advanced materials.
Key Performance Metrics and Ashby Chart Positioning
The performance of ML-optimized nanolattices can be quantified through several key metrics, which are essential for accurately placing them on Ashby charts.
Table 1: Key Performance Metrics of ML-Optimized Carbon Nanolattices
| Performance Metric | Value Achieved | Benchmark Comparison |
|---|---|---|
| Specific Strength | 2.03 MPa m³ kg⁻¹ [3] | ~5x higher than titanium [1] |
| Density | 125 – 215 kg m⁻³ [3] | Comparable to Styrofoam [3] [1] |
| Compressive Strength | 180 – 360 MPa [3] | Comparable to carbon steels [3] |
| Young's Modulus | 2.0 – 3.5 GPa [3] | Comparable to soft woods [3] |
| Strength Improvement | Up to 118% vs. standard lattices [3] | |
| Stiffness Improvement | Up to 68% vs. standard lattices [3] |
When plotted on an Ashby chart of strength versus density, these nanolattices occupy a distinct regime that was previously unattainable. They demonstrate specific strengths (strength-to-weight ratios) that are more than an order of magnitude higher than other materials of equivalent density [3]. This performance approaches the Suquet theoretical limit, which defines the maximum theoretical strength for any isotropic cellular topology [3] [55]. This positioning highlights their potential to revolutionize applications where light weight and high strength are both critical, such as in aerospace and automotive industries.
Experimental Protocols for Fabrication and Characterization
Machine Learning-Enabled Design Workflow
The design of these high-performance nanolattices relies on a generative modeling approach centered on a Multi-Objective Bayesian Optimization (MBO) algorithm [3]. The following diagram illustrates this integrated workflow, from computational design to experimental validation.
The process begins by defining the objectives, typically to maximize effective Young's modulus and shear modulus while minimizing relative density [3]. An initial dataset is generated using Finite Element Analysis (FEA) on randomly generated lattice geometries. The MBO algorithm then iteratively explores the design space, learning the relationship between geometric parameters and mechanical performance until it identifies a set of Pareto-optimal designs that represent the best possible trade-offs between the competing objectives [3]. This efficient process requires only about 400 high-quality FEA data points, unlike other data-intensive ML algorithms [12] [1].
Fabrication via Two-Photon Polymerization and Pyrolysis
The optimized digital designs are physically realized using a precise additive manufacturing and conversion process.
- Two-Photon Polymerization (2PP): A high-resolution 3D printing technique that uses a focused laser to solidify a photopolymer resin in a voxel-by-voxel process. This creates a polymeric nanolattice precursor, often referred to as a "photopolymer template" [3] [12].
- Pyrolysis: The polymer template is heated to 900°C in an inert atmosphere. This process pyrolyzes the material, converting it into a glassy aromatic carbon structure and reducing its size to approximately 20% of the original [3]. A key outcome is the creation of a carbon structure with a radial gradient of up to 94% sp² bonding, which is crucial for achieving high strength [3].
Mechanical Characterization through Nano-Compression
The mechanical properties of the fabricated nanolattices are validated through in-situ uniaxial compression testing [3] [55]. This is typically performed using a nanoindentation system equipped with a flat-punch tip. The system compresses the nanolattice while simultaneously measuring the applied force and displacement, from which the stress-strain response is calculated. This data directly provides the Young's modulus, compressive strength, and failure behavior of the material [3].
The Scientist's Toolkit: Essential Research Reagents and Materials
Table 2: Essential Research Reagents and Materials for Nanolattice Development
| Item Category | Specific Example / Property | Function in the Research Process |
|---|---|---|
| Photopolymer Resin | Acrylic-based resin for Two-Photon Polymerization [3] | Forms the 3D polymer template (nanolattice precursor) before pyrolysis. |
| High-Strength Constituent Material | Pyrolytic Carbon (94% sp² aromatic carbon) [3] | The final composition of the nanolattice, providing ultra-high specific strength. |
| Optimization Algorithm | Multi-Objective Bayesian Optimization (MBO) [3] [56] | The core ML tool that generates optimal lattice geometries by balancing multiple targets. |
| Software for Simulation | Finite Element Analysis (FEA) Software [3] [57] | Generates high-quality training data by simulating mechanical responses of designs. |
| Characterization Tool | Nanoindentation System with Flat-Punch Tip [3] [55] | Enables in-situ uniaxial compression testing to measure modulus and strength. |
Frequently Asked Questions (FAQs) and Troubleshooting
Q1: Our ML-designed nanolattices show high performance in simulation, but consistently fail prematurely during physical testing. What could be the cause?
- A: This is a common bridging problem between simulation and reality. Focus on these two areas:
- Stress Concentrations: The primary advantage of ML-optimized designs is their ability to redistribute material and minimize stress concentrations at the nodes [3] [12]. Check your fabrication fidelity using high-resolution SEM to ensure that the smooth, curved transitions predicted by the algorithm are being printed accurately. Sharp corners or thickened nodes due to printing artifacts will act as failure initiation sites.
- Strut Diameter and Pyrolysis: Ensure your strut diameters are minimized to the feasible limit (e.g., 300 nm). Thinner struts exhibit stronger nanoscale confinement effects, leading to a higher fraction of sp² bonds and reduced oxygen impurities, which dramatically increases specific strength [3]. Monitor and control the pyrolysis process carefully, as it induces shrinkage and creates the critical atomic gradient.
Q2: The Bayesian Optimization process seems to be converging slowly. How can we improve its efficiency?
- A: The multi-objective Bayesian optimization algorithm is notable for its data efficiency, requiring only about 400 data points [12] [1]. If progress is slow, review the quality of your initial FEA training dataset. Ensure that the randomly generated geometries in the initial set are diverse enough to span a broad region of the design space. The algorithm's acquisition function should be guided to explore uncertain regions while exploiting known high-performance areas. Also, verify that your objectives (e.g.,
[E/ρ * μ/ρ]^0.5) correctly capture the multi-modal loading conditions you aim to design for [3].
Q3: We are encountering manufacturing defects, particularly warping and loss of geometric fidelity, especially at lower densities. How can this be mitigated?
- A: This is a significant fabrication challenge, particularly during the pyrolysis step.
- Scaling Effects: Warping is more prominent in lower-density nanolattices because the thinner struts are more susceptible to thermal and capillary forces during processing [55].
- Process Refinement: Adapt the printing strategy for different structural orientations to account for the ellipsoidal voxel shape of the TPP-DLW process, ensuring uniform polymerization [55]. Furthermore, the introduction of small, strategically placed holes (≈100-160 nm) in plate-like faces can facilitate the removal of unpolymerized resin and reduce internal stresses during development, without significantly compromising mechanical performance [55].
Q4: How does this ML approach for beam-based nanolattices compare to other advanced topologies, like plate-lattices?
- A: Plate-based nanolattices are theoretically predicted to reach the Hashin-Shtrikman and Suquet upper bounds for stiffness and strength, and have been experimentally demonstrated to do so [55]. They represent the current pinnacle of performance. The role of the ML-optimized beam-based lattices is to push the performance of more fabricable, open-cell topologies much closer to these theoretical limits. By optimizing the beam shape, these designs mitigate the classic weakness of beam-lattices—stress concentrations at nodes—thereby achieving performance that was previously the exclusive domain of more complex closed-cell topologies [3] [55]. The ML approach provides a powerful pathway to maximize the performance of a given topological class.
Experimental FAQs
Q1: What is the core achievement validated in this experiment? The experimental work validated that a machine learning (ML)-optimized carbon nanolattice achieves an 118% increase in strength and a 68% increase in Young's modulus compared to standard lattice designs at equivalent densities [22] [6]. This results in a material with the strength of carbon steel at the density of Styrofoam [8].
Q2: How does AI contribute to the material design process? A Multi-Objective Bayesian Optimization algorithm was used to design the nanolattice geometries [8] [1] [2]. This machine learning approach learned from simulated data to predict geometries that would enhance stress distribution and improve the strength-to-weight ratio, moving beyond traditional, intuition-based designs [1] [2].
Q3: What is the significance of reducing strut diameters to ~300 nm? Reducing the strut diameters to approximately 300 nanometers induces beneficial "size effects" [22] [6]. At this scale, the material develops a pyrolysis-induced atomic gradient consisting of 94% sp² aromatic carbon with low oxygen impurities, which contributes to its high specific strength [22].
Q4: How was scalability demonstrated in the experiment? Using a multi-focus two-photon polymerization (2PP) system, the team fabricated a millimeter-scale metamaterial consisting of 18.75 million lattice cells [22] [6]. This demonstrated a significant advancement in production throughput for nano-architected materials.
Q5: What are the potential applications of this material? The combination of ultrahigh specific strength and low density makes the material suitable for lightweight components in aerospace (e.g., aircraft, spacecraft), automotive, and other high-performance engineering applications. Replacing titanium components in an aircraft could save approximately 80 liters of fuel per year for every kilogram of material replaced [8] [1] [2].
Troubleshooting Guide
| Problem | Possible Cause | Solution |
|---|---|---|
| Premature nodal failure during mechanical testing [1] [2] | Stress concentrations at sharp intersections and corners of traditional lattice designs [1] [2]. | Implement the Bayesian-optimized geometries which thicken near nodes and curve to neutralize stress concentrations [22] [4]. |
| Excessive shrinkage and warping during pyrolysis [58] | Volumetric shrinkage inherent in the polymer-to-carbon conversion process [58]. | For macroscale structures, consider a template-coating approach or partial carbonization to improve dimensional retention [58]. |
| Insufficient manufacturing throughput for large-scale samples [22] | Use of conventional single-focus lithography techniques. | Employ multi-focus two-photon polymerization (2PP) to parallelize the writing process [22] [6]. |
| Low specific strength in final pyrolyzed structures | Sub-optimal lattice geometry or inadequate carbon purity. | Ensure strut diameters are reduced to ~300 nm and pyrolysis parameters (900°C) are strictly controlled to achieve high sp² carbon content [22] [6]. |
| AI model requires excessive data for optimization | Use of data-inefficient machine learning algorithms. | Apply Multi-Objective Bayesian Optimization, which achieved results with only ~400 high-quality data points from finite element analysis [1] [2]. |
Table 1: Key Performance Metrics of Optimized Carbon Nanolattices
| Metric | Result | Comparative Context |
|---|---|---|
| Specific Strength | 2.03 MPa m³ kg⁻¹ [22] [6] | About five times higher than titanium [1] [2]. |
| Density | 125 - 215 kg m⁻³ [22] [6] | Similar to expanded polystyrene (Styrofoam) [8] [22]. |
| Compressive Strength | 180 - 360 MPa [6] | Comparable to carbon steel [8] [6]. |
| Strength Improvement | 118% increase [22] [6] | Versus traditional nano-architected designs at equivalent density. |
| Stiffness (Young's Modulus) Improvement | 68% increase [22] [6] | Versus traditional nano-architected designs at equivalent density. |
| Strut Diameter | ~300 nm [22] [6] | Induces size effects for higher strength. |
| Carbon Composition (sp²) | 94% [22] | Resulting from pyrolysis-induced atomic gradient. |
Table 2: Core Experimental Fabrication Parameters
| Parameter | Specification |
|---|---|
| AI Optimization Algorithm | Multi-Objective Bayesian Optimization [8] [1] |
| Fabrication Method | Two-Photon Polymerization (2PP) [8] [6] |
| Printing System | Nanoscribe Photonic Professional GT2 [8] [59] |
| Post-Printing Process | Pyrolysis at 900°C [6] |
| Scalability Demonstration | 18.75 million lattice cells fabricated via multi-focus 2PP [22] [6] |
Experimental Protocols
AI-Driven Design Optimization Protocol
This protocol describes the machine learning workflow for generating optimal nanolattice geometries.
- Data Generation: Create an initial dataset of lattice geometries and their simulated mechanical properties using Finite Element Analysis (FEA) [52] [1].
- Algorithm Setup: Apply a Multi-Objective Bayesian Optimization (MBO) algorithm. The algorithm's role is to predict geometries that enhance stress distribution and the strength-to-weight ratio [8] [1].
- Iterative Learning: The MBO algorithm iteratively learns from the FEA data, requiring only about 400 data points to identify optimal designs. It proposes new geometries that balance multiple objectives, such as high strength and low density [1] [2].
- Design Output: The process yields non-intuitive, optimized lattice blueprints that thicken at nodes and curve struts to minimize stress concentrations [22] [4].
Nanofabrication and Pyrolysis Protocol
This protocol covers the fabrication and processing of the AI-designed nanolattices.
- Additive Manufacturing: Fabricate the designed lattice structures using a Two-Photon Polymerization (2PP) 3D printer (e.g., Nanoscribe Photonic Professional GT2). This system uses a photosensitive resin to write 3D structures with voxels a few hundred nanometers wide [8] [4] [6].
- Scalable Production: For larger samples, employ a multi-focus 2PP system to parallelize the writing process, enabling the fabrication of samples containing millions of lattice cells [22] [6].
- Pyrolysis Conversion: Place the 3D-printed polymer lattice in a furnace and heat it to 900°C in an inert atmosphere [6]. This process converts the polymer into a glassy, pyrolytic carbon structure.
- Result: The pyrolysis process shrinks the structure and induces a favorable atomic-level architectural gradient, resulting in a final composition of 94% sp² aromatic carbon [22].
Mechanical Validation Protocol
This protocol outlines the procedure for experimentally measuring the mechanical properties of the fabricated nanolattices.
- Sample Preparation: Mount the pyrolyced carbon nanolattice sample for mechanical compression testing [6].
- Mechanical Testing: Perform uniaxial compression tests to failure to measure the compressive strength and stiffness (Young's modulus) of the optimized nanolattices and control samples with traditional designs [22] [6].
- Data Analysis: Calculate the specific strength (strength-to-weight ratio) and compare the performance of the optimized design against the baseline designs. The reported 118% strength and 68% stiffness improvements are derived from this direct comparison at equivalent densities [22] [6].
Workflow and Pathway Diagrams
Diagram 1: Overall experimental workflow from AI design to validation.
Diagram 2: AI optimization loop for material design.
Research Reagent Solutions
Table 3: Essential Materials and Equipment for Experiment Replication
| Item | Function / Rationale |
|---|---|
| Photosensitive Resin | The polymer precursor material used in Two-Photon Polymerization to create the initial 3D lattice structure [8] [6]. |
| Multi-Objective Bayesian Optimization Algorithm | The core AI software used to generate optimal lattice geometries by efficiently exploring the design space with minimal data [8] [1]. |
| Two-Photon Polymerization (2PP) System (e.g., Nanoscribe Photonic Professional GT2) | A high-resolution additive manufacturing system capable of 3D printing at the micro and nanoscale to create the complex AI-designed lattices [8] [59] [6]. |
| Pyrolysis Furnace | The equipment used to heat the 3D-printed polymer lattice in an inert atmosphere to 900°C, converting it into a strong, glassy carbon structure [6]. |
| Finite Element Analysis (FEA) Software | Software used to simulate the mechanical performance of different lattice geometries, generating the high-quality data needed to train the AI model [52] [1]. |
Quantitative Performance Data
The following tables summarize the key properties of AI-optimized carbon nanolattices in direct comparison to conventional engineering alloys.
Table 1: Specific Strength Comparison
| Material | Density (kg/m³) | Compressive Strength (MPa) | Specific Strength (MPa m³/kg) |
|---|---|---|---|
| AI-Optimized Carbon Nanolattice (CFCC MBO-3) | 125 - 215 [3] [4] | 180 - 360 [3] [4] [43] | 2.03 [60] [3] |
| Titanium Alloy (Ti-6Al-4V) | 4,510 [61] | ~920 (Tensile) [61] | ~0.4 (Estimated) |
| 304 Stainless Steel | 7,850 [61] | ~520 (Tensile) [61] | ~0.07 (Estimated) |
| Aluminum Alloys | ~2,700 | - | ~0.2 (Referenced as 10x less) [60] |
Table 2: Key Mechanical and Physical Properties
| Property | AI-Optimized Carbon Nanolattice | Titanium Alloy (Ti-6Al-4V) | 304 Stainless Steel |
|---|---|---|---|
| Young's Modulus | 2.0 - 3.5 GPa [3] | 116 GPa [61] | 200 GPa [61] |
| Density | 125 - 215 kg/m³ [3] [4] | 4.51 g/cm³ [61] | 7.85 g/cm³ [61] |
| Primary Failure Mode | Distributed load sharing, no single point of failure [4] | Fatigue & cyclic load failure [61] | Impact & fatigue failure [61] |
| Key Advantage | Ultra-high specific strength, lightweight [60] [1] | Excellent fatigue life, corrosion resistance [61] | High rigidity, low cost, ease of fabrication [61] |
Experimental Protocols
Protocol 1: Multi-Objective Bayesian Optimization for Generative Design
Purpose: To computationally design nanolattice unit cells that maximize specific stiffness and strength under multimodal loading while minimizing density [3].
Methodology:
- Initialization: A cubic-face centered cubic (CFCC) lattice structure is deconstructed into its constituent strut segments [3].
- Parameterization: Four control points for each strut are randomly distributed within the design space. A Bézier curve is generated from these points and revolved in 3D to create the initial strut geometry [3].
- Data Generation (FEA): A training dataset is created by performing Finite Element Analysis (FEA) on 400 randomly generated geometries. For each geometry, the relative density ((ρ¯)), effective Young's modulus ((E¯)), and effective shear modulus ((μ¯)) are calculated [1] [3].
- Optimization Loop: A Multi-objective Bayesian Optimization (MBO) algorithm iteratively expands a 3D hypervolume defined by the normalized values of (E¯/ρ¯) and (μ¯/ρ¯). The algorithm selects new design points to evaluate based on maximizing improvement toward the Pareto optimum surface, typically for about 100 iterations [3].
- Design Selection: The generative designs that approach the Pareto-optimal surface are selected. The algorithm often produces non-intuitive geometries that redistribute material toward the nodes, thinning mid-beam regions to eliminate stress concentrations [3].
Protocol 2: Fabrication via Two-Photon Polymerization and Pyrolysis
Purpose: To physically manufacture the AI-designed nanolattices with nanoscale precision and convert them into a high-strength glassy carbon structure [60] [3].
Methodology:
- 3D Printing: The optimized 3D unit cell design is patterned into a 5x5x5 lattice structure. This structure is fabricated using Two-Photon Polymerization (2PP), a nanoscale additive manufacturing technique. A photosensitive acrylic polymer is solidified by a laser at voxel resolutions of a few hundred nanometers to create the struts [1] [3] [4].
- Pyrolysis: The 3D-printed polymer structure is placed in a furnace and heated to 900 °C in an inert, nitrogen-rich atmosphere. This process converts the crosslinked polymer into a glassy, aromatic carbon material [60] [3].
- Shrinkage and Densification: During pyrolysis, the structure shrinks to approximately 20% of its original printed size, locking in a dense, sp²-bonded carbon atomic architecture [3] [4]. The resulting carbon nanolattices have strut diameters ranging from 300 nm to 600 nm [60] [3].
Workflow and Signaling Diagrams
AI-Driven Material Design Workflow
AI-Driven Material Design Workflow
Carbon Nanolattice Atomic Enhancement Pathway
Carbon Nanolattice Atomic Enhancement Pathway
Frequently Asked Questions (FAQs)
Q1: The Bayesian optimization process is computationally expensive. How can I reduce the number of required FEA simulations? The Multi-objective Bayesian Optimization (MBO) algorithm is specifically chosen for its data efficiency. It can identify optimal designs using a small, high-quality dataset of around 400 FEA data points, unlike other machine learning algorithms that may require tens of thousands of data points. This makes the process feasible for high-fidelity simulations [1] [12].
Q2: During pyrolysis, my structures warp or collapse. What critical factors should I control? Pyrolysis is a critical step. Ensure strict control of the temperature ramp rate and the inert atmosphere (nitrogen) to prevent oxidation and minimize thermal stress. Furthermore, the geometric fidelity of the initial 3D-printed polymer structure is crucial; designs with very thin, unsupported features are more prone to warping. Reducing strut diameters below 300 nm can exacerbate this issue due to print resolution limits [3] [4].
Q3: Why does reducing the strut diameter to 300 nanometers significantly increase strength? This is due to the "size effect," a phenomenon where materials behave differently at extremely small scales. At the nanoscale, the pyrolysis process creates a unique radial atomic gradient, producing an external shell composed of 94% sp²-bonded carbon with low oxygen impurities. This high-purity carbon shell is exceptionally strong and stiff, and the reduced diameter also minimizes the statistical probability of critical flaws, leading to enhanced specific strength [60] [3].
Q4: My optimized designs fail at the nodes despite the AI. What could be the issue? Traditional lattices fail at sharp intersections due to stress concentrations. The primary goal of the MBO algorithm is to eliminate this exact problem by redistributing material to homogenize stress. If failure persists, verify that your FEA model accurately captures the curved, non-intuitive geometries generated by the optimizer, particularly the thickening near the nodes and thinning in mid-spans [3] [12] [4].
Q5: How scalable is this 2PP manufacturing process for macroscopic components? Current research has demonstrated the fabrication of millimeter-scale metamaterials consisting of 18.75 million individual lattice cells [60] [3]. Scaling to larger, macroscopic components is an active area of research. Strategies include using multi-focus multi-photon polymerization to parallelize the printing process and developing hybrid approaches where high-value lattice cores are printed and then overmolded or integrated into larger structures [3] [4].
The Scientist's Toolkit: Research Reagent Solutions
Table 3: Essential Materials and Equipment
| Item | Function in the Experiment |
|---|---|
| Two-Photon Polymerization (2PP) System | Enables 3D printing of the nanolattice structures with voxel resolutions of a few hundred nanometers [3] [12]. |
| Photosensitive Acrylic Polymer Resin | The "ink" for the 2PP process; a crosslinkable polymer that forms the initial nanolattice structure prior to pyrolysis [3]. |
| Tube Furnace with Inert Gas Control | Used for the pyrolysis step. It provides the controlled high-temperature (900°C), nitrogen-rich environment needed to convert the polymer into glassy carbon [60] [3]. |
| Bayesian Optimization Software | The core AI algorithm for the generative design process. It efficiently navigates the design space to find geometries that maximize target mechanical properties [1] [3]. |
| Finite Element Analysis (FEA) Software | Provides high-quality simulated mechanical data (Young's modulus, shear modulus) on which the Bayesian optimization algorithm is trained [60] [3]. |
| Nanomechanical Testing System | Used for experimental validation, performing uniaxial compression tests on the fabricated nanolattices to measure their actual Young's modulus and strength [3]. |
Conclusion
The integration of machine learning with carbon nanolattice design marks a significant leap forward in materials science. The successful application of multi-objective Bayesian optimization has yielded materials with a previously unattainable combination of extreme lightness and high strength, validated by experimental performance that dramatically surpasses traditional designs. For biomedical and clinical research, these advancements suggest a future where ultra-lightweight, high-strength implantable sensors and drug delivery systems can be rationally designed, overcoming previous limitations of material performance. Future directions should focus on expanding the ML framework to optimize for biological interactions, such as controlled drug release profiles and enhanced biocompatibility, and on solving the economic challenges of large-scale manufacturing to enable widespread clinical adoption.
References
- 1. Machine Learning Designs Materials As Strong As Steel ... [https://www.technologynetworks.com/applied-sciences/news/machine-learning-designs-materials-as-strong-as-steel-and-as-light-as-foam-395414]
- 2. Strong as steel, light as foam: High-performance, nano- ... [https://www.sciencedaily.com/releases/2025/01/250124154227.htm]
- 3. Ultrahigh Specific Strength by Bayesian Optimization of ... [https://pmc.ncbi.nlm.nih.gov/articles/PMC11983246/]
- 4. AI-Engineered Nanolattices: Stronger Than Steel, Lighter ... [https://www.impactlab.com/2025/09/03/ai-engineered-nanolattices-stronger-than-steel-lighter-than-foam/]
- 5. Redefining Strength and Lightness: Carbon Nanolattices ... [https://advanceseng.com/redefining-strength-lightness-carbon-nanolattices-optimized-bayesian-design/]
- 6. Optimized Carbon Nanolattices Achieve Record Strength [https://3dprintingindustry.com/news/optimized-carbon-nanolattices-achieve-record-strength-237221/]
- 7. Machine Learning Develops Super Strong Yet Ultra-Light ... [https://bizfortune.com/2025/02/machine-learning-develop-super-strong-ultra-light-materials]
- 8. AI designs an ultralight carbon nanomaterial that's as ... [https://newatlas.com/materials/ai-ultralight-carbon-nanomaterial/]
- 9. Scientists Created the Lightest and Strongest Nanomaterial ... [https://www.popularmechanics.com/science/a63786292/ai-nanomaterial/]
- 10. Nanoscale Origins of the Size Effect in the Compression ... [https://pmc.ncbi.nlm.nih.gov/articles/PMC5951445/]
- 11. Mechanical behavior and size–dependent strength of small ... [https://www.sciencedirect.com/science/article/pii/S1359645425003817]
- 12. Strong as steel, light as foam: Machine learning and nano-3D ... [https://news.engineering.utoronto.ca/strong-as-steel-light-as-foam-machine-learning-and-nano-3d-printing-produce-breakthrough-high-performance-nano-architected-materials/]
- 13. Fabricating lightweight and ultrastrong mechanical ... [https://spie.org/news/6832-fabricating-lightweight-and-ultrastrong-mechanical-metamaterials]
- 14. Frequently Asked Questions (FAQs) [https://nanointegris.com/faq/]
- 15. Scientists use nanoscale geometry for colors shift, making ... [https://dst.gov.in/scientists-use-nanoscale-geometry-colors-shift-making-way-wearable-tech]
- 16. Stress Concentration Factor: Minimizing Its Effects ... [https://www.neuralconcept.com/post/stress-concentration-mitigating-risk-factors-in-design-engineering]
- 17. Stress Concentrations: How to Identify and Reduce Them ... [https://www.fictiv.com/articles/stress-concentrations-how-to-identify-and-reduce-them-in-your-designs]
- 18. Dealing with Stress Concentration and Singularities [https://www.digitalengineering247.com/article/dealing-stress-concentrations-singularities]
- 19. Lightweight, flaw-tolerant, and ultrastrong nanoarchitected ... [https://pmc.ncbi.nlm.nih.gov/articles/PMC6452738/]
- 20. AI system learns from many types of scientific information ... [https://news.mit.edu/2025/ai-system-learns-many-types-scientific-information-and-runs-experiments-discovering-new-materials-0925]
- 21. Multi-objective Bayesian Optimization [https://www.emergentmind.com/topics/multi-objective-bayesian-optimization-mobo]
- 22. Ultrahigh Specific Strength by Bayesian Optimization of ... [https://pubmed.ncbi.nlm.nih.gov/39846271/]
- 23. Ultrahigh Specific Strength by Bayesian Optimization of ... [https://www.aph.kit.edu/wegener/english/1163_1191.php]
- 24. Newly-Developed Carbon Nanolattices are Stronger than ... [https://www.sci.news/othersciences/nanotechnologies/carbon-nanolattices-08328.html]
- 25. Multi-Objective Causal Bayesian Optimization [https://proceedings.mlr.press/v267/bhatija25a.html]
- 26. Covering Multiple Objectives with a Small Set of Solutions ... [https://arxiv.org/abs/2501.19342]
- 27. AI-Powered Molecular Innovation: Breakthroughs and ... [https://www.mantellassociates.com/ai-powered-molecular-innovation-breakthroughs-and-2025-growth/]
- 28. Finite Element Analysis (FEA) Software [https://www.autodesk.com/solutions/simulation/finite-element-analysis]
- 29. What is Virtual Prototyping and why is it so powerful? [https://www.sgwdesignworks.com/blog/what-is-virtual-prototyping-and-why-is-it-powerful]
- 30. Pyrolysis-induced shrinking of three-dimensional structures fabricated by two-photon polymerization: experiment and theoretical model | Microsystems & Nanoengineering [https://www.nature.com/articles/s41378-019-0079-9]
- 31. Effect of pyrolysis on microstructures made of various ... [https://opg.optica.org/viewmedia.cfm?r=1&rwjcode=ome&uri=ome-11-2-371&html=true]
- 32. High-resolution two-photon polymerization: the most versatile technique for the fabrication of microneedle arrays | Microsystems & Nanoengineering [https://www.nature.com/articles/s41378-021-00298-3]
- 33. Machine Learning as a “Catalyst” for Advancements in ... [https://www.mdpi.com/2079-4991/14/21/1688]
- 34. Drug delivery carriers with therapeutic functions - PMC [https://pmc.ncbi.nlm.nih.gov/articles/PMC8440421/]
- 35. Delivering more for less: nanosized, minimal-carrier and ... [https://pmc.ncbi.nlm.nih.gov/articles/PMC9633093/]
- 36. Nanohybrid Aerogels in Drug Delivery: Emerging Platforms ... [https://www.sciencedirect.com/science/article/abs/pii/S177322472500886X]
- 37. Deep active optimization for complex systems [https://www.nature.com/articles/s43588-025-00858-x]
- 38. Elements must meet minimum color contrast ratio thresholds [https://dequeuniversity.com/rules/axe/4.8/color-contrast]
- 39. Nano Metrology in the Real World: 5 Uses You'll Actually ... [https://www.linkedin.com/pulse/nano-metrology-real-world-5-uses-youll-2hcff]
- 40. Computational methods in nanometrology: the challenges ... [https://www.frontiersin.org/journals/nanotechnology/articles/10.3389/fnano.2025.1559523/full]
- 41. Advances in lithographic techniques for precision ... [https://pmc.ncbi.nlm.nih.gov/articles/PMC10713959/]
- 42. Metrology, Inspection, and Process Control XXXIX | (2025) [https://spie.org/Publications/Proceedings/Volume/13426]
- 43. AI Helps Researchers Discover New Structural Materials [https://hackaday.com/2025/02/27/ai-helps-researchers-discover-new-structural-materials/]
- 44. Preliminary manufacturability evaluation of complex geometrical parts... [https://link.springer.com/article/10.1007/s40964-025-01202-5]
- 45. Revolutionary Nano-Materials Combine Strength of Steel with ... [https://www.impactlab.com/2025/01/30/revolutionary-nano-materials-combine-strength-of-steel-with-the-lightness-of-foam-using-machine-learning/]
- 46. How to Manage Product Cost With Geometric Dimensioning and... [https://www.apriori.com/blog/how-to-manage-product-cost-with-geometric-dimensioning-and-tolerancing/]
- 47. GD&T Fundamentals for Beginners: How to Balance ... Manufacturing [https://www.linkedin.com/advice/0/how-can-you-balance-manufacturing-costs-y3z8f]
- 48. Partners With Nano-3D Printing to Produce... Machine Learning [https://theaiinsider.tech/2025/01/27/machine-learning-partners-with-nano-3d-printing-to-produce-material-thats-light-as-foam-strong-as-steel/]
- 49. Strength of Materials | Mechanics of Materials | MechaniCalc [https://mechanicalc.com/reference/strength-of-materials]
- 50. Mechanical metric for skeletal biomechanics derived from spectral analysis of stiffness matrix | Scientific Reports [https://www.nature.com/articles/s41598-021-94998-5]
- 51. Strength of materials - Wikipedia [https://en.wikipedia.org/wiki/Strength_of_materials]
- 52. Top 5 Emerging Trends in Nanotechnology for [https://www.azonano.com/article.aspx?ArticleID=6865]
- 53. Characterization of mechanical stiffness using additive manufacturing and finite element analysis: potential tool for bone health assessment | 3D Printing in Medicine | Full Text [https://threedmedprint.biomedcentral.com/articles/10.1186/s41205-023-00197-5]
- 54. A new stiffness-sensing test to measure damage evolution in solids | Scientific Reports [https://www.nature.com/articles/s41598-021-04452-9]
- 55. Plate- nanolattices at the theoretical limit of... | Nature Communications [https://www.nature.com/articles/s41467-020-15434-2?error=cookies_not_supported]
- 56. Machine Learning‐Driven Grayscale Digital Light ... [https://pmc.ncbi.nlm.nih.gov/articles/PMC12548508/]
- 57. Rapid inverse design of metamaterials based on ... [https://www.nature.com/articles/s41467-023-40854-1]
- 58. Balancing strength, toughness, and shrinkage in 3D ... [https://www.sciencedirect.com/science/article/abs/pii/S0032386125012030]
- 59. AI designs an ultralight carbon nanomaterial that’s as strong as steel [https://blog.kowatek.com/2025/02/21/ai-designs-an-ultralight-carbon-nanomaterial-thats-as-strong-as-steel/]
- 60. Scientists Create a Material as Strong as Steel but Light ... [https://www.zmescience.com/science/news-science/scientists-create-a-material-as-strong-as-steel-but-light-as-styrofoam-using-ai/]
- 61. Titanium Alloy vs Steel: In-Depth Performance Comparison [https://www.chalcotitanium.com/blog/titanium-vs-steel-performance-comparison]